I have hundreds of photos stored on a computer and external hard drive just sitting there being neglected. 🙁 I’ve always intended on printing my favorites but never got around to it and now there are so many, the task is overwhelming. I also intended on buying a digital frame to display them; however, I never got around to that either. The Nixplay Edge 13 inch WiFi Cloud Frame was offered to the Gadgeteer for review, so now seemed to be the appropriate time to try one out. How well does it work? Is there anything that makes it stand out from the others? Let’s find out.
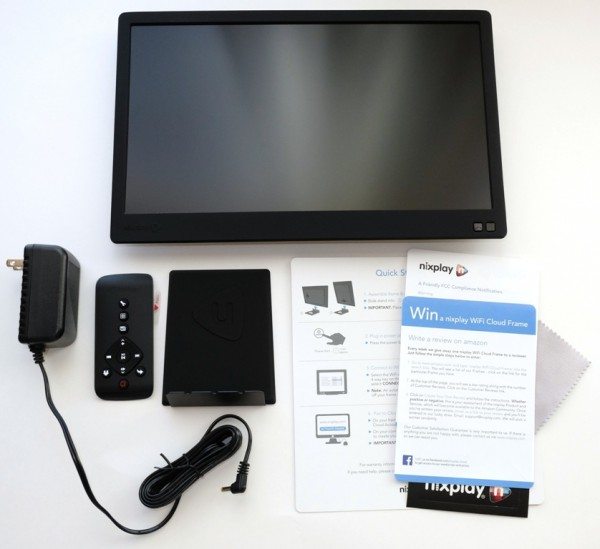
Package Contents
- Nixplay Edge 13 inch WiFi Cloud Frame
- DC power adapter
- Remote control
- Frame stand
- Quick Start Guide
- FCC Compliance Notification, an Ad, and Nixplay stickers
- Cleaning cloth
Technical Specifications
- Dimension: 12.5 in (W) x 7.9 in (H) x 1.1 in (D) without stand, 4.5 in (D) with stand
- Screen Resolution: 1920 x 1080 pixels
- Wireless Network: WiFi 802.11 b/g/n (WEP, WPA, WPA2 encryption supported)
- VESA Mount: 75 mm x 75 mm
- Security: Kensington Lock
- Card Compatibility: SD/SDHC & USB stick
- Supported Photo Formats: JPEG
- Supported Video Formats: HD 720p H.264 AAC
Design & Build
Note: Photos may be clicked to view a larger size.
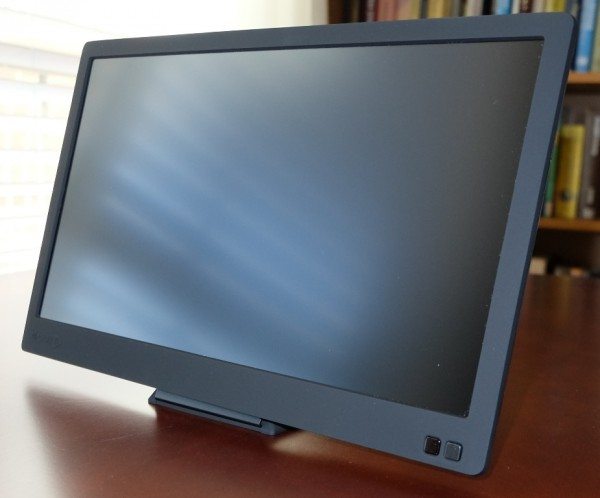
The Nixplay frame appears to be well built, is made of hard black plastic, and looks more like a monitor than a frame. The edges of the frame are covered in what feels like a thin layer of rubber and the frame has an anti-glare screen. The stand can be inserted into the frame so that it sits in a landscape or portrait position. Located at the bottom right of the frame (in landscape position) are the IR sensor for the remote and the motion detector.
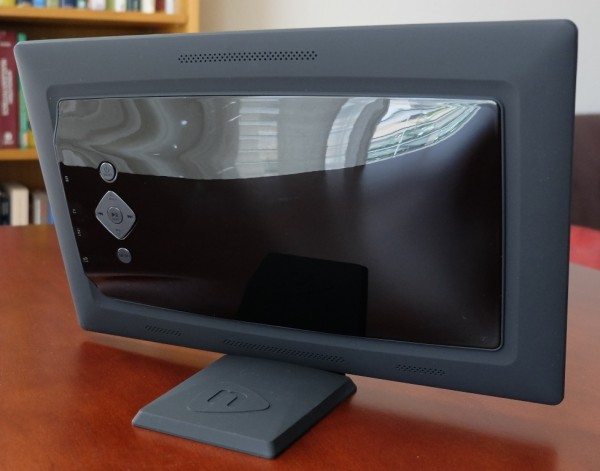
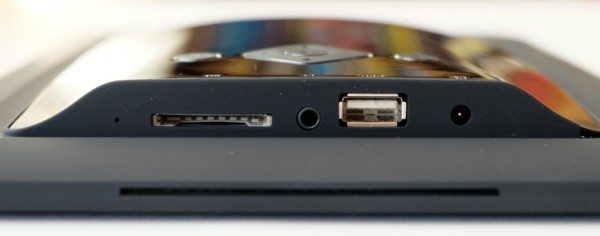
The back of the frame has many of the same controls as the remote, speakers located on the top and bottom of the frame (in landscape position) for when playing videos, and the ports.
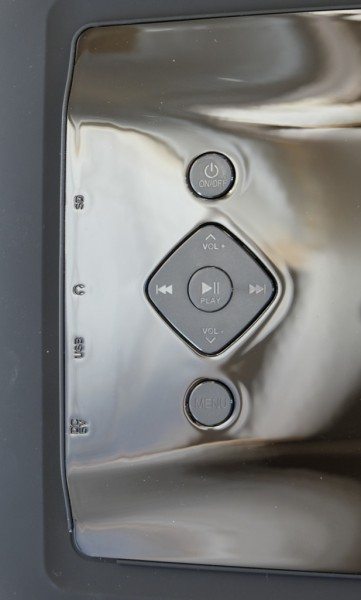
If you don’t have the remote with you, you can control the frame from the controls on the back. Here you’ll find the power button; the pause, play, skip buttons; and the volume up and down buttons some of which have dual functions when in the menu of the frame (use the menu button) to change the settings.
Just to the left of the SD card slot is a hole for resetting the frame. There are slots for an SD card, a 3.5mm jack for headphones, a USB port and the DC power port for the frame. The large slot located on the bottom of the photo is one of the slots for the stand.
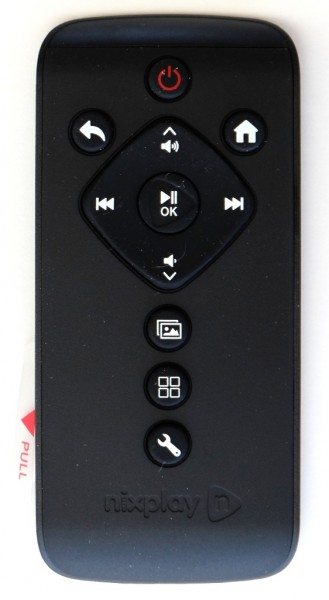
The Nixplay frame comes with a remote control so that you can control the frame without having to go to your computer to change things. The remote has a power button; back button; home button; volume up and down button for videos (or navigation buttons); and play, pause, and skip buttons. The last three in order from top to bottom are the playlists button, the custom button (can be set up to do one of several things from a computer but only for the 13 inch frame not the eight inch frame), and the settings button.
Setup
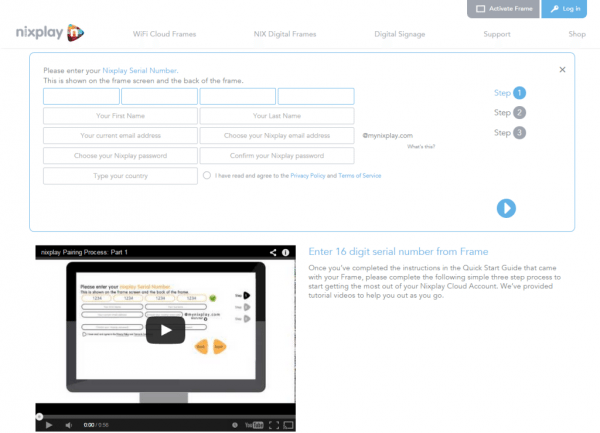
When setting up your frame, you may want to plug it in near a computer (you will be able to move it after the setup). Upon powering up your frame for the first time, you will be asked to connect to your home network. You will need to use the remote control or the controls on the back of the frame to navigate around. After connecting to your home network, an update will be installed. At this point you will go to the Nixplay website to create your Nixplay cloud account and enter your information. You will have to read the serial number displayed on the frame to enter it on the computer. After the serial number, you will be asked to enter a specific word displayed on the frame. Then voila! You’re frame is paired with your account!
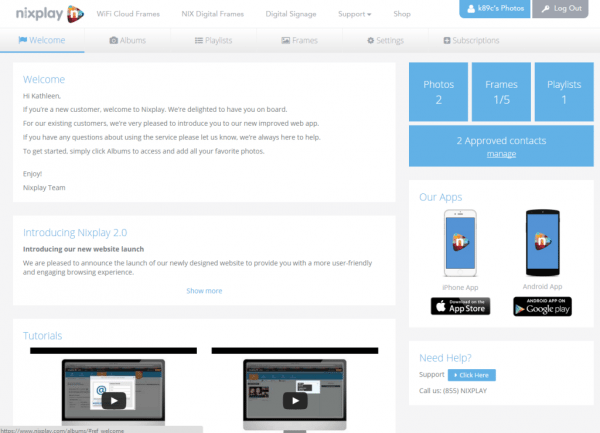
My frame did not come with much documentation so I think it is helpful to describe each of the main tabs on my Nixplay cloud account. The Welcome page has online video tutorials. I noticed that these tutorials and the online manual (the frame did not ship with a user manual) are out of date which sometimes required me to hunt around the website to accomplish certain tasks.
To access any of your photos that are on computers or laptops or other hardware in your home network, you can copy them to an SD card or USB flash drive to use with your frame, or you can upload the files to an album (maximum file upload size is 10 MB with 10 GB of total available Nixplay free cloud storage). To create an album, you will need to click on the Albums tab, then click on Add New Album as shown in the photo above. You will then name it and then start adding photos by either clicking on Add Photos or dragging and dropping them from your computer onto the newly created album. Once you have created the album and added all of your pictures, you will then need to create a playlist by clicking on Add New Playlist just under “Playlists” in the right column of the Albums page. After naming the playlist, you will then need to drag and drop any desired album(s) onto a playlist. The first time you add photos to a playlist it will ask you to save. When you click on Save, it will then ask, “You have created a playlist and added some photos but have not yet assigned it to any Cloud Frame. Would you like to add this playlist to your Cloud Frame now?” You will be able to either “Save” or “Save and Send to a Frame”.
While you are still in the Albums tab, you may also setup your frame to receive photos that are emailed to you from only those people you designate (don’t forget to include yourself) by clicking on the email icon just below the Albums tab, then selecting the Manage Settings button (you must set up your frame to use Nixplay filter – turning this setting off allows everyone to email photos to you). It is important to note that if you do not add your own email address, you will not be able to send pictures to your frame from your mobile device(s).
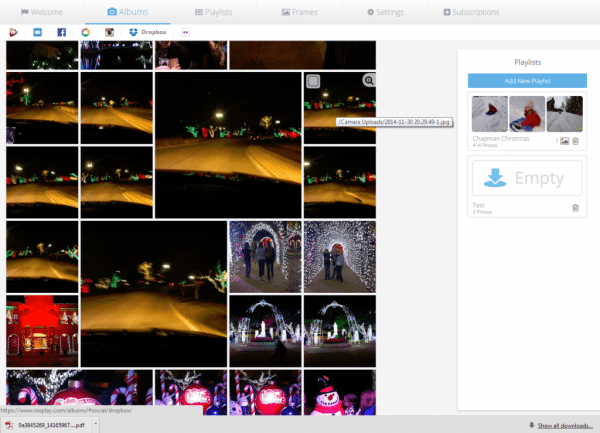
If however, you have many of your photos on Facebook, Picasa, Instagram, Dropbox, or Flickr you can create a playlist without having to create an album which means you do not take up any of the free 10 GB of Nixplay cloud storage. To access each of those accounts, you will need to click on the icon for each (located in the upper left hand corner of the page just under the Albums tab) and login. From there you will navigate to the groups of photos you are interested in (if they are organized into groups or albums) and then select certain photos by checking the box on each photo (or selecting All or None from the Select drop down box located in the upper right corner just above the pictures). Next, drag and drop them onto one of the playlists that you have created.
I selected all the photos within my Camera Uploads folder located on Dropbox. I then dragged my whole list of pictures to the Playlists column and dropped them onto a playlist that I had created. I also selected some Facebook and Picasa photos and dropped them into playlists as well.
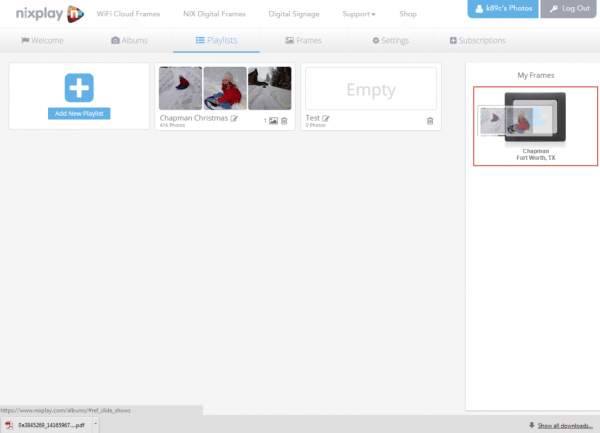
After populating your playlists, you will then need to click on the Playlists tab located at the top of the page to drag and drop the playlist onto the desired frame(s) if you did not save and send it to a frame. It is possible to have up to five frames connected to your account for free (Nixplay Standard account: five frames and 10 GB storage forever, which is what I have), but if you have more that five or would like to store more than 10 GB of photos in albums on your Nixplay cloud account, you will need to pay a subscription fee for the Nixplay Plus service (10 frames per account and 30 GB of storage for $1.99 per month or $19.90 per year). Owning multiple frames and placing them in different rooms of your house will allow you to play different playlists on each one or have them play the same playlists. Or, according to the Nixplay website, you can “Connect multiple frames to your Nixplay Cloud account to share photos with your loved ones wherever they are in the world. Provided they have a WiFi connection – they can instantly receive whichever photo playlists you choose to send and share.”
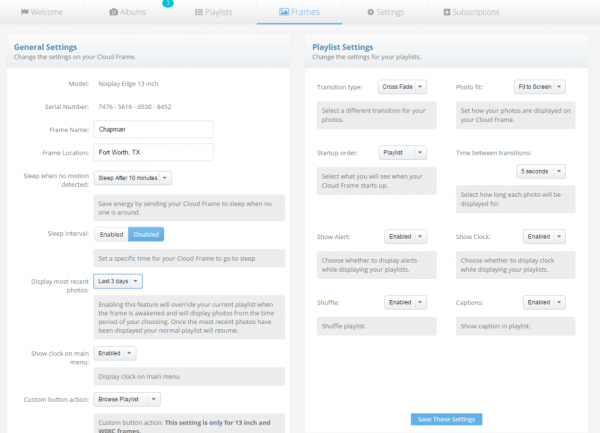
I’ve described the Welcome tab, the Albums tab, the Playlists tab, and now we come to the Frames tab. After clicking on this tab, you will see a picture of all the frames that are connected to your account. To change your frame’s settings, you need to click on the frame. You might think that the Settings tab at the top of your Nixplay cloud account page are the settings for the frame but these are actually for your Nixplay profile or email settings. This is one of those things that is not readily apparent from the tutorials or the manual – so I do what I do when I don’t know what else to do – just click on everything! The frame settings allow you to change your frame’s name, location, when to sleep when no motion is detected, display the most recent pictures, whether or not to show the clock on the main menu, and change the action of the custom button on your remote.
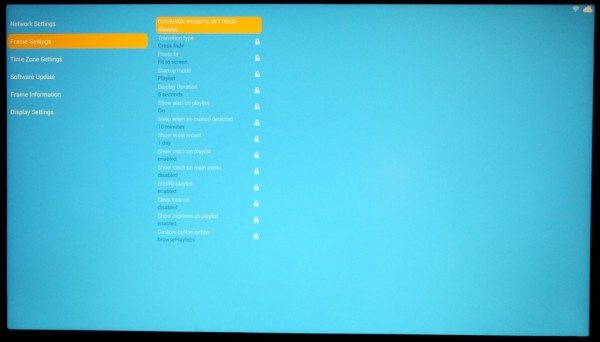
Under the Playlist Settings you can choose the transition type, whether or not the photo will fill the screen or fit to the screen, what the frame will play when starting up from sleep mode or being powered on, the amount of time to display each photo, whether or not to show the clock or shuffle the pictures, or enable captions for your pictures. It would appear that you can only add captions to those pictures that are uploaded from your computer, not those that are obtained from your social media sites.
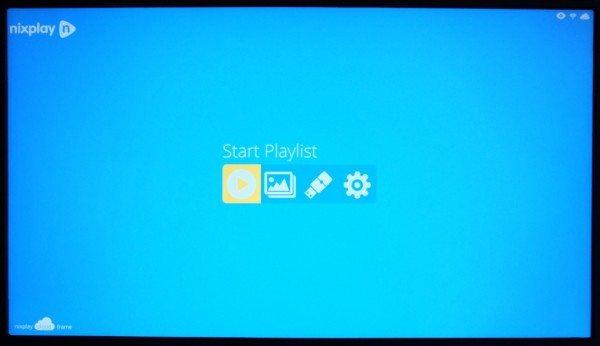
The frame’s Main Menu consists of the the following: Start Playlist, Browse Playlists, USB & SD, and Settings.
You can set your frame’s settings using a computer or you can go into the Frame Settings directly on the frame to override the computer settings.
Use
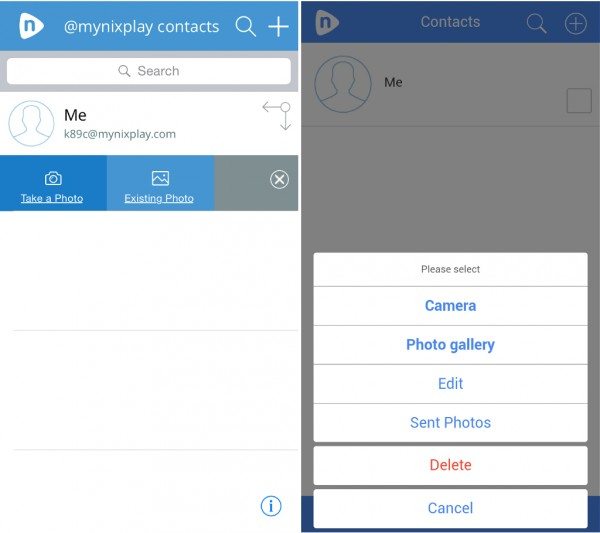
There are apps available for iOS and Android that will allow you to send pictures taken with your mobile device camera right to the frame. The apps look very similar on both types of devices. They are very simplistic in function and are set up only to send pictures to any of your frames using the email addresses that you enter into the app (you must also make sure that you enter the email address from which you are sending the pictures into your Nixplay account under the Albums tab → email icon → Manage Settings). After installing the apps on your devices you may have to choose your email client first (if you have several like I do), you will then need to add the email address of your frames. Once that has been completed, all you have to do is tap on that email address to either use the camera to send a photo or send an existing photo from the photo gallery on your device. The left picture above is a screenshot of the iOS app on my iPod Touch 5G, and the right is the screenshot on my HTC One X phone after having tapped on the email address. Each device was able to successfully send a picture to my frame.
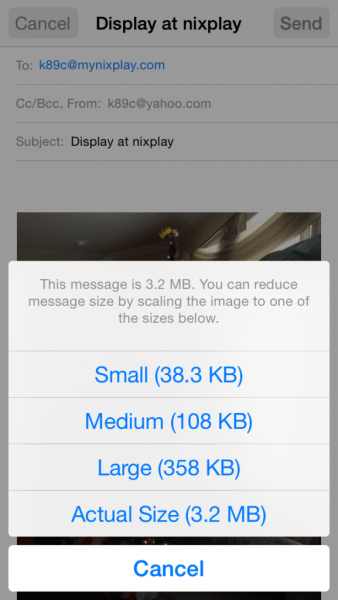
There seems to be one major difference between the iOS and Android apps. It appears that the iOS app will allow you to select the size of the picture to be sent to your frame (this option pops up after selecting Send on your device), whereas the Android app on my phone will not. It may exist within the app somewhere, but there is no documentation for it and all my hunting and pecking methods have failed to find it.
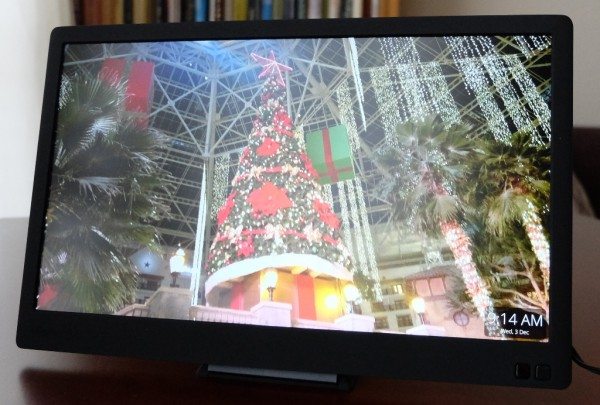
The Nixplay frame is a high resolution frame that will display JPEG pictures. It displayed my photos loaded into a Christmas playlist from Dropbox, Facebook, and Picasa beautifully – they were bright (the brightness level can be adjusted on the frame in the Display Settings) and could be viewed from all angles. I had the frame set to shuffle the pictures, but I did notice that several pictures were displayed multiple times (I had over 400 pictures in the playlist so the repeating of some pictures without having shown the majority of the rest of the pictures was unexpected). I also noticed that to adequately view older pictures with different aspect ratios, I needed to have the frame set to Fit to Screen rather than Fill the Screen (the frame supports 16:9 aspect ratios). When it is on Fit to Screen, the pictures look small and leave black bars on the screen. And the photo quality is only as good as the equipment used and the abilities of the photographer 😉
I was also able to successfully display pictures using an SD card and USB flash drive. If however, any of your pictures are stored inside folders, you will need to navigate within the folder directly to the files for the frame to display them. The frame will not automatically play pictures within folders or subfolders.
The Nixplay frame is also capable of playing MOV, MP4 and MTS video files (I have other video files such as 3GP, AVI, and WMV that are not supported by the frame). The videos played without any issues and the sound was loud and clear. The only thing to note about the frame is that it will play your pictures separately from your videos. So, if you have a folder on an SD card or USB flash drive that includes both, you will have to manually play a video, after which the frame will play all the videos in the folder and then repeat them until you manually select and play a photo within that folder after which it will then play all photos. It is also important to note that the frame will not show videos from social media sites and since the maximum file upload size is 10 MB, this effectively limits you to viewing videos solely from an SD card or USB flash drive.
Final Thoughts
I’ve enjoyed using the Nixplay Edge 13″ WiFi Cloud Frame. The frame has some good things about it and some that are not so good. The good: the high resolution and brightness of the display allowed the frame to display my pictures (JPEG) in their full glory. It also displayed MOV, MP4, and MTS video files (you may be able to convert others) with sound that was loud and clear. Also, the frame has all kinds of settings to allow you to play several playlists at once or one at a time. You can even play different playlists on different Nixplay frames using one account. If you wish to, you can purchase your family members frames and link them to your account to share your playlists with them, although I have not tested this feature to see how well this works.
The not so good: my frame did not come with a user manual and the documentation available online is out-of-date, the frame will not display videos from your social media sites, the maximum file upload size is only 10 MB thus making most videos available to you only using an SD card or USB flash drive, and the frame will only play videos and pictures separately even from within the same folder (on an SD card or USB flash drive). I’m also hoping that one day they will allow you to access shared folders or files on your home network and be able to play all that is within those folders and subfolders.
For $229.99 the frame is a little pricey, but it is a 1080p full high definition WiFi cloud frame and does more than many of the digital frames out there. I finally have a high resolution digital frame that will display all of my digital pictures and some of my videos!
Updates 07/20/16
I love using this frame. I has a high resolution and works well. My only complaint is that they have not yet allowed users to link Google Photos to the frame.
Source: The sample used in this review was provided by Nixplay. Please visit www.nixplay.com for more information or Amazon to order.
Nixplay Digital Touch Screen Picture Frame with WiFi - 15.6” Photo Frame, Connecting Families & Friends (Black/White Matte)
$319.99 (as of January 7, 2026 05:11 GMT -06:00 - More infoProduct prices and availability are accurate as of the date/time indicated and are subject to change. Any price and availability information displayed on [relevant Amazon Site(s), as applicable] at the time of purchase will apply to the purchase of this product.)Nixplay AI-Enhanced Digital Picture Frame | Stunning HD Touch Screen Display | Perfect Digital Picture Frame for Gifting | Auto-Rotation Feature, Securely Share Photos/Videos via Email or App | 10.1"
$139.99 (as of January 7, 2026 05:11 GMT -06:00 - More infoProduct prices and availability are accurate as of the date/time indicated and are subject to change. Any price and availability information displayed on [relevant Amazon Site(s), as applicable] at the time of purchase will apply to the purchase of this product.)Product Information
| Price: | $229.99 |
| Manufacturer: | Nixplay |
| Retailer: | Amazon |
| Requirements: |
|
| Pros: |
|
| Cons: |
|




Gadgeteer Comment Policy - Please read before commenting
I’m having problems with pictures actually going straight to the frame instead I have to go to wedsite each time to send it to the frame. Is there a solution to this.
@Peggy – I am only a reviewer of this product and not in any way affiliated with Nixplay, so the only suggestion I have is the following:
On the Nixplay website, log in, click on “Albums”, then “mynixplay Email”, then “Manage Settings”. Next to the email address you are sending photos from, make sure you have selected the playlist that you have playing on your frame. You do this by clicking on the blue edit pencil under “Actions”. A window will pop up and from there you will be able to select the playlist; then click on “Save”.
While still on the website you will want to click on “Frames”, click on your frame to go to its settings, then under the General Settings area make sure that “Display Most Recent Photos” is set on one of the following: “Last Day”, “Last 3 Days”, or “Last Week” (then click on “Save These Settings” at the bottom of the page).
Also, check your Frame Settings on the actual frame (select the gear icon from the Main Menu on the frame, then navigate to Frame Settings). Make sure that “Override Website Settings” is set to “Disabled”.
If this does not work for you, you should visit Nixplay’s support website:
https://support.nixplay.com/home
I hope this helps!
I intent to send a Nixplay Edge 13 to my friend with no knowledge of computer !!. Can I manage the frame (without computer involved) to display photos from media SD / USB card ? and also can I turn off the moving detect option and let the frame display in its self timing photo by photo ?
Thanks for your help.
Thanh T.
It sounds like you actually want a Nixplay Digital frame and not a WiFi Cloud frame. The WiFi Cloud frames immediately ask for your WiFi password when first turned on to link to your in-home network. This then allows you to access any photos that you have online. But the Nixplay Digital frames will work with SD cards or USB thumb drives, no computer necessary – “Simply plug in an SD/SDHC card or USB and you’re on your way”. Here’s the link for their Digital frames: https://www.nixplay.com/nix-frames/
With a Nixplay Digital frame, you are apparently able to use the motion sensor settings OR the Auto On/Off setting. It sounds like you want the Auto On/Off setting. Here’s the documentation for how to set the Auto On/Off:
“The Auto ON/OFF feature allows you to set the frame to turn on or off automatically at a selected time of the day.
In ‘Settings’, if you scroll down the screen, you see the option to set the Auto Power ON and OFF time:
If you want the frame to turn on at 9 am, then set “Auto ON” to: 09:00 ON (The word to the right of the time must be set to “on” for the function to be set to on)
If you want the frame to turn off at 7 pm, then set “Auto OFF” to 19:00 ON (The word to the right of the time must be set to “on” for the function to be set to on).
Just remember, you need to set the clock first for this to be effective. The clock functions in Military Time.”
I hope this helps!
Very clear, Thanks Kathleen.
Thanh T.
For the Wifi frames, is it possible to just have the photos already loaded display without a wifi connection? My husband wanted to have this frame at work, but he will not be able to connect it to wifi.
Van – It sounds like you actually want a Nixplay Digital frame and not a WiFi Cloud frame (that is if you know that you do not have any future plans to use it with WiFi). The WiFi Cloud frames immediately ask for your WiFi password when first turned on to link to your in-home network. This then allows you to access any photos that you have online. But since you have no intention of connecting to a WiFi network, the Nixplay Digital frames will work with SD cards or USB thumb drives – “Simply plug in an SD/SDHC card or USB and you’re on your way”. Here’s the link for their Digital frames: https://www.nixplay.com/nix-frames/
You mention captions in the settings
Will it pick up and display embeded captions in jpeg files that were created with adobe photo elements (and also Picasa)
With many thousands of images captioned and tagged I could not face the task again and my wife is always asking ‘where was that and when’
Dennis – I have not messed with captions much when using this frame. It does have the option to view captions, however, when I tried adding a caption using Picasa, it did not show up on the photo when displayed on my Nixplay frame. There may be a way to display the embedded caption, but I do not know how. Please contact Nixplay support via the following link:
https://www.nixplay.com/contact-us/
Good luck!