 I’ve been searching for a way to keep an eye on my summer cabin while we’re not in residence, and the Xtreme Life Landscape Stone from KJB Security products would seem to be the answer. It claims to provide unattended surveillance with minimal operator intervention and ease of operation. I guess we’ll have to see about that…The Landscape Stone system consists of two major components: a compact DVR and a camera disguised as a rock.
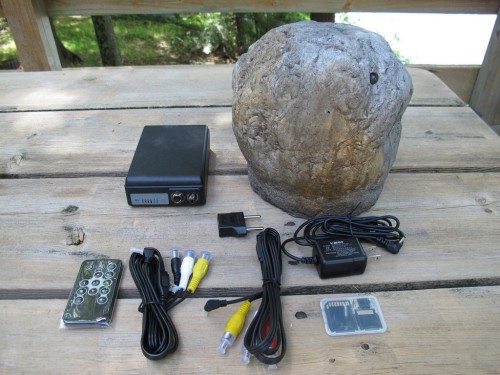 Here you can see all the pieces that I received.
Specifications:
- Video Input: NTSC/PAL Auto Detection
- Standby-time: Up to 365 days (1 Year)
- Continuous Usage: 20 hours
- Record Mode: Standard, Motion, Overwrite
- Max DVR resolution is 720 x 480
- Min Illumination: 0.2LUX
- Resolution Mode: 320×240 / 640×480 / 720×480
- Frame Rate: 1,5,15,20,25,30fps
- Video Format: MPEG-4 ASF file format
- Picture Format: JPG
- Storage: SD Card (up to 16GB SDHC)
- Recording Time: ~40 minutes per GB @ 720×480
- Frame Counter Stamp: Yes
- PC Interface: USB 2.0 ( This was NOT on my device)
- Battery Type: 3.7V 15000mA Lithium Battery
- Camera Resolution: 480 TV Lines
- Image Sensor: 1/4 CMOS
- Size: 8″H x 9″L x 7″W
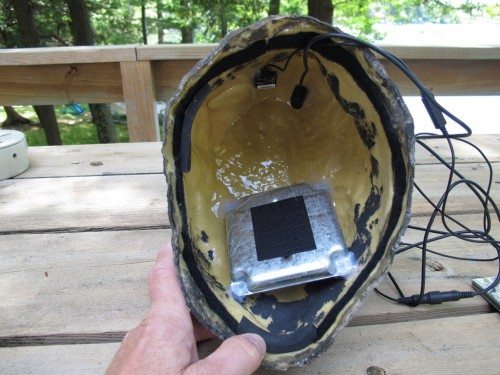 This is the interior of the rock without the DVR installed. At the top of the photo you have the camera and P.I.R. (Passive Infrared)sensor that detects motion. The shell is made of fiberglass and does somewhat resemble a rock.
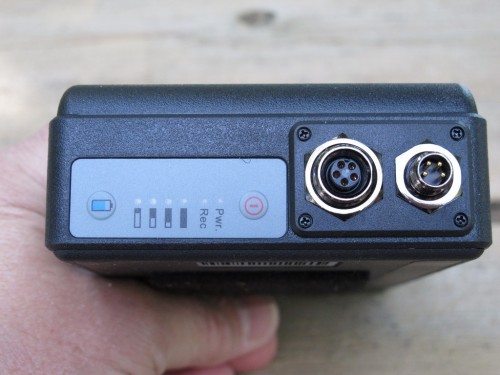 The DVR has inputs for the camera and P.I.R., plus indicators for power and battery state.
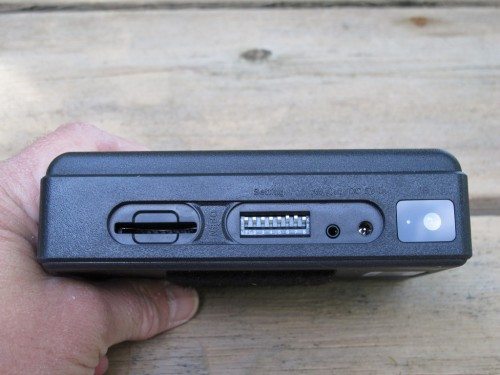 On the other side of the DVR is a slot for an SD card (there is no internal storage), power and interface cable connection , the infrared port for the remote and a bank of switches to set the parameters of the DVR. All the ports have a cover to protect them from the elements.
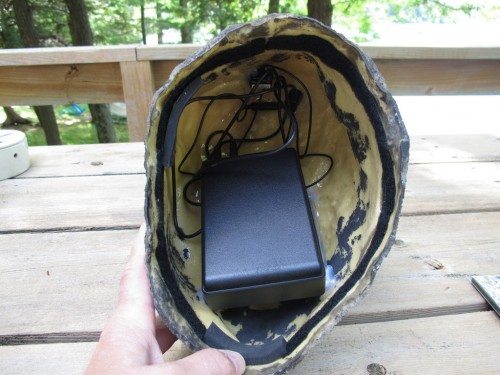 Here the rock is ready to go with the DVR attached with hook-and-loop tape and the cables connected.
 There is a bottom, but it doesn’t fit too snugly. On the plus side, I did not experience any water issues even though I left the device out in a heavy rain storm. My concern is that there is enough space around the bottom to allow little critters access.
Before you can use the surveillance camera, the DVR has to be setup. This is accomplished by connecting the DVR to a TV via a cable using the component input. Curiously the cable came with connectors for video and sound, but there is no sound available from the stone. It is important to note that the DVR can be used with other hidden cameras supplied by KJB, and this may be why they send a generic cable.
After charging the DVR overnight, I then began the setup procedure. This is done with the DVR connected to the component video inputs of a TV.
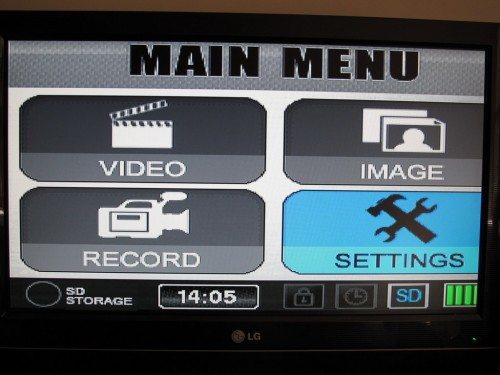 Here adjustments are made for the resolution of the video, frame rate, SD card formatting, etc. You’ll probably notice that the image on the TV is cut off on the right side. There is an adjustment for that, but using both an old analog TV and a new digital TV, I was unable to fit the image in the screen. Once the parameters are set, there is no need to connect to the TV again unless you wish to view the videos using the DVR. You could just as well remove the SD card from the device and view the videos on a computer.
 Unfortunately the only way to move about the various menus is by using the credit card size remote. It’s no secret that I have no love for these small, directional, and difficult-to-press button remotes and this one didn’t disappoint. Multiple button pushes were required to initiate an action, and if it was more than 12″ away from the DVR, it wouldn’t work. Yes, I did put in fresh batteries, but it made no difference. What’s worrisome is that the only way to access the menus is via this remote. Lose it, and you have a non-functional device.
After several frustrating hours of fighting with the remote, I had everything set. The next step was to set the switches on the DVR box for the length of each recording, the sensitivity of the PIR sensor, and to put the device in stand-alone mode. I was now ready to place the rock where it could record people entering my property.
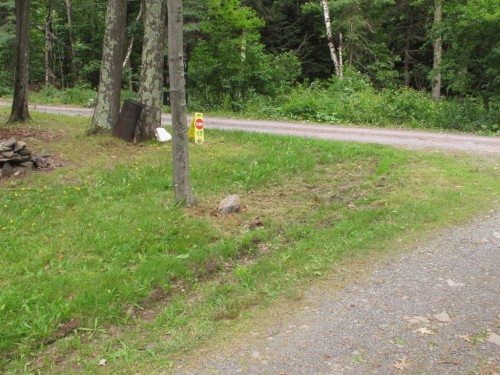 It’s at this point when I had a ah-ha moment. Remember, this device is a stand-alone recorder without a monitor. How would I know if it was pointed in the correct direction? It turns out that this is a trial and error process. I placed the rock and activated the PIR by waving my hand; I turned the rock over and removed the bottom; I then removed the SD card and went inside to view the video on my computer; I returned the SD card to the rock and adjusted the placement of the rock to what I thought would capture the scene I wanted. This whole process was a W.A.G. Scroll back to the beginning of this post and look at the photo of the rock. The tiny hole in the middle is for the camera (the black dot is the PIR sensor). There is no way to know which way it’s pointed.
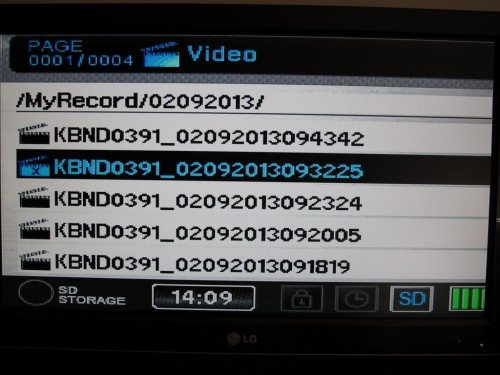 In this photo of my TV screen are the partial results of about 12 hours of operation. For whatever reason, the camera would trigger at random short intervals throughout the day, even though I had the sensitivity set to the lowest level. Each of these files is a one minute recording, which when played back was very legible, but there was no activity in the scene. On occasion, it would activate if there were actual motion.
Being a former Field Service Engineer for a computer company, I always default to blaming operator error before questioning the hardware. I thought perhaps the change of going from shadow to sunlight was effecting the PIR.
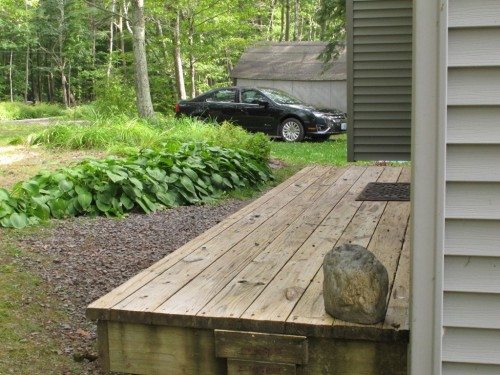 So I moved the rock to a location that spends most of the day in shade. Unfortunately, the results were the same. The camera would record until the 4 GB SD card was full, which happened very fast because it was recording several times an hour. To eliminate the possibility that the sensitivity was set wrong, I tried at all three different settings with the same results.
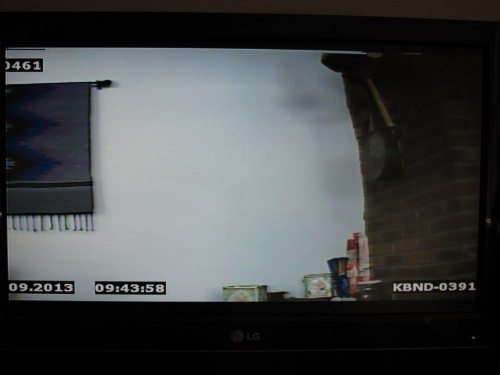 My last test was to point the camera at a blank wall in the house and again the camera triggered randomly without any apparent motion. Also, during night recording, there were fewer videos recorded, but there was still no motion to trigger the device.
To say I was disappointed with the results of using the Xtreme Life DVR and Landscape Stone would be an understatement. For a device that costs almost $650, I would expect more, especially since this was the second unit I received. The first one developed a problem with the camera after about a day, but when it did work, it exhibited the same issues as the replacement unit.
It’s too bad things didn’t work as expected. This would be a perfect device for surveillance at my remote summer home, because there’s no broadband available. If there was, I’d just go with a network camera like I use at my home.
L39 Ultra Slim UV Protective Filter for Leica Q3 43 Q2 Camera with Moisture-Proof Case & Removal Tool 19 Layers Mulit-Coated UV Ultraviolet Filter 99.3% Light Transmission Water Oil Scratch Resistant
(as of February 14, 2026 17:24 GMT -06:00 - More infoProduct prices and availability are accurate as of the date/time indicated and are subject to change. Any price and availability information displayed on [relevant Amazon Site(s), as applicable] at the time of purchase will apply to the purchase of this product.)JcBlaon Outlet Extender Surge Protector - 6 Outlet Splitter with 4 USB Ports (2 USB C), Multiple Plug Expander Wall Charger, 3 Sided Multi Plug Wall Adapter Power Strip for Home Office Kitchen Travel
(as of February 14, 2026 17:26 GMT -06:00 - More infoProduct prices and availability are accurate as of the date/time indicated and are subject to change. Any price and availability information displayed on [relevant Amazon Site(s), as applicable] at the time of purchase will apply to the purchase of this product.)Product Information
| Price: | $649 |
| Manufacturer: | KJB Security Porducts |
| Retailer: | Home Security Super Store |
| Requirements: |
|
| Pros: |
|
| Cons: |
|


Gadgeteer Comment Policy - Please read before commenting
To me that “rock” looks more like a hornet’s nest than a rock. 🙂
Seems like anyone could steal your ‘rock’ if you leave it lying around.
VernC,
Not if they think it’s a hornet’s nest 🙂 Seriously, that is a concern, so I tried to place it where it would be inconspicuous. To facilitate the testing though, I had it in the open most of the time.
Great review! This did look like an interesting product at first.
Really @Jackie? The last line on the sign is unacceptable!
I had to watch over my rental property during the winter, while I was remodeling it on the weekends. The biggest problem with offline cameras is that, should a problem occur, you will not know about it soon enough. Which means simple to fix problems (furnace shuts down due to overuse) quickly turns into expensive problems (frozen pipes).
Thus, I just hunkered down and activated cable internet to deal with the problem. Two web cams with a big wall thermometer and wall clock in view, and an open router port to access the cameras from elsewhere.
If I were in your situation, I would install satellite internet to do the same.
There is a remote annunciatior product out there called the Sensaphone. Uses a telephone line to monitor temperature, sound levels internally, and can be connected to up to 4 external sensors (leak detection, dry contact, etc.) When an alarm is detected, it dials out, relentlessly until somebody on its outcall list answers the phone and clears the alarm. Even has a microphone so you can listen in for a minute.
Wow, Jackie, that’s an appalling link you provided. I can’t believe Julie would approve of racist humor being used by one of her contributors. Do you even understand how hurtful that word is? I don’t know anything about you, but I’m hoping you’re just a very young person who is ignorant of our nation’s recent sordid history. You need to go watch “Eyes On The Prize” and get a clue.
This is really bad form for what is otherwise a very respectable website.
@John Selden You’re right; the image was inappropriate. Jackie’s comment has been removed at Julie’s request. I apologize that it wasn’t noticed before you spotted it.
Yes, very sorry everyone… Jackie didn’t realize it was there either.
@John Selden – Oops….I didn’t realize it used the N word. All I remember is seeing the funny weather stone in one of those casino shops and I just googled a picture for it. Didn’t read all the way through and just thought it was the same thing. But it should be stone gone because of tornado like the one in the casino shops. My mistake..sorry!!!