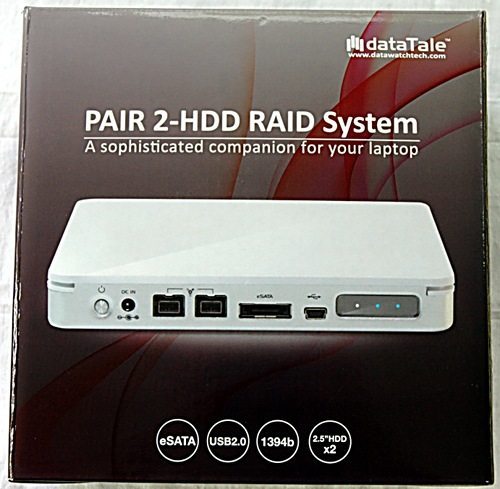
The Data Watch DataTale PAIR 2.5-inch 2-Bay RAID Enclosure is an external dual-2.5″ drive enclosure with just about every interface possible, along with actual hardware RAID capabilities. It comes at a hefty price premium, but if you’ve got the need for external speed, and the right interface option on your target device, it delivers the speed. Alternately, it delivers two 2.5″ disks worth of space, should you need that more than speed.
Enclosure Unboxed
The enclosure is just big enough to encompass a pair of 2.5″ drives, up to 12.5mm thick, and comes with mounting screws, a cable for every supported interface, an AC adapter, and a pouch you can stuff the drive and one cable into. It also comes with a manual, and (via a download) MacOS and Windows setup software that allows you to configure your RAID options. The unit is an actual hardware RAID device, which explains the cost. Once configured it appears as one (or two) disk drives to whatever you plug it into, with no additional software needed.
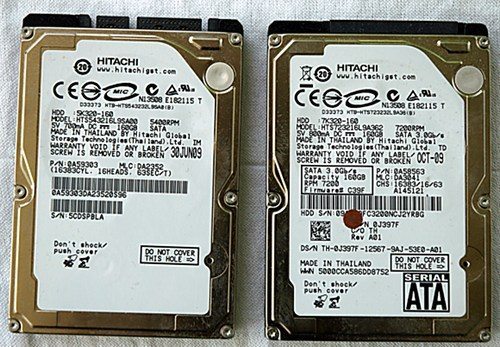
Not included (perhaps obviously) are actual hard drives. The enclosure accepts only SATA drives, which by now are about the only kind of consumer drive you can get. Ideally with RAID systems, you’ll want two identical (speed and size) drives. I didn’t have two identical drives available, but I had two nearly identical drives:
Those are one 5400 RPM and one 7200 RPM Hitachi 160GB drives pulled from various laptops, as I upgraded their internal storage. This will be important later, and is one of those facts of RAID life that you probably know already, but just in case… when using mixed speed devices, your speed is pretty much going to be limited by the slower of the two drives. I’ll come back to that in a minute, but first, let’s get this thing ready to test.
Some Assembly Required
Installing the drives is straight forward. Four Phillips screws hold the enclosure together, so start with removing those: 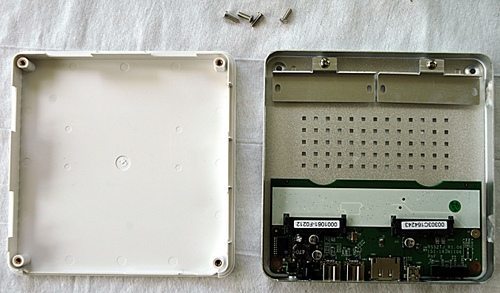
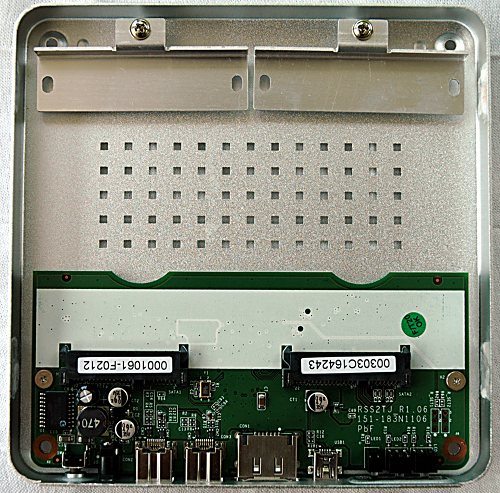
Inside you’ll find a couple of mounting brackets (upper right) and a logic board that provides all the interface support as well as the RAID controller.
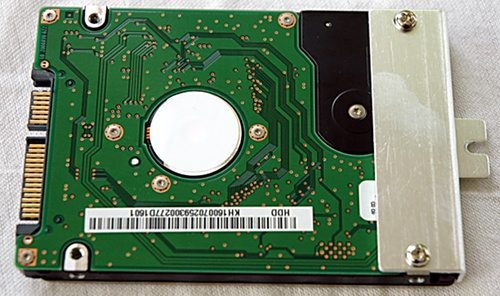
Remove those two brackets and attach them to your drives.
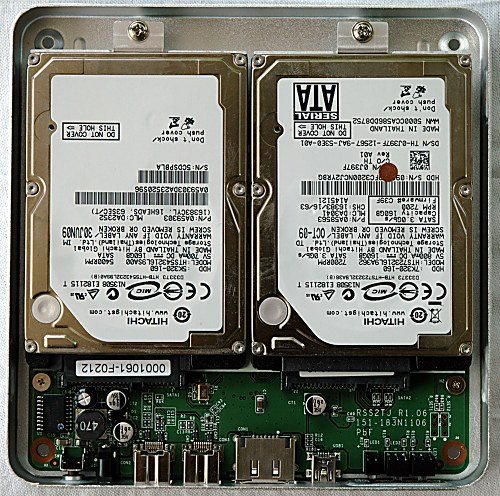
You’re ready to insert them into the enclosure, which is just a matter of sliding them in and screwing down the mounting bracket.
There isn’t any special shock reduction/noise reduction/padding – the drives mount straight to the enclosure, and through the mount any shock/vibration will be passed right along, in or out. This isn’t really any different than any other external drive enclosure, and the PAIR’s rubber feet isolate it a bit from the surface it sits on, but it’s not designed to protect the drives inside in any significant way from external shock. Once it’s buttoned up, you’re ready to plug it in and go. Your interface choices (and the display, and power button) are all on one side.
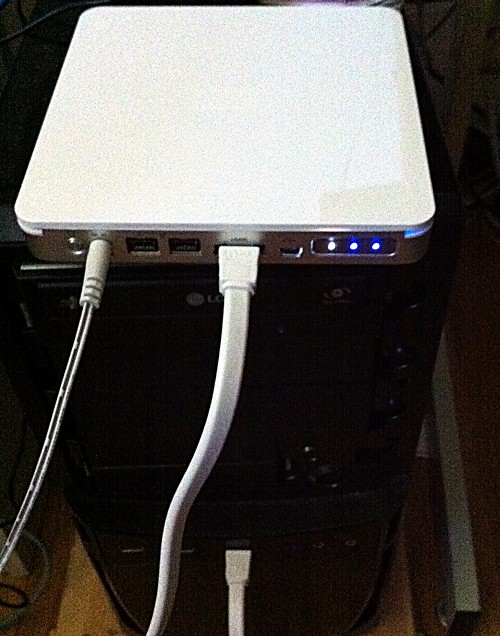
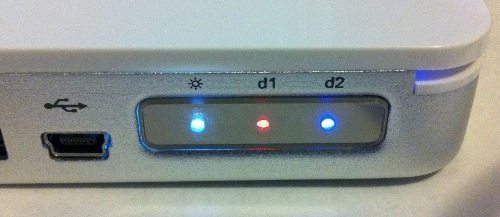
From left to right, that’s the power button, DC in for the AC adapter, a pair (nice touch) of Firewire 800 ports, an eSATA port, and a mini USB (2.0) port. The display has a power LED, and a pair of disk read/activity/RAID status LEDs. If you’re in RAID 1 mode, where data is duplicated onto both disks, the disk status will change from Blue (all OK) to Red if either of your dives has failed. You’ll need to fire up the RAID Master software (covered in a bit!) to rebuild your RAID once you swap out the failed drive. It all works just fine, but having the connectors and display on the same side is a little unsightly in actual use:
If you connect the enclosure via any one of the interfaces, you’ll get two new drives in whatever OS you’re using. By default out of the box, the enclosure is configured for JBOD (Just a Bunch Of Disks) mode. If you want anything more interesting than that, you’ll need to install the RAID Master software (on MacOS or Windows) and set the enclosure up.
RAID Master Software (Mac)
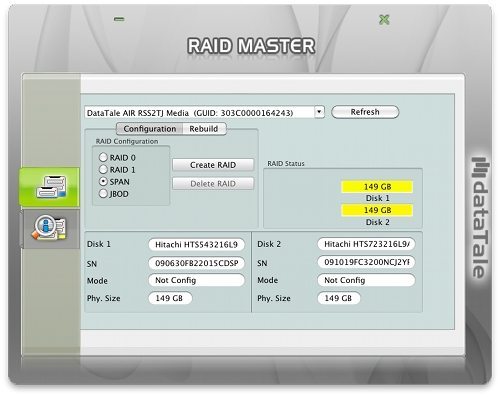
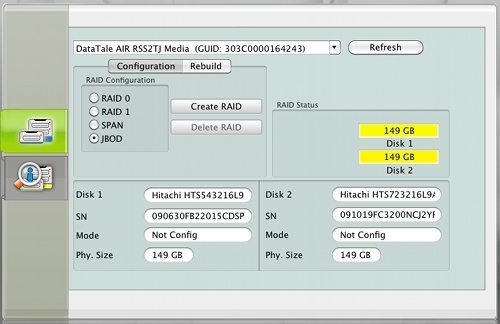
For the Review I’ll show the Mac interface – the Windows version is functionally identical. You download the software from Data Watch, and install it. You must be connected via USB or Firewire to configure the drive with RAID Master, but again once it’s configured you can use any interface, and any OS for that matter. Launch the application, and you’ll get the main display:
You can configure/rebuild the RAID, or Delete the current configuration and select a different one. You also can see the disk information for each hard drive. The various modes and resulting disk are shown below. I’m only showing the results in MacOS, but recall that it works the same in all OSes once configured – I tested on Linux, Windows, and MacOS and had no issued with the resulting “disk” after configuring.
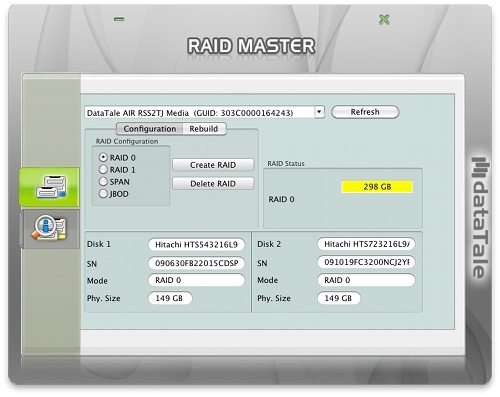
Raid 0 – “Striping” – Two disks combined into one, alternating tracks used:
Raid-0 uses alternating tracks on each disk for faster read/write, resulting in a disk that is twice as big as the smaller of the two disks:
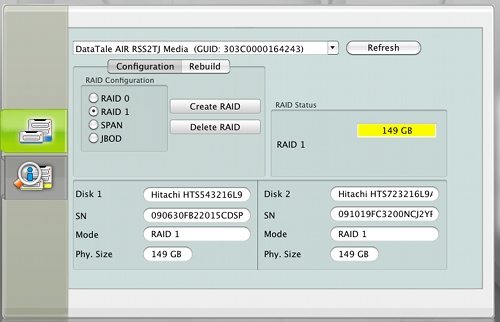
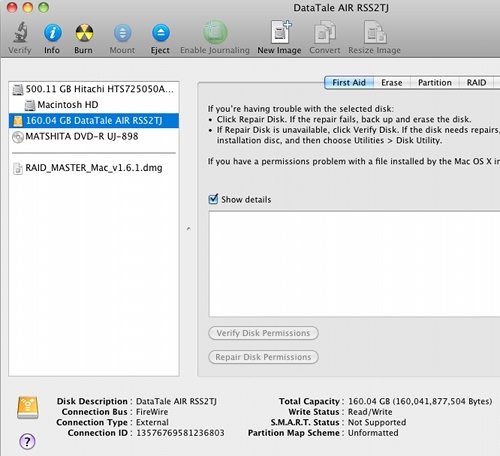
Raid 1 – “Fault Tolerant” – Two disks combined into one, data duplicated on both:
This gives you one disk as large as the smaller of your two drives:
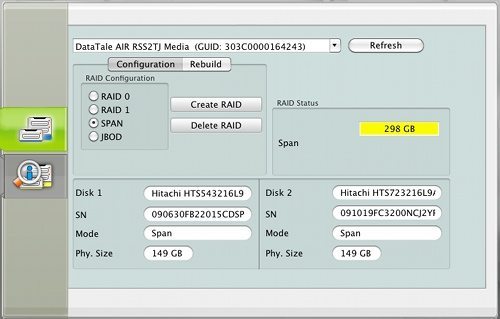
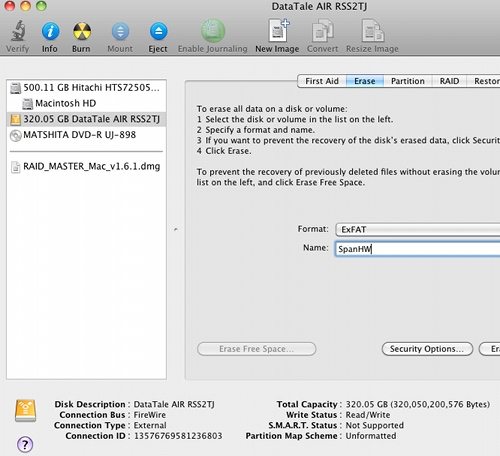
Span – Two disks combined into one, one after the other:
This just glues the two together, one after the other. You’ll get all the space of both drives, and the speed will be whatever the speed is for whichever drive you’re currently accessing.
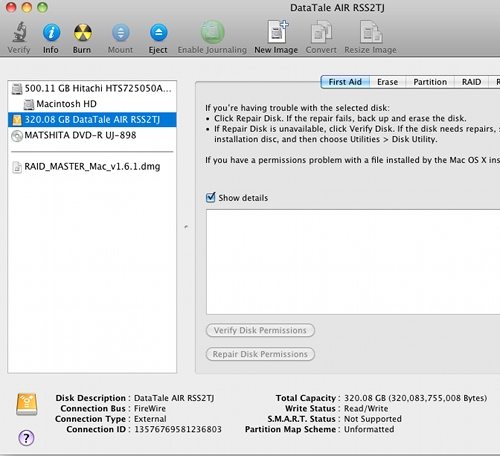
JBOD – “Just a Bunch Of Disks” – Two disks each mount as, well, a disk:
Each disk will show up as a separate disk. Like having two disks in one enclosure. Which is exactly what you have: 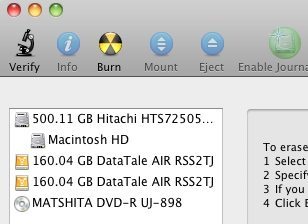
A Word On Modes
Keep in mind that the only fault tolerant mode above is the Raid-1 mode. To a lesser degree, the JBOD mode at least doesn’t completely fail if one disk dies, since each disk is just a separate disk to the operating system. In the other two modes (Raid-0 and Span) losing either disk is likely going to render all data on both disks mostly impossible to recover. This isn’t specific to the PAIR enclosure, it holds true for all RAIDs. To test the PAIR’s Raid-1 data recovery, I removed one of the two disks, and reformatted it. Then I put it back in to see what happened. That’s about as bad a disk failure as you can get! The PAIR detected something odd was up, and raised the red flag:
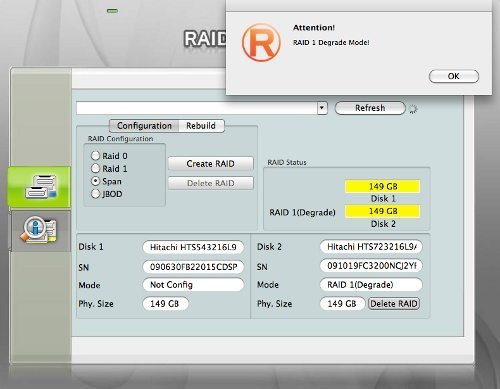
Running RAID Master, it agreed something was very wrong:
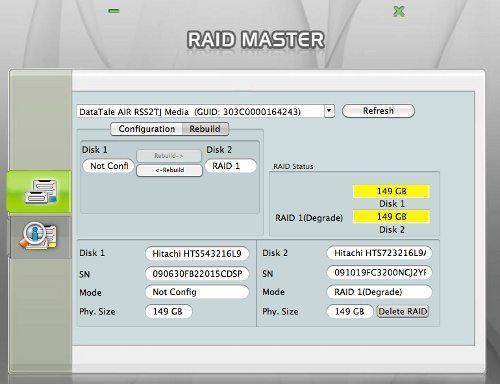
Clicking Rebuild, I get the option to copy Disk 2 (the good one) onto Disk 1 (the reformatted one)
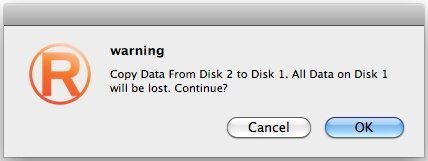
Clicking <-Rebuild, I get one last chance to change my mind…
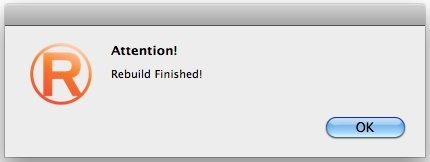
I click OK, walk the dog, and then a mere 45 minutes (these are only 160gb drives, remember) later…
It’s all better. So, it seems like as long as you notice one of your lights going Red in Raid-1 mode, and you have a disk you can replace, you can recover from a disk failure. Even in degraded mode, the PAIR will mount and run, it’s just as safe at that point as any other single disk.
The Need For Speed
The last thing to consider with any RAID disk system, and any external disk enclosure, is how does it do speed-wise? This is another solid performance area for the PAIR – it has one interface that’s faster than most SATA disks, one that’s “fast enough”, and the legacy USB 2.0 interface that, while slower than most modern disks, is pretty much universally supported by most any computer you’re likely to run across. The table below summarizes my tests, which were done with a combination of tools under Linux, MacOS, and Windows.
| Interface | Max speed |
Raid 1 | Raid 0 | Span/JBOD |
|---|---|---|---|---|
| eSATA | 300 | 58 read 60 write |
94.4 read 126 write |
53.7 (1) 71.2 (2) |
| Firewire 800 | 78.6 | 58 read 60 write |
73.9 read 76.4 write |
60.4 (1) 75 (2) |
| USB 2.0 | 60 | 33.9 | 33.9 | 33.9 (1,2) |
Speeds in MB/second (1) is 5400rpm disk, (2) is 7200 rpm
What this table tells you is that the USB 2.0 interface is actually quite good at nearly 40MB/sec – but still slower even than the pokey 5400 rpm disk. Moving up to Firewire 800, at just under 80 MB/s this interface is faster than an average speed disk, but not really fast enough to deliver the nearly 2x performance (of your slower disk) in Raid 0 mode. Finally, eSATA is faster than most spinning disk drives, and you see the full speed benefit of Raid 0 in the tests above.
One Tiny Little Glitch
At review time (late July) the RAID Master software under MacOS only ran in 32 bit mode. If you’re got a very recent Mac, you will need to reboot holding down the 3 and 2 keys to force it to 32 bit mode, in order for the RAID Master software to successfully load its driver and see the PAIR enclosure. Once configured, you can reboot back to 64 bit mode. I contacted the manufacturer and was told they were working on an update for 64 bit, so this annoyance should be removed at some point soon.
Conclusion
This is a pretty slick little enclosure. It does hardware Raid 0/1, Spanning, or just acts like a dual enclosure. It will recover Raid 1 failures. And, once configured, it works in all these modes with any OS that supports at least one of its three interfaces. When using Firewire 800, the drive doesn’t even need external power – it can be powered by the Firewire cable.
ESR for MagSafe Wallet, 5-Card Holder With RFID Blocking, MagSafe Sticker Included, Slim Magnetic Wallet for iPhone 17/16/15/14/13/12 Series and Selected Samsung Devices, Not for 13/12 Mini, Black
(as of February 4, 2026 12:10 GMT -06:00 - More infoProduct prices and availability are accurate as of the date/time indicated and are subject to change. Any price and availability information displayed on [relevant Amazon Site(s), as applicable] at the time of purchase will apply to the purchase of this product.)SUPCASE for MagSafe Wallet with Stand, Magnetic Wallet for Men, [Hold 5 Cards] [Adjustable Stand] [RFID Blocking] Phone Credit Card Holder Tripod for iPhone 17/16/15/14/13/12 Series, Black
(as of February 4, 2026 18:14 GMT -06:00 - More infoProduct prices and availability are accurate as of the date/time indicated and are subject to change. Any price and availability information displayed on [relevant Amazon Site(s), as applicable] at the time of purchase will apply to the purchase of this product.)Product Information
| Price: | $109.95 |
| Manufacturer: | Data Watch |
| Requirements: |
|
| Pros: |
|
| Cons: |
|



![[Strong Magnetic Lock]:Built-in magnets, offering a magnetic force of up to 3000g. Ensures the magnetic wallet fits tightly and attaches securely to the back of your iPhone. [Smart Card Storage]:The magnetic wallet is designed ingeniously to hold 5 c...](https://m.media-amazon.com/images/I/41SFnxrNs0L._SL160_.jpg)