
REVIEW – If you caught my (absurdly long) review on the eufyMake E1 UV inkjet printer, you might remember my short detour into other printing methods, including dye sublimation. Since publishing that review, a few sublimation companies have reached out with new product review opportunities, including premier Chinese sublimation paper manufacturer A-Sub. The same company produces a line of printable sticker materials under the brand Koala, and both brands are officially available through Amazon.
⬇︎ Jump to summary (pros/cons)
Price: Varies per product / save 12% with links A-Sub and Koala below
Where to buy: A-Sub, Koala, and Amazon
Discount links:
https://www.koalagp.com/discount/juliethegadgeteer
https://www.a-sub.com/discount/juliethegadgeteer
A-Sub sent me a variety of materials for sublimation and printing. I’ll be using two printers in this review: an HP LaserJet M477 and an Epson RX595, which is an obsolete inkjet photo printer, which I’ve retrofitted for dye sublimation.
What is it?
Sticker materials are printable substrates with an adhesive applied to one side, protected by a removable backing sheet (usually paper). Stickers can either be cut out by hand, or a hobby plotter (like those offered by Cricut, Silhouette, Siser, and others) can be used to “kiss cut” the material, which cuts the sticker substrate without cutting the backing paper. This makes removal and application of your stickers much easier.
I own a few Cricuts, so in addition to looking at how well these materials print, I’ll cover how well they work with Cricut’s print-then-cut feature.
Sticker materials are often paper-based (but are sometimes just plastic), and materials with any sort of special finish (holographic effects, gloss, semigloss etc.) are either plasticized, or a plasticized layer of some kind is applied to the paper surface. My PR rep explained that inkjet-compatible materials often use polypropylene (PP), while laser-compatible materials use polyethylene terephthalate (PET). Since my only functioning inkjet printer is currently set up for sublimation printing, I requested materials compatible with my LaserJet.
I also did sublimation experiments with the laser-compatible materials. The temperature required for sublimation varies from 350-400F, depending on the substrate. This is useful to know – laser printer fusers also tend to range from 350-400F, which means any substrate designed for a laser printer might be compatible with sublimation, since the materials used must be heat-resistant.
Sublimation paper is a consumable material used in the course of dye sublimation. Your design is printed in reverse on sublimation paper, which is then taped onto the sublimation blank. Heat and pressure combine to sublimate the ink, by vaporizing it and forcing it to bond with the blank’s surface. Once the image has been sublimated, the paper on which it was printed is discarded.
Dye sublimation takes advantage of the chemical and molecular properties of certain polymers. Polyesters of all kinds are excellent sublimation candidates, including textiles and PET.
I was also sent a special PET film. This is a very glossy PET material designed to accept sublimation ink. It can be used to produce high-quality, glossy photos that are much more durable than what you can print with a standard consumer inkjet printer and glossy photo paper.
What’s included?
I was sent a variety of materials for evaluation purposes. I was familiar with both A-Sub and Koala products prior to the company reaching out to offer materials for review, so the items marked with an asterisk(*) are materials I purchased, rather than received as samples.
Sticker materials:
- Semigloss sticker paper (94-SSGP)
- Glow-in-the-dark vinyl sticker paper (ALSP-083)
- Glossy vinyl sticker paper* (90-LGPP-20)
- Holographic sticker paper* (HOPPMIX-652)
Sublimation materials:
- Sublimation PET film (ASPET-432)
- 125g ECO sublimation paper* (KDL5-8.5×14, KDL-4×9.5)
- 125g sublimation paper (KAL4)
- 105g sublimation paper (KDL5)
A few important notes…
My LaserJet has a persistent problem with vertical lines on color prints. I have spent years trying to fix this without success, so please ignore the lines in my laser prints…and leave a comment if you can help me with my printer problems!
Successful sublimation is dependent on numerous factors which extend well beyond the sublimation paper used. You may notice some issues with color representation and ink blowout (overspray of dark ink into surrounding lighter areas). These problems are kinks in my sublimation printer setup, and are not reflective of the quality of A-Sub’s paper.
I’ve uploaded full-resolution, 600 dpi scans of my sublimation prints, the final result, and the consumed paper, so you can see how well the paper releases ink, and how good the prints look when sublimated. I’ve also uploaded scans of the stickers I made. Click any of the relevant images to check out the full resolution view. I also scanned everything with color correction turned off.
This review references the hatch test in the sections on the sticker materials. This is a standard ink adhesion test used in the commercial print industry. While I don’t have a tool for making a perfect hatch pattern, I followed the basic idea: use a sharp blade to scratch a fine hatch pattern into the printed image, then use aggressive adhesive tape over the scratches to pull up and observe what sticks to the tape – think a Pond’s pore strip, but less gross. This is an easy way to test whether or not the ink and substrate get along, and will stick together for the long haul.
This also brings me to my biggest complaint about the entire assortment of products: the semigloss sticker paper is treated with some sort of very thin film, and it’s too fragile for my liking. The surface of the printed sticker easily scratches off and pulls off with regular office tape. This was evident from my first ink adhesion tests on the semigloss paper. If you plan on sealing your stickers, this shouldn’t be a problem, but if you’re looking for material to use with durable quick print-and-stick projects, I don’t recommend it. Koala makes better materials with a more durable finish.
I’m an experimenter by nature, so I did a lot of experimenting with the sticker materials which falls well outside what Koala advertises and supports for these materials. Sublimating (and UV printing) on materials that are not explicitly designed for it is at your own risk.
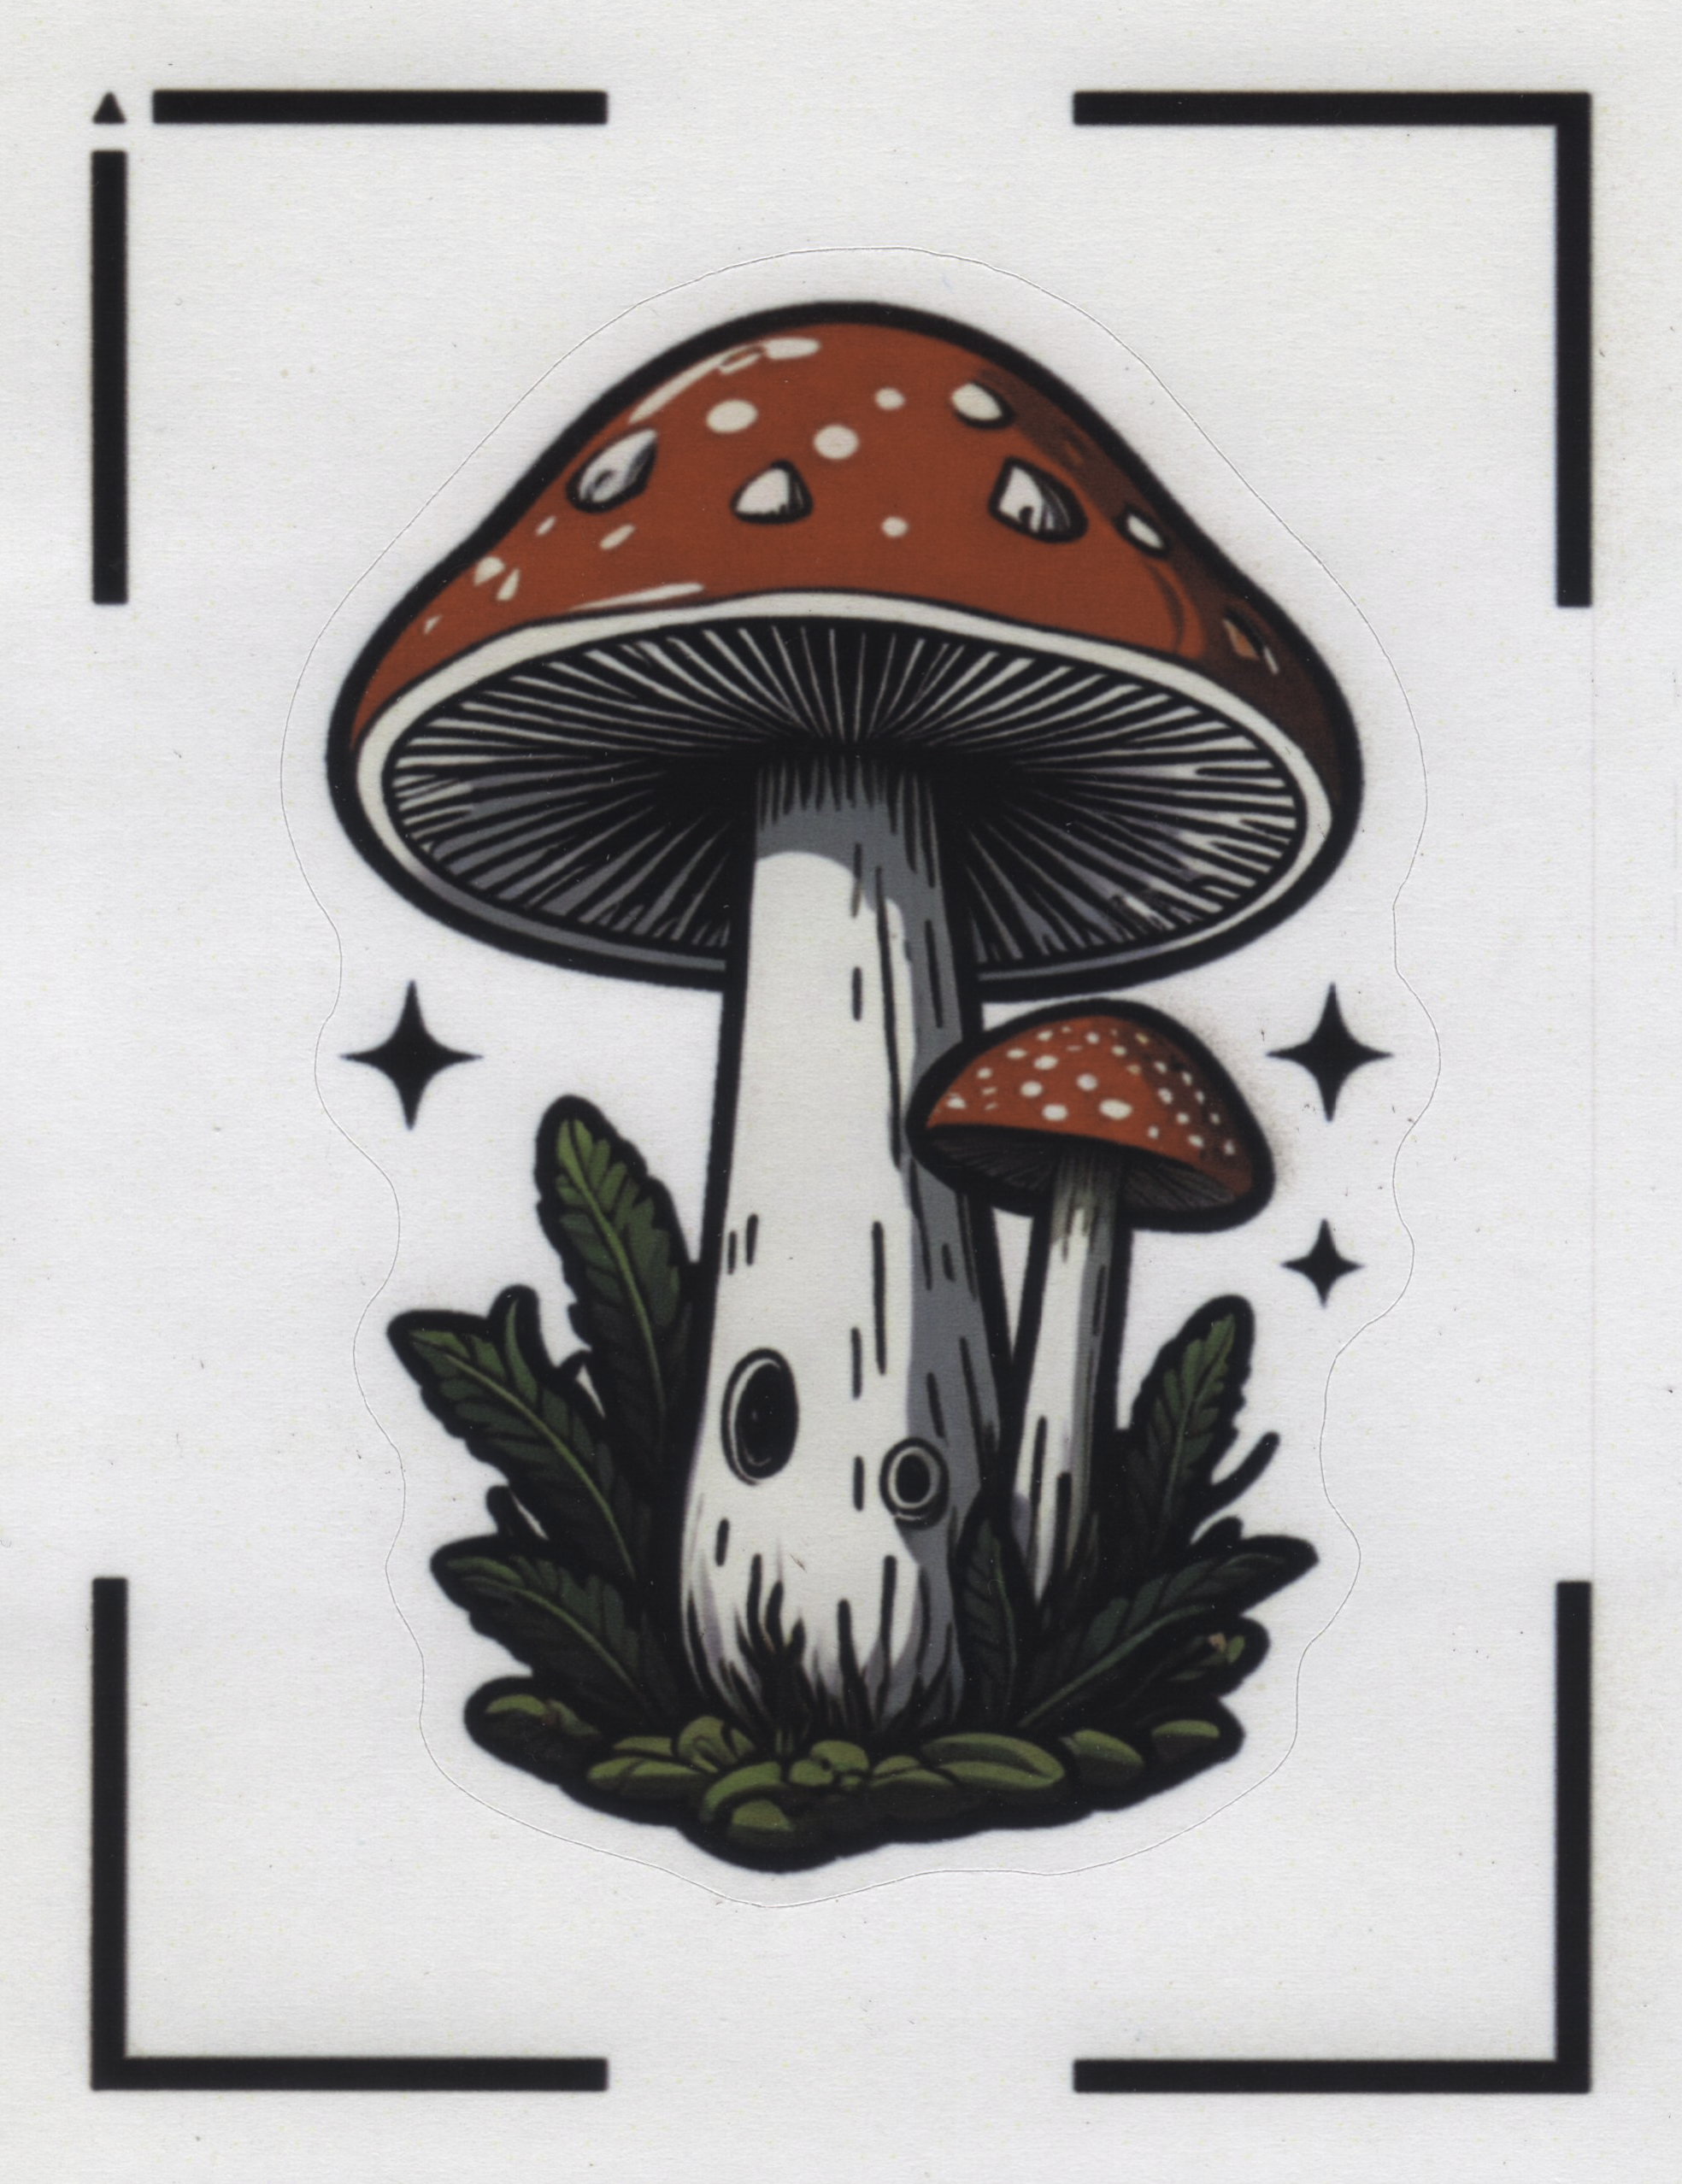
The sticker project
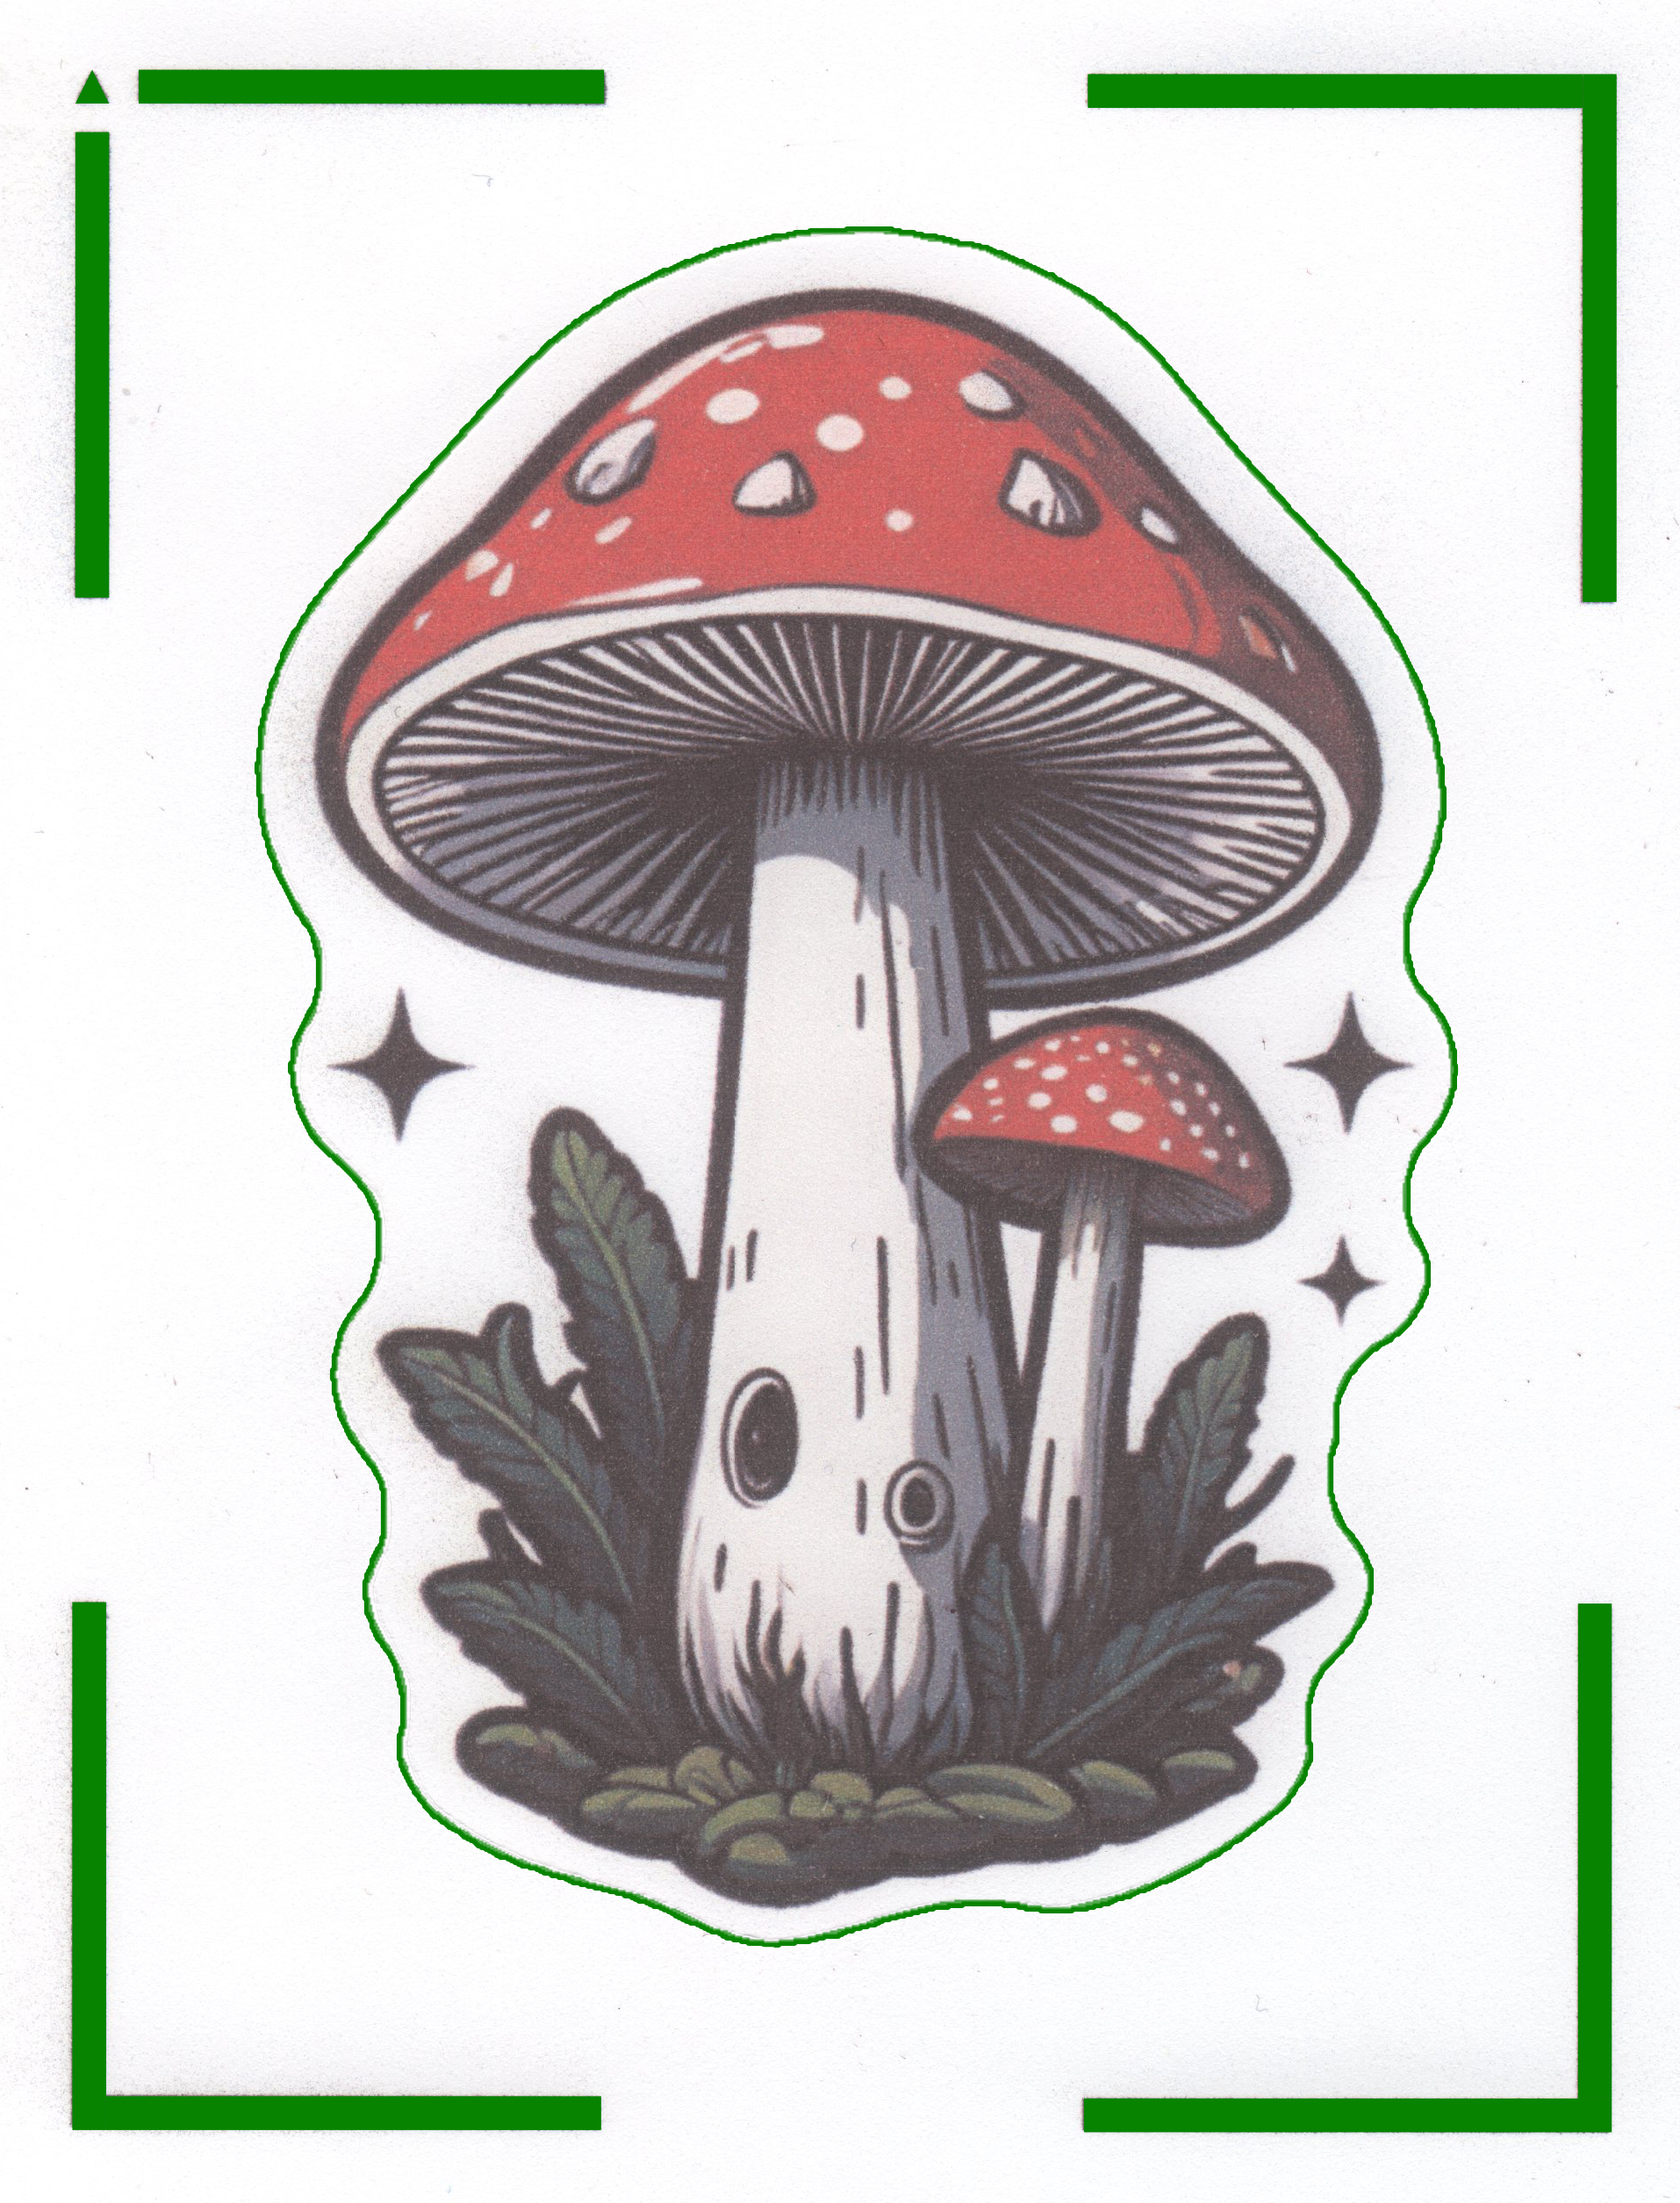
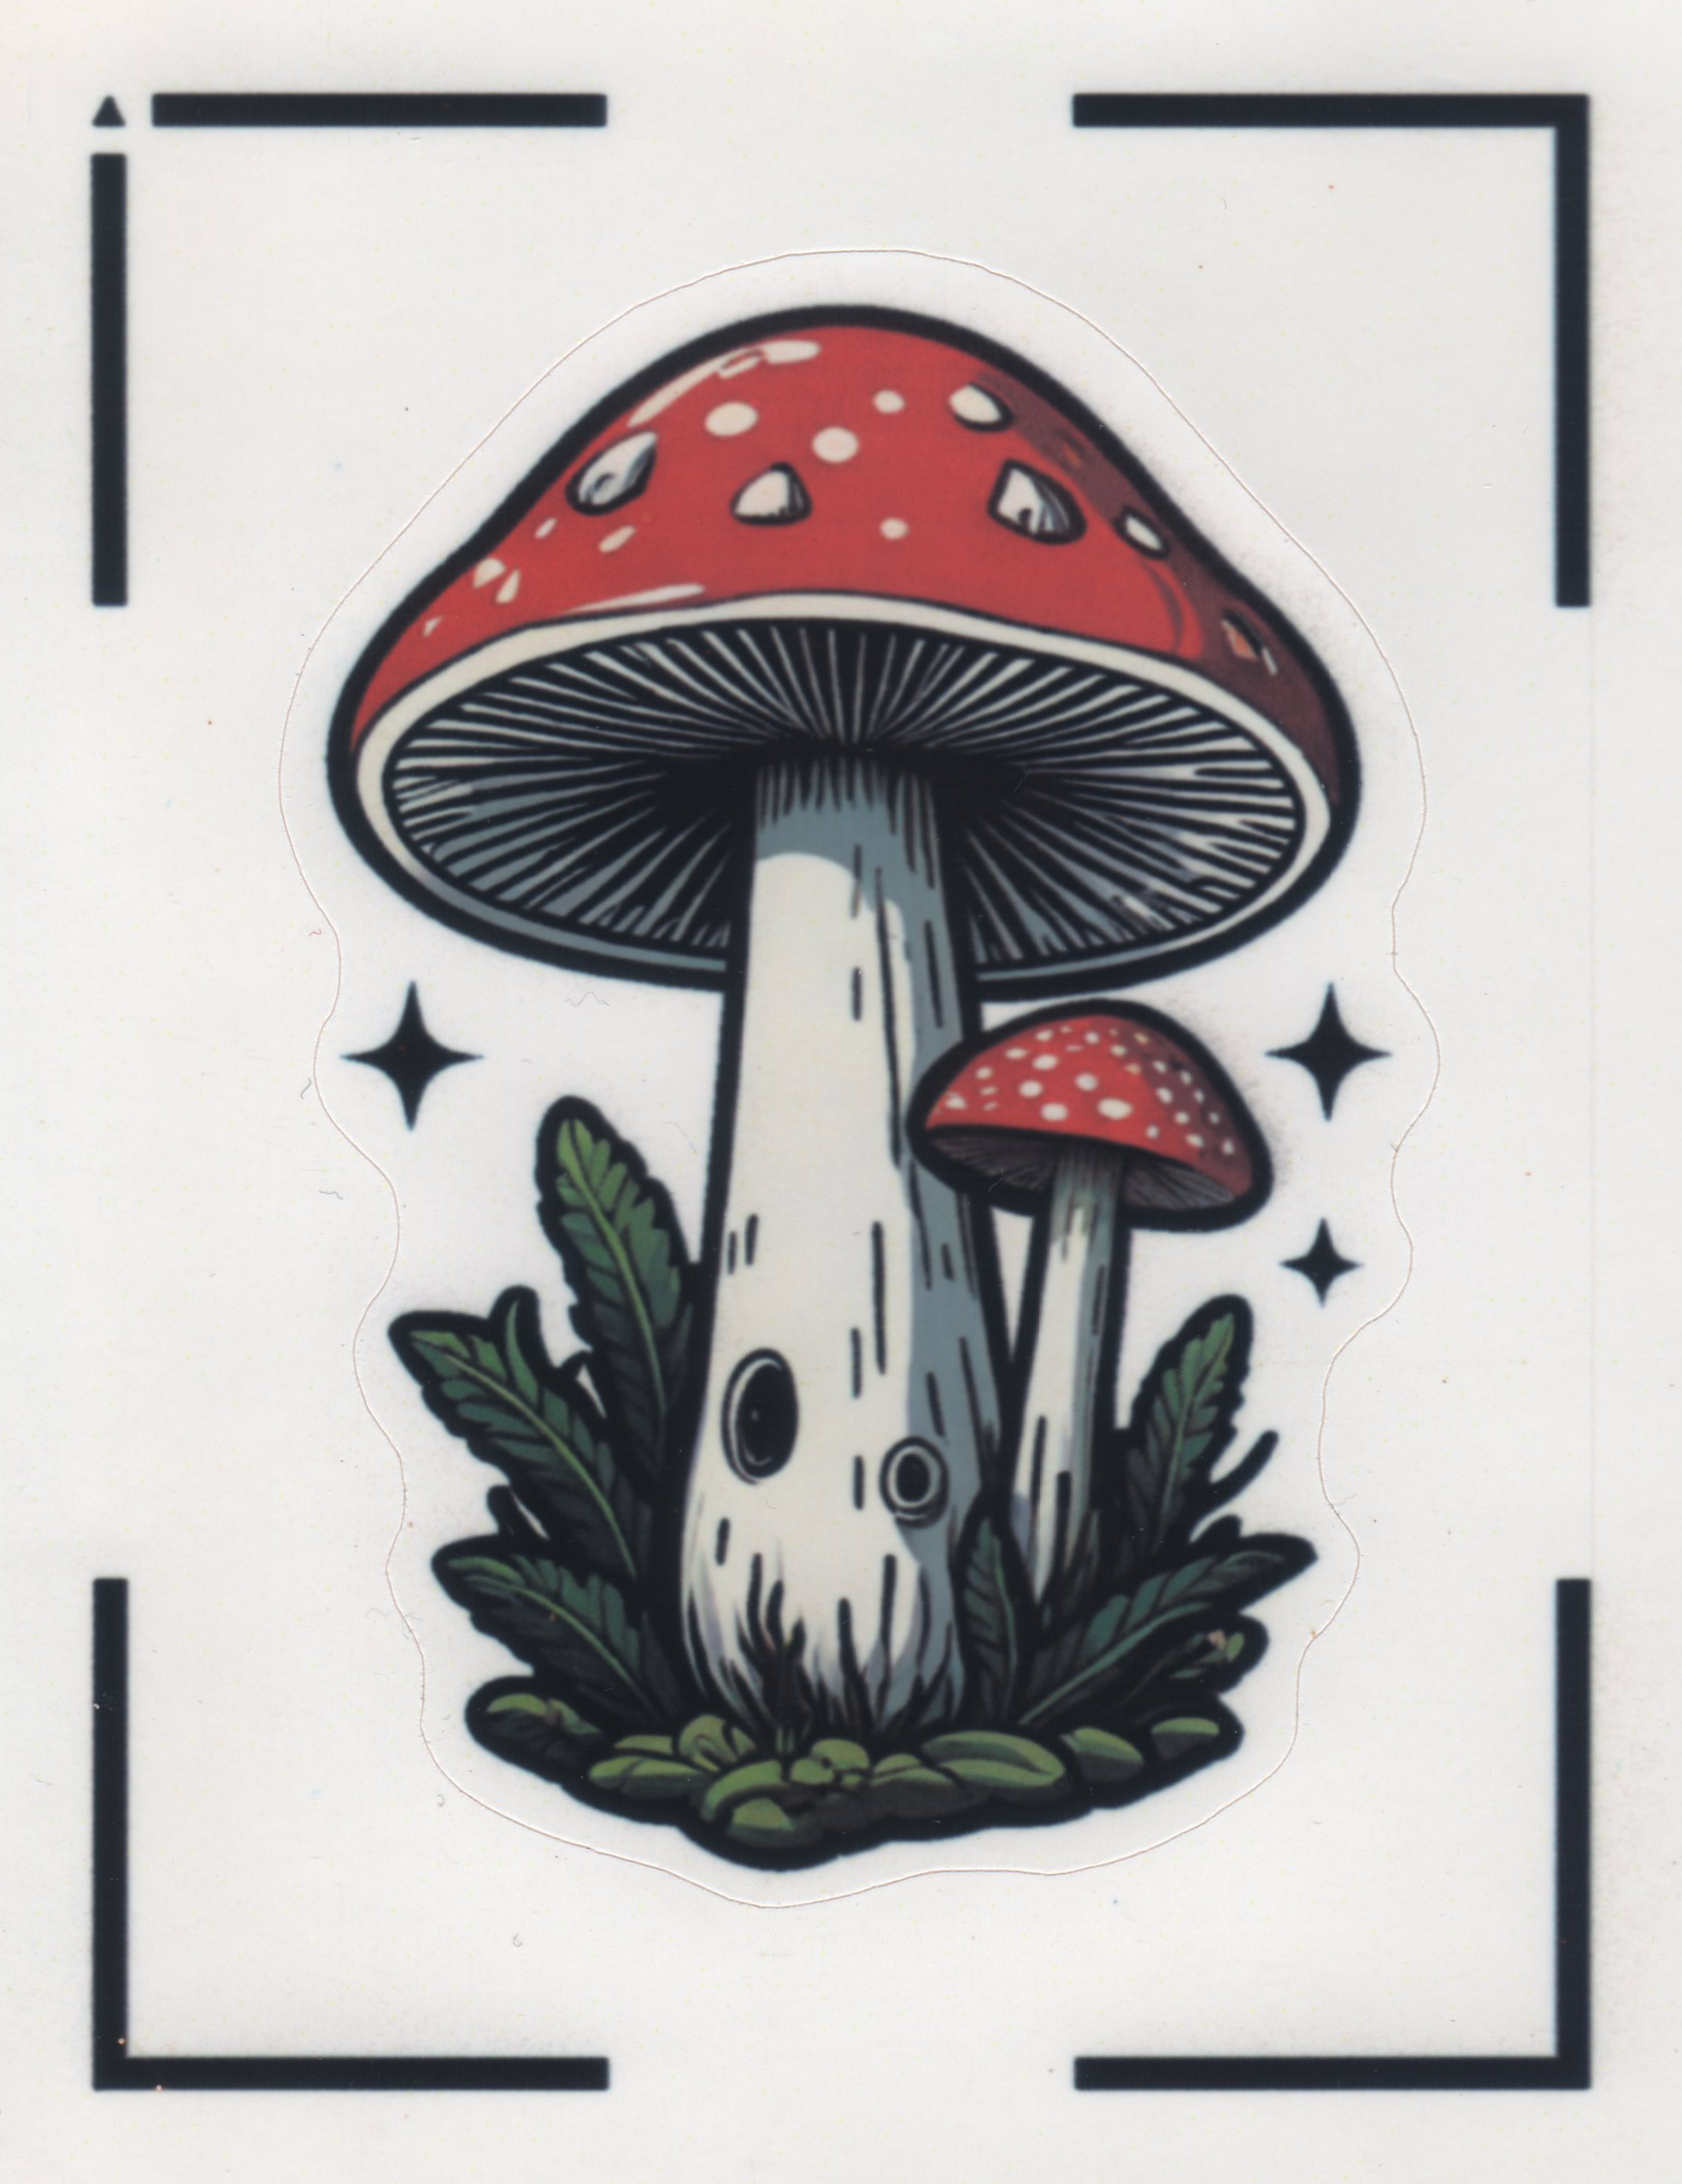
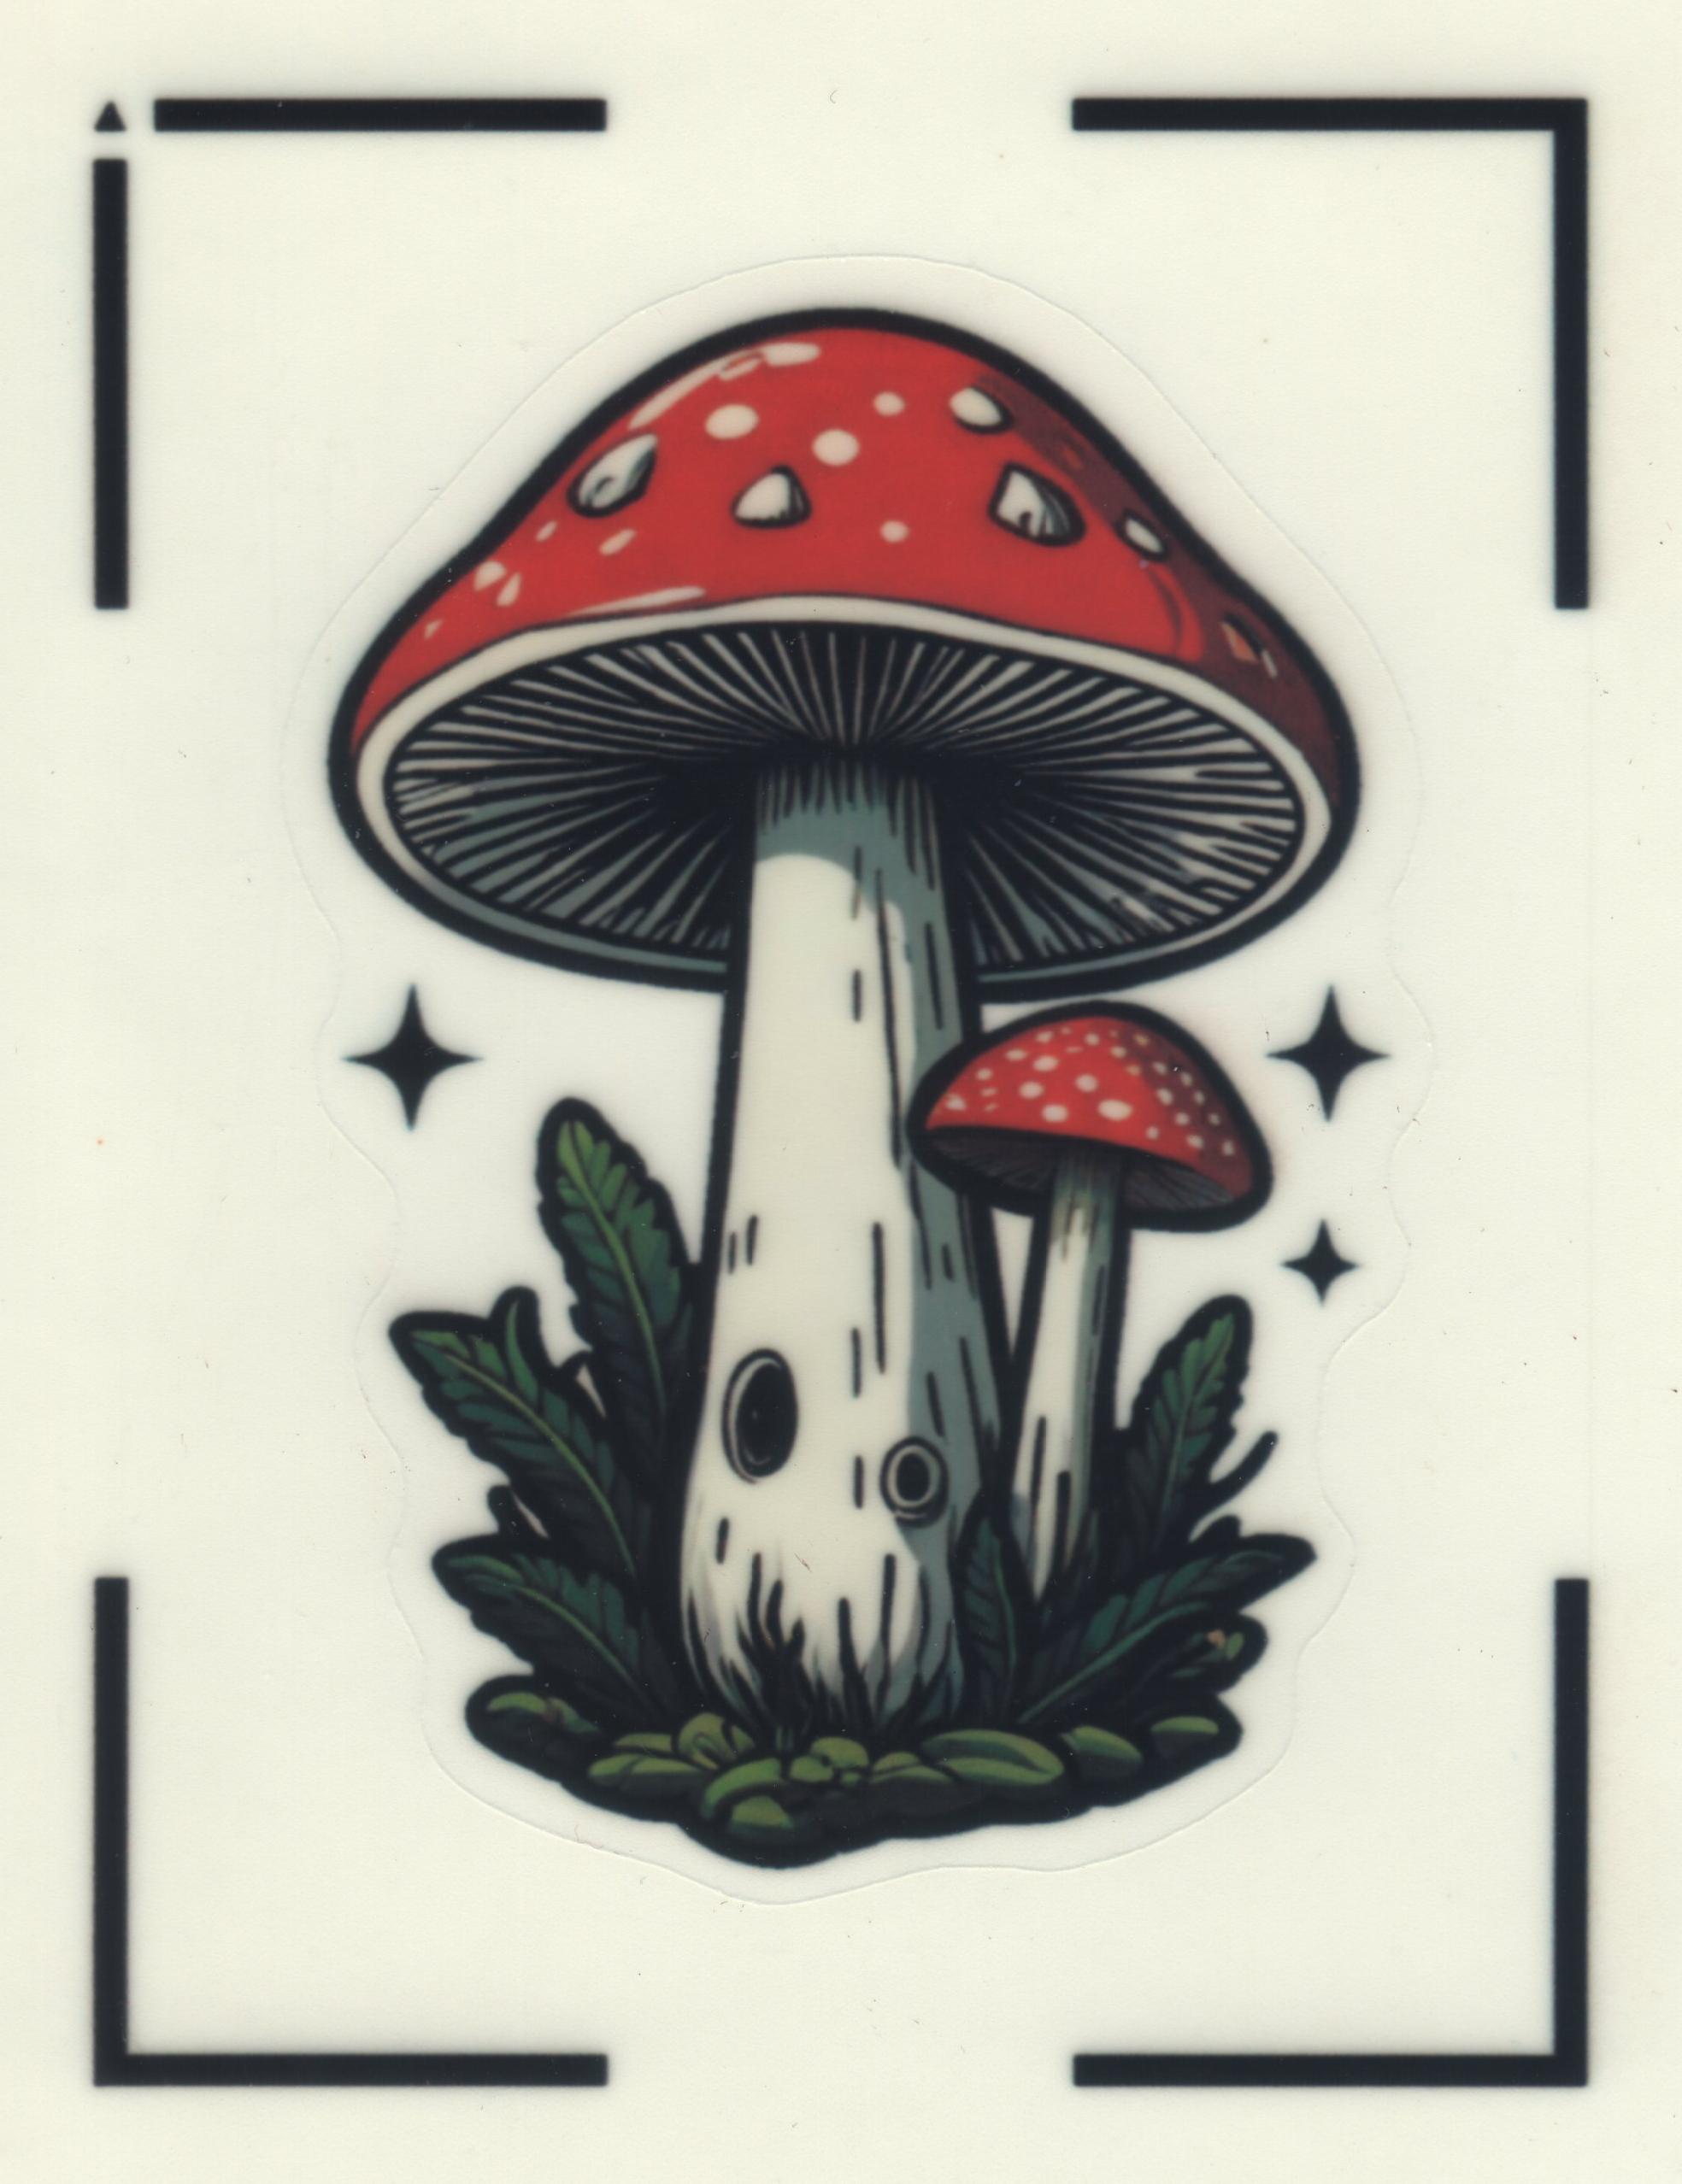
I used Wombo to create this mushroom sticker design. I’ve enhanced this image’s Cricut registration marks, along with illustrating the cut alignment. The green line is on the outside of the cut line. This was printed on regular copy paper with sublimation ink, but was not sublimated.
Now let’s talk about these different materials, and whether they’re worth adding to your craft supplies.
The Basics: Laser printing
Most home users have inkjet and/or laser printers. I used my HP LaserJet M477 to test the laser-compatible materials I was sent. It’s important to note here how laser technology works. Unlike water-based ink, which absorbs into the substrate and dries, laser toner is a powder that becomes sticky when heated above 350F. The stickiness allows it to adhere to the substrate. It then immediately cools, forming a semipermanent print layer.
I say “semipermanent,” because laser prints really aren’t permanent on anything. The toner will rub off with enough abrasion and pressure. Some substrates are more friendly than others to laser toner, though, and printing on regular paper is durable enough for everyday use.

Prints look really good on both the glossy and semigloss sticker materials, but in both cases, they didn’t hold up to the tape test at all. The toner pulled right off the surface with nothing more than a piece of heatproof tape, which uses low-tack adhesive.
With any laser print, you absolutely must seal the print somehow if you want it to last through lots of handling and use. The same is true for standard water-based inkjet ink, because the dry ink bleeds if the print is exposed to any moisture at all. Koala’s sticker papers are no exception to this standard.
Since I have a more limited quantity of the holographic sticker materials at my disposal, I opted to forego laser printing tests on those – given that those are made with what appears to be an all-plastic substrate, I doubt toner will perform any better compared to the glossy and semigloss materials I tested.
The Basics: Cutting
I did all my sticker cutting with my OG Cricut Explore Air and the latest version of Design Space. Even after calibration, my Cricut has a 1/32″ alignment variance, so keep that in mind as we go through each material scenario.
Both laser-compatible sticker materials worked really well with the Cricut’s optical sensor. The alignment appears to be as perfect as can be expected from the hardware.
Recommended Cricut settings
This list includes all the materials I used with my Cricut, and which settings I selected to ensure good results.
- Glossy sticker vinyl: Vinyl
- Semigloss sticker paper: Vinyl+
- Holographic sticker material: Vinyl+ (matte transparent tape over registration marks)
- Glow-in-the-dark vinyl: 0.35mm adhesive magnet
The semigloss material is noticeably thicker than the glossy vinyl, which feels more like PVC (i.e. standard Oracal 631 or 651) than paper. The glow-in-the-dark vinyl is very thick. I used the “more” pressure setting, but this did cut through the backing paper a bit, so normal pressure might be adequate.
Once I figured out the optimal settings for each sticker material, my Cricut handled each with ease. My biggest complaint is the backing paper: it sticks to a new OEM standard grip mat a bit too well, so I recommend using a light grip mat – or a well-used standard grip mat – with all of these sticker materials.
The packaging for the holographic paper recommends taping over the black registration marks detected by the Cricut’s optical sensor. This is indeed necessary – the matte finish of regular office tape helps the optical sensor see more clearly against the reflective holographic substrate.
The Cricut’s optical sensor worked well with the other sticker materials. The glossy finish of the white and glow-in-the-dark vinyls caused no apparent problem with the Cricut’s sensor and software.
Now let’s look at two unsupported options for working with these sticker materials: sublimation and UV printing.
If you caught my review on the eufyMake E1 UV printer, I briefly covered dye sublimation. For those who might not want to read that behemoth of a review, here’s the quick version:
As noted earlier in this piece, sublimation involves vaporizing a polymer ink against a polyster-based substrate. The combination of heat and pressure causes the ink to chemically bond with the polyesters in the substrate. Sublimation generally requires some type of polyester surface, although certain other similar polymers (particularly polyamide, aka nylon) may be compatible.
UV printing is a type of inkjet printing which uses photosensitive polymer resins as ink. A UV light on the printhead cures the ink as it’s deposited onto the substrate, creating a layer of resin. Whatever substrate is used must be capable of bonding with the resin layer, since it behaves much like a polymer glue set with UV light.
UV Printing
Although my eufyMake E1 has run out of ink since I started working on this review, I was able to do some test prints on some of the sticker materials – glow-in-the-dark, semigloss, and glossy vinyl. The print looked great on all three, but it pulled up with regular tape on both the glow-and-the-dark and semigloss materials.
This tracks with my existing tests with the E1’s ink on a variety of substrates. Although it appears other reviewers report a very different experience, I found that the E1’s ink doesn’t bond at all with polyesters, including PET. Since most of Koala and A-Sub’s laser-compatible materials use PET, this makes sense, based on my ink’s observed performance.
The glossy vinyl, on the other hand, appears to be made with some sort of heat-resistant PVC, because the ink held up well to the hatch test. The material also bubbles rather than wrinkling when a section is pulled up with tape, suggesting the material is vinyl, not paper. I did a CMYK-only print with no white base layer, and the material performed admirably. This could work really well for sticker projects with UV ink, and prints definitely appear to be more durable than what you’ll get from laser printing on the same material.
I didn’t purchase a pack of holographic sticker material until after I ran out of UV ink, so I haven’t been able to test it with the E1. Since this material appears to be a non-vinyl type of plastic with no paper content, I’m assuming it’s PET, which means my UV ink won’t bond with it.
Sublimation
Since sublimation works well with PET substrates, I made sublimated stickers with all the materials at my disposal. None of these materials are specifically designed for sublimation, though, so your mileage may vary in terms of long term durability and print integrity.
In all cases, I used a real heat press set to 380F, and I pressed each sticker for 90 seconds. I originally tried my OG Cricut EasyPress, but it doesn’t get hot enough, nor does it apply enough pressure, for successful sublimation.
As these materials aren’t officially sanctioned for sublimation, I took a simple precaution when pressing them – protecting both sides with scrap paper. When it comes to plastic and heat from something like a heat press (not a flame – a lighter hits around 2,000F!), if it turns out your substrate isn’t actually heat safe, never fear – turn off your heat press, let it cool, and the plastic will pull right off the Teflon surface of the platen (or your Teflon platen cover).
I attempted to sublimate a folder awhile back before realizing it was made of polypropylene, which has a melt point of 320-338F. I panicked when I realized my terrible mistake, but as the plastic cooled, it pulled off very easily.
All the materials sublimated really nicely. Because the semigloss sticker paper uses some sort of thin film as the printable substrate, even sublimated stickers on this material are susceptible to damage from scratches and other abrasions.
The glow-in-the-dark and glossy vinyls are very durable, on the other hand, and held up well to hatch tests.
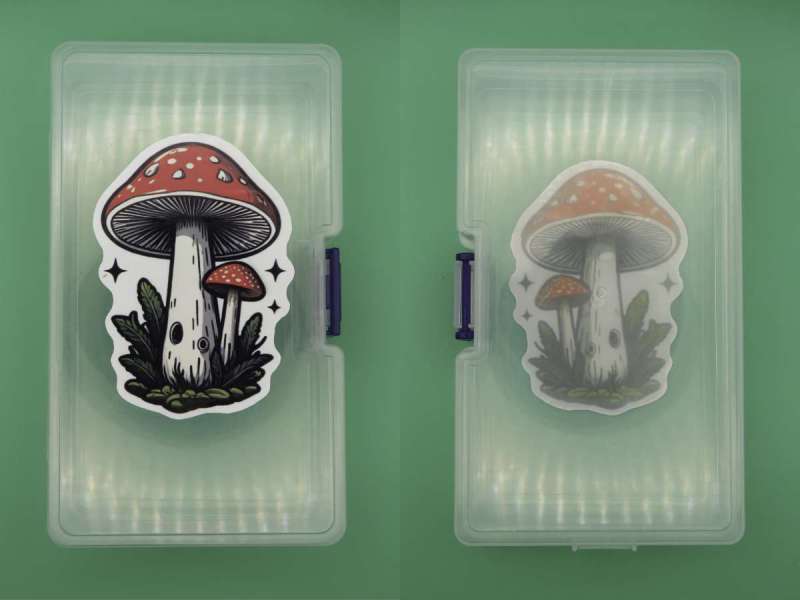
As you will see in my 600dpi scans, sublimated images aren’t quite as sharp as those printed with my LaserJet, but they are very good and within the quality standard you should expect from any hobby sublimation setup. This had no negative effect on my Cricut’s ability to recognize the registration marks for print-then-cut.
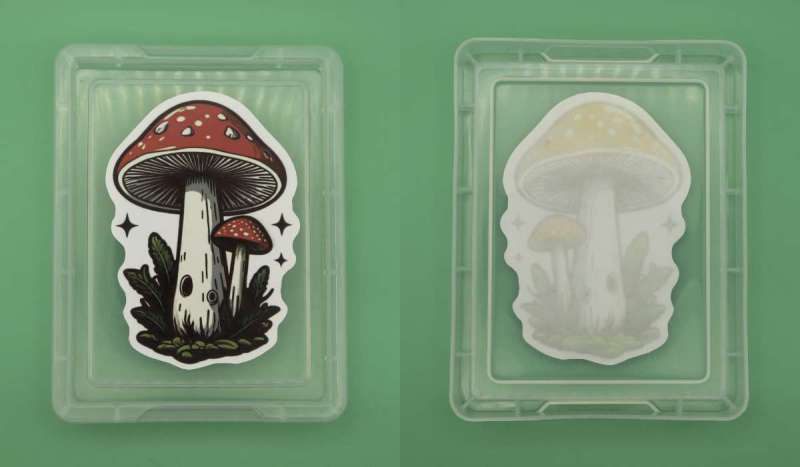
Glossy white vinyl
Here are my sublimation and cut results with the glossy white vinyl:
Sublimation dye absorbs through the entire substrate with the glossy vinyl material. This makes the sticker image visible on the back side of the sticker, which might be desirable, depending on your project.
Semigloss paper
With the semigloss sticker paper, which is compatible with both inkjet and laser printers, the finished sublimated image looks very good.
The thicker, multilayer material means the sublimated image is visible from the reverse side of the sticker, but only just so.
This material is fragile. It’s good for inexpensive, disposable stickers (if you’re a teacher, this stuff is great for putting custom messages and images on homework), but it’s not good at all if durability is a bigger priority for your projects.
Holographic plastic
The holographic materials are particularly interesting. The holographic effect is definitely altered by the sublimation process – although this material is designed to tolerate heat up to around 400F, constant, direct exposure for the full 90 seconds required for good sublimation is probably altering the plastic enough for the effect to be visible. That said, I think the effect is still really nice.
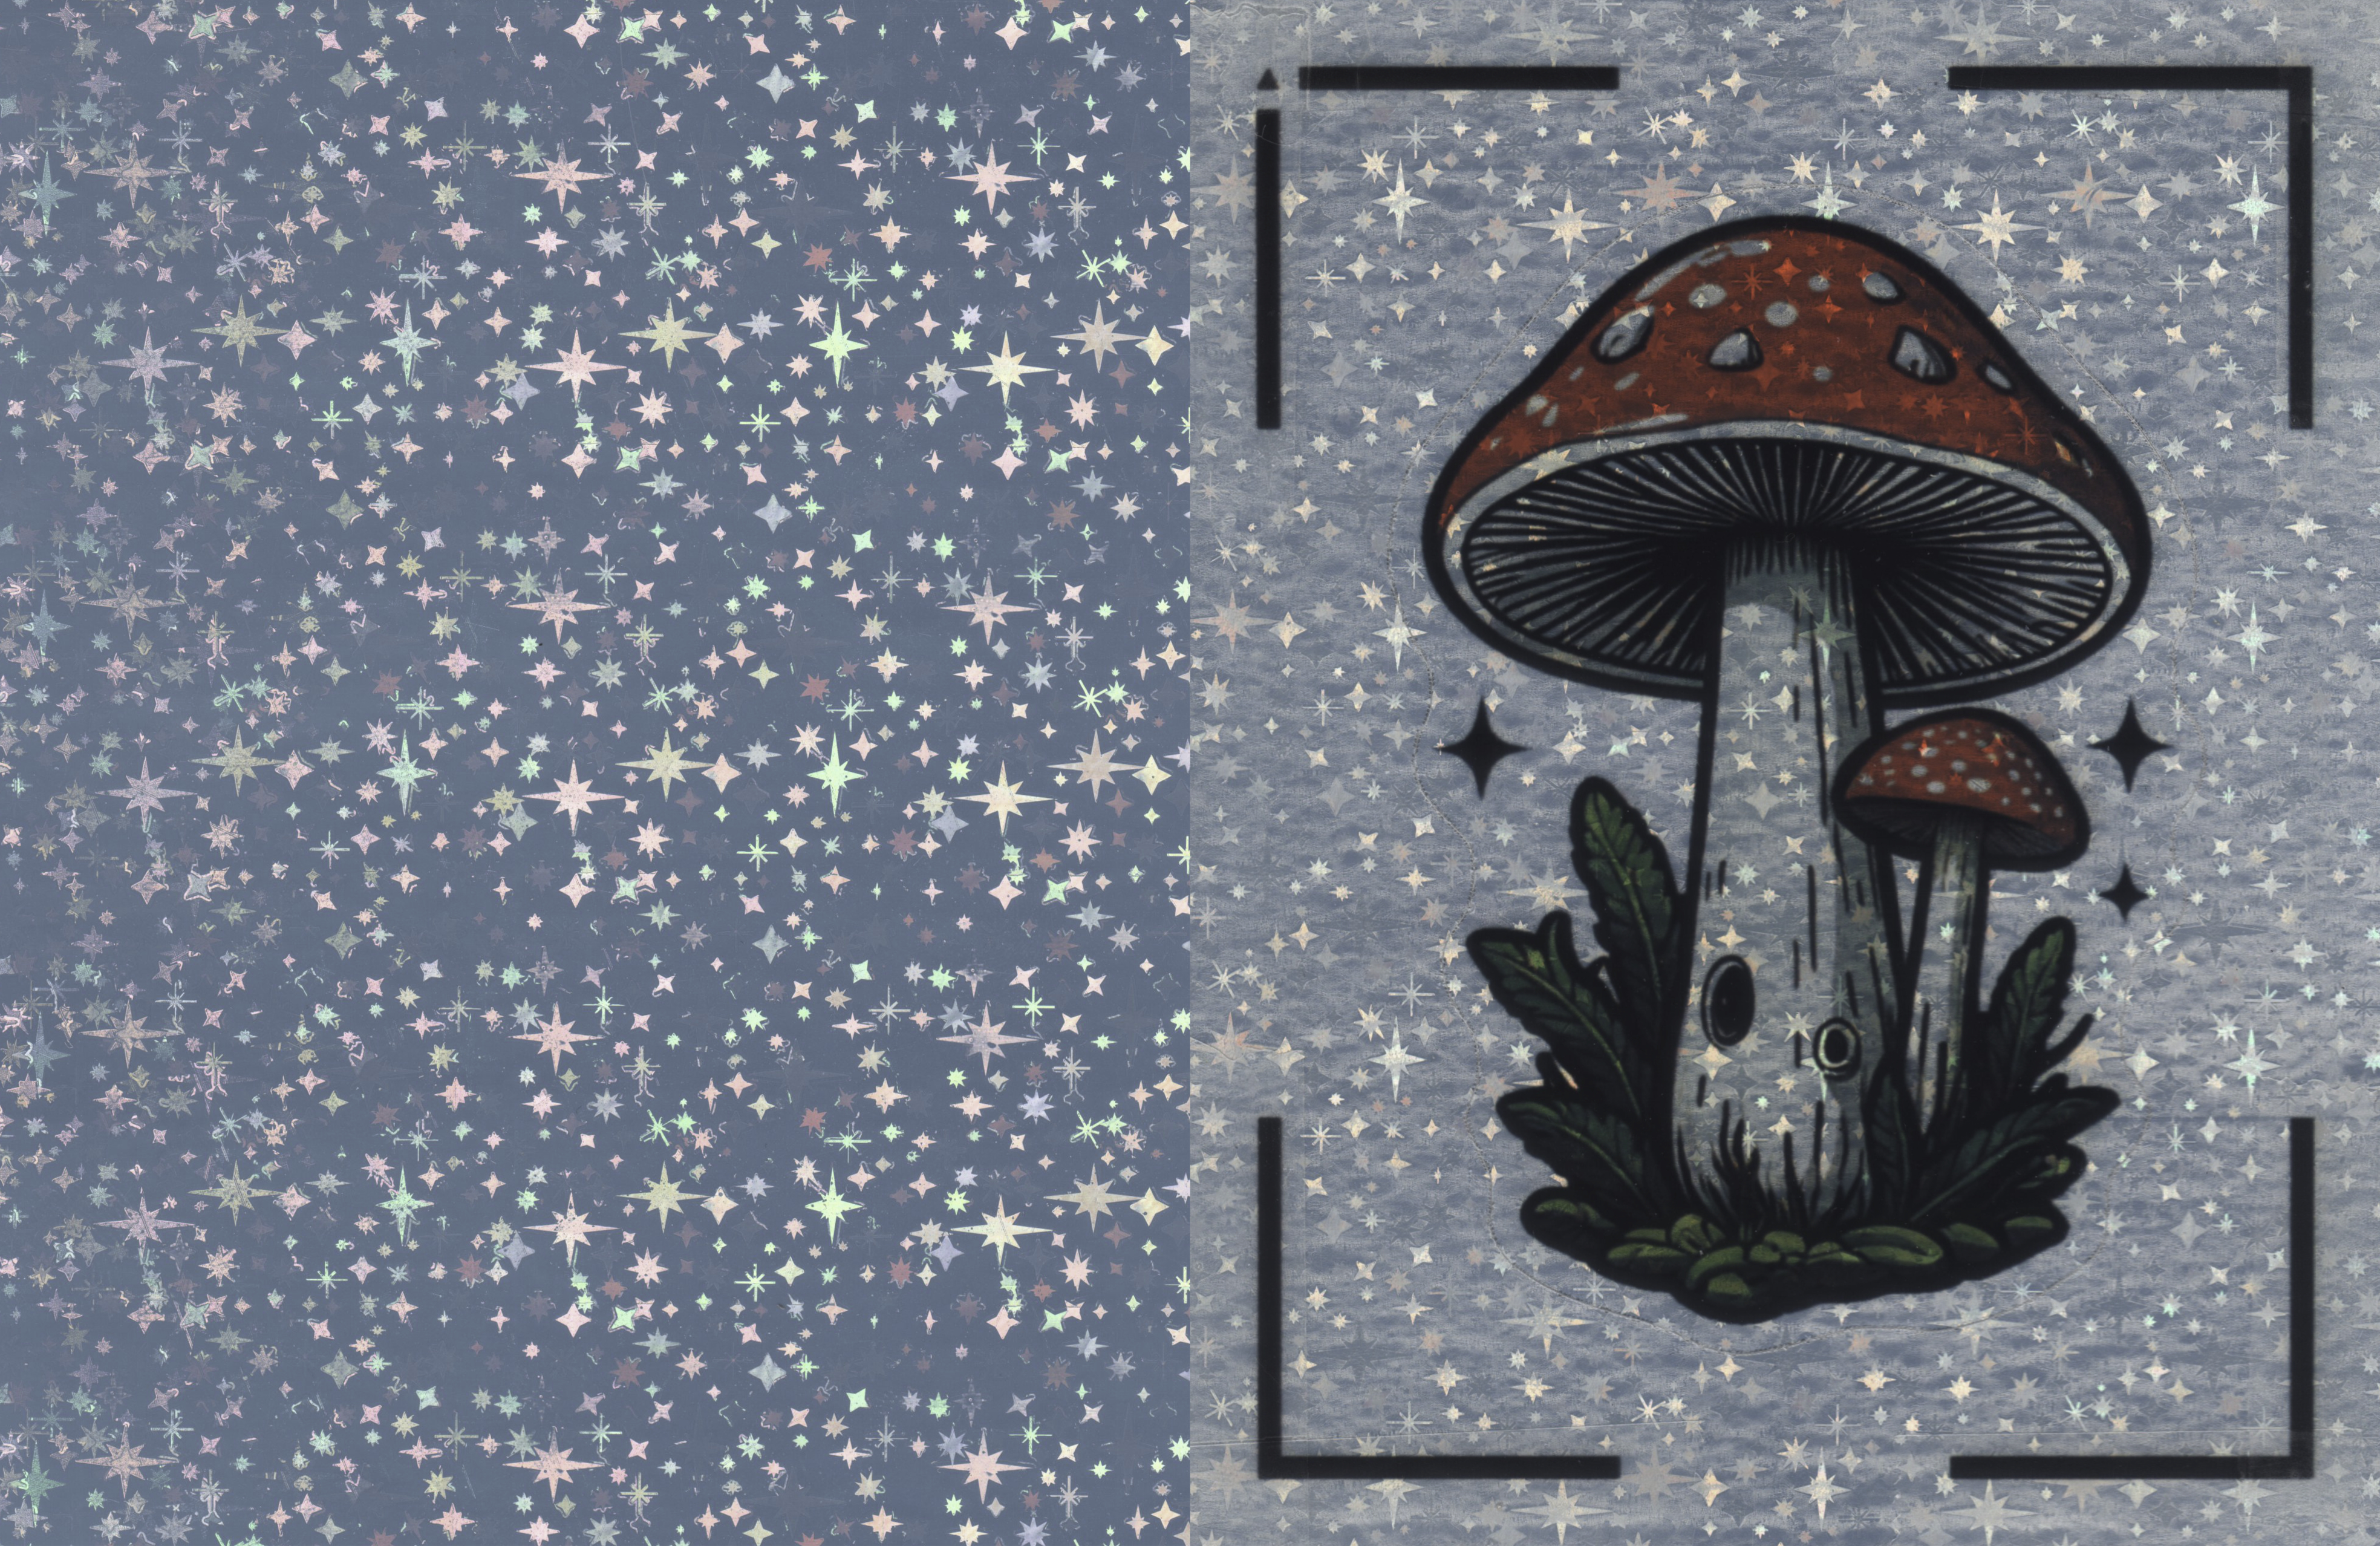
The finished, applied sticker looks great from both sides. The back is opaque, but still holographic.
Glow-in-the-dark vinyl paper
The glow-in-the-dark vinyl is pretty cool. It’s sturdy and thick, and glows really nicely. As I mentioned earlier, I had no problems with my Cricut recognizing the registration marks on this material, in spite of its gloss and yellow-green hue.
The applied sticker looks really cool. I put this one on the side of the DVD changer in our server rack, and when it’s charged up with UV light, it looks pretty sweet!
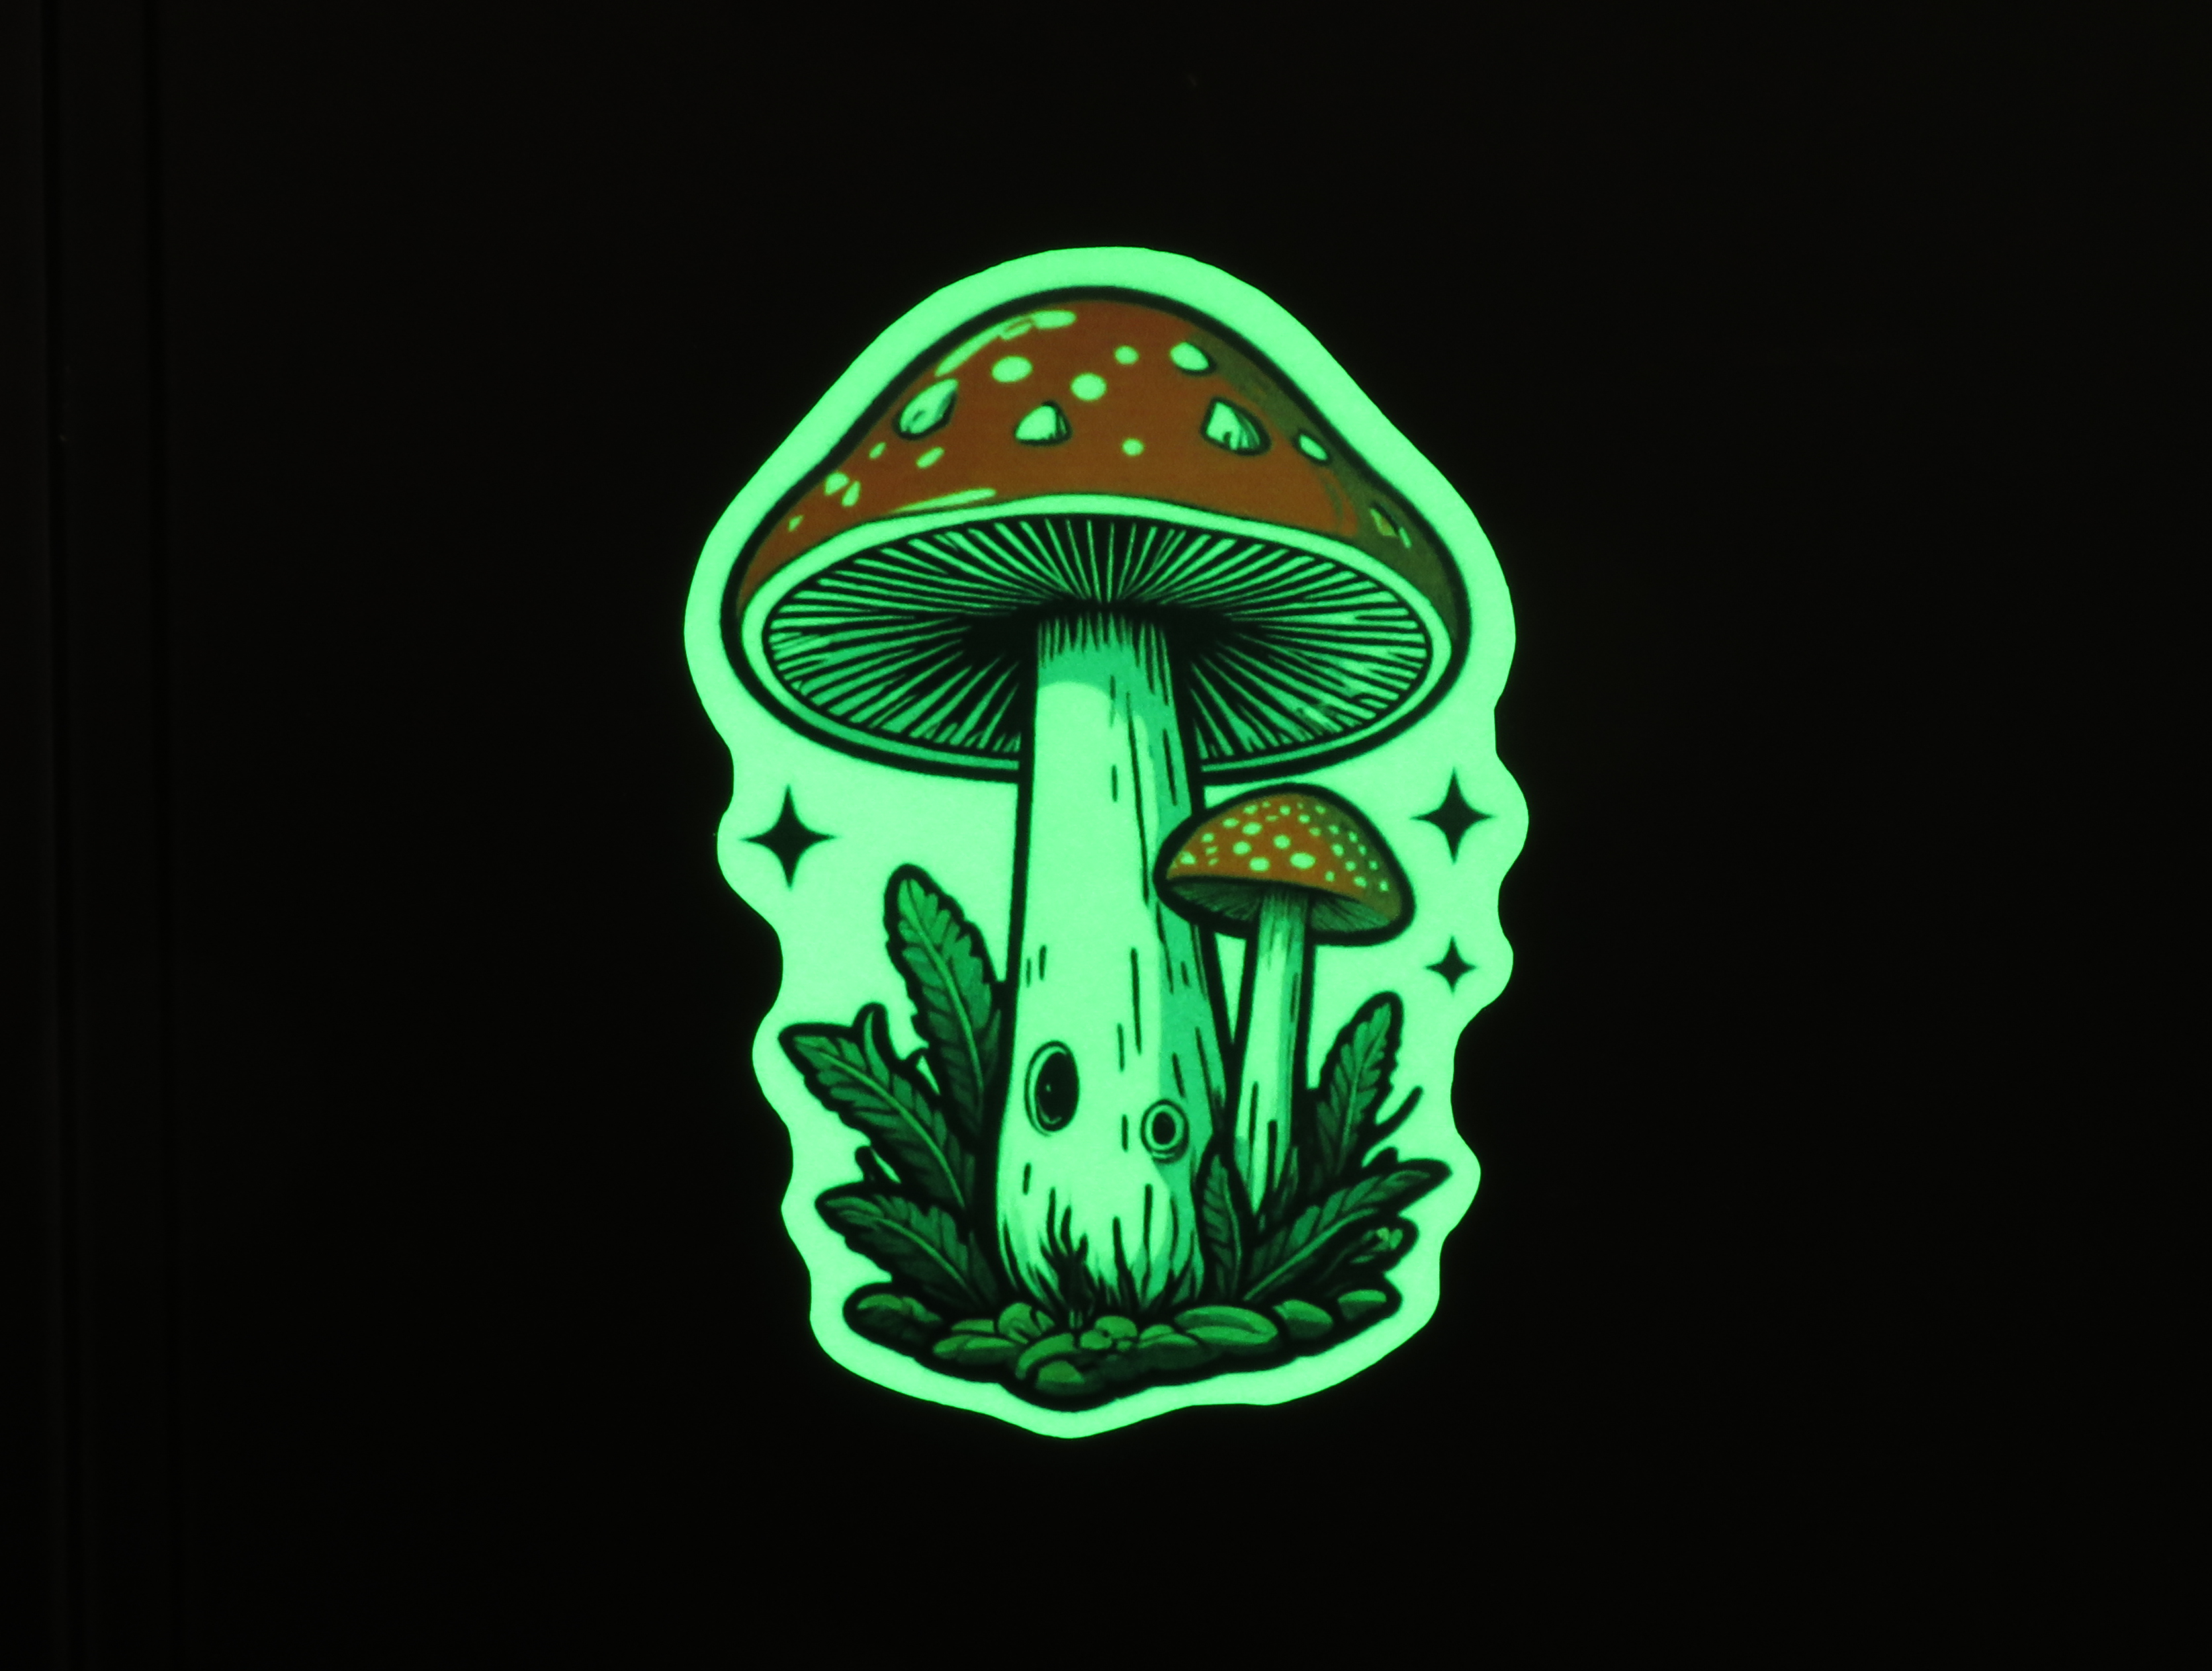
Light absorption and emission from this material is quite good. I charged up my sticker with a UVBeast LED flashlight (an indispensable tool if you have pets), and it took over twelve minutes for the sticker to (mostly) stop glowing.
I made this video to show just how long this material continues to glow. I think it’s pretty great – and in the dark, it can be recharged with UV light. The song in this video was composed by Tim Kulig, who shared it on Pixabay.
Final thoughts on sticker making
My results with sublimation have been good enough that I think it’s a setup worth investigating for anyone who runs a side hustle making custom stickers. The end result is vastly more durable across a wider range of scenarios than inkjet or laser printing with lamination of some kind, and no extra effort is required for successful print-then-cut performance with Cricut hardware.
A-Sub also makes a line of sticker materials specifically designed for sublimation, and based on my experiments with the materials I tested, I think it’s worth checking out this product line, as well.
I don’t think the semigloss sticker paper is a good buy for making durable stickers, but it’s half the price per sheet of the glossy white vinyl, so it’s a good option for making inexpensive, disposable stickers.
I’ve collected current undiscounted pricing from Amazon on the assortment of products I tested. The glow vinyl is quite expensive, but if you’re selling stickers, you can probably afford it.
These prices are current as of June 28, 2025. The prices in (parentheses) are per sheet, rounded to the nearest cent.
- Semigloss paper: $21.99 for 100 sheets ($0.22)
- Glossy vinyl: $8.99 for 20 sheets ($0.45)
- Holographic sticker plastic: $8.99 for 20 sheets ($0.45)
- Glow-in-the-dark vinyl paper: $9.99 for 5 sheets ($2.00)
Sublimation-receptive film: an alternative to glossy photo paper
A-Sub recently introduced a new product on Amazon – a glossy PET material designed for sublimation. This product is analogous to glossy photo paper for a regular inkjet photo printer, except the final result is much more durable than anything an inkjet printer can produce.
Rather than printing directly on this material, it’s meant to be sublimated. This detail may confuse some consumers. Like any other sublimation blank, your design should be printed in reverse on sublimation paper, then the substrate should be taped to the paper and pressed with a real heat press.
A hand press, such as any of the Cricut EasyPress products, will not apply enough pressure for long enough to properly sublimate this material. Unlike a lot of sublimation blanks which can be sublimated in 90 seconds or less, this film requires two and a half to three minutes under your heat press. I was getting terrible results from my OG EasyPress, and when I switched to a new high-quality heat press, my prints were much, much better.
The pressed film deforms really easily, so it’s best to just leave it alone until it’s fully cooled. Then you can remove your sublimation paper and use the sublimated film in your project.
This is a good option if you want to make some durable printed photos for a scrapbook or something similar, but it’s also very expensive, at over $20 for a five-pack. The current undiscounted price on Amazon comes to $4.60 per sheet, so this is something I’ll be reserving for special projects.
That said, this material is very scratch-resistant, whereas inkjet-printed photos on glossy photo paper are frustratingly fragile.
The Final Act: Sublimation paper
In addition to a variety of sticker materials, A-Sub is one of the leading manufacturers of sublimation paper. They are the standard brand used by many hobbyists, and I’ve been using A-Sub paper since I first joined the heady world of dye sublimation.
They make three different products, depending on your requirements: two 125g papers, as well as one 105g paper. Unsurprisingly, the 105g paper is the least expensive.
These prices are current as of June 28, 2025. The prices in (parentheses) are per sheet, rounded to the nearest cent.
- 105g paper: $21.99 for 150 legal sheets ($0.15)
- 125g ECO paper: $24.99 for 200 legal sheets ($0.12)
- 125g paper: $22.99 for 110 legal sheets ($0.21)
I really like that the products I was sent – letter 125g and legal 105g – are packed in sturdy chipboard boxes. These are much better for storage than the tuck box packaging used with my older pack of legal ECO paper.
I have previously only used the 125g ECO paper. The 105g paper is noticeably thinner, and is a bit easier to wrangle when wrapping tightly around a stainless steel tumbler. I liked this and will probably switch to the 105g paper for most of my sublimation projects.
The premium 125g paper can take a higher ink load, which means higher-quality prints, but too much ink can lead to blowout of dark ink into neighboring lighter regions of the image.
It’s easy to tell which paper you’re using: A-Sub has helpfully color-coded its logo printed on the back of the paper: red for 125g ECO, green for 105g, and dark gray for 125g.
Protip: Buy legal size paper whenever you can. The extra-long remnant from printing 20 oz. tumblers is wide enough to work in your printer for smaller projects, like keychains and coasters. I usually cut 4″ off the end as my remnant, and the 8.5×10″ sheet is perfect for printing tumblers.
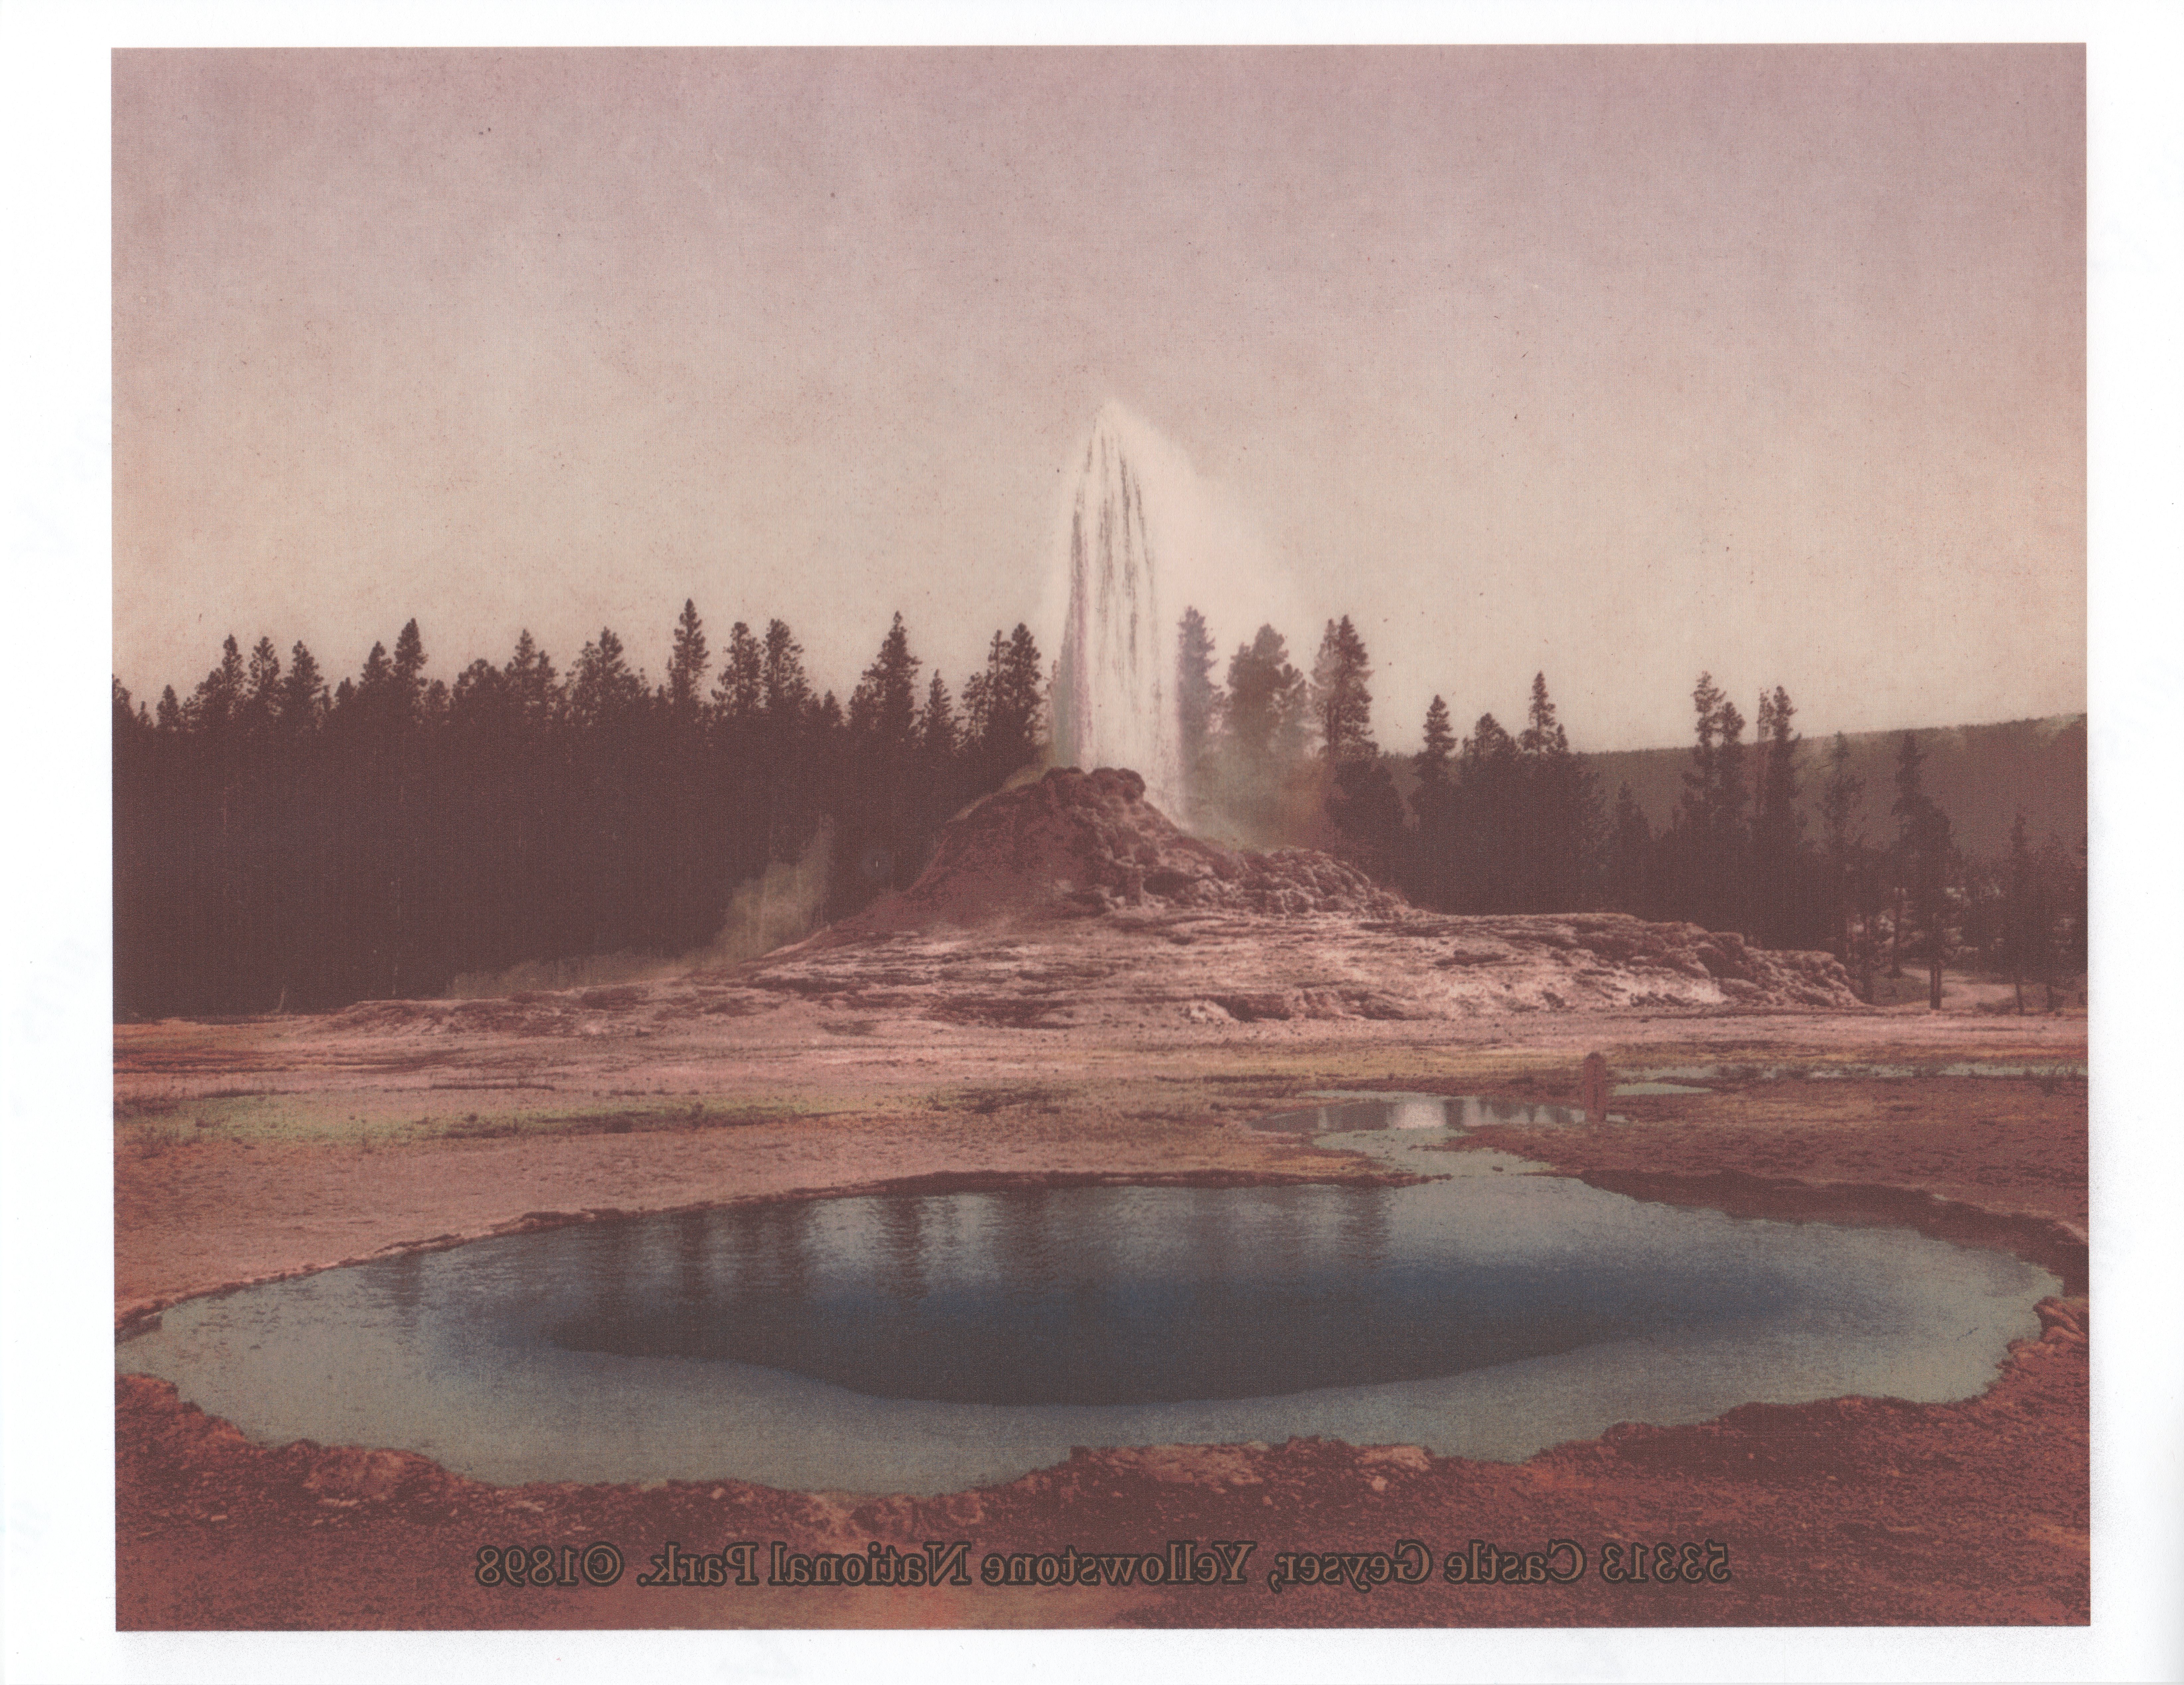
The Project: A photo from the Library of Congress archives
The photo I selected is a Photochrom print, which is made with a lithographic process from a hand-colored monochrome photo negative. These public domain images are part of a large library of Photochrom samples from 1898, which are available today through the Library of Congress website as uncompressed, high-resolution TIFs. I’m using this print of Castle Geyser at Yellowstone.
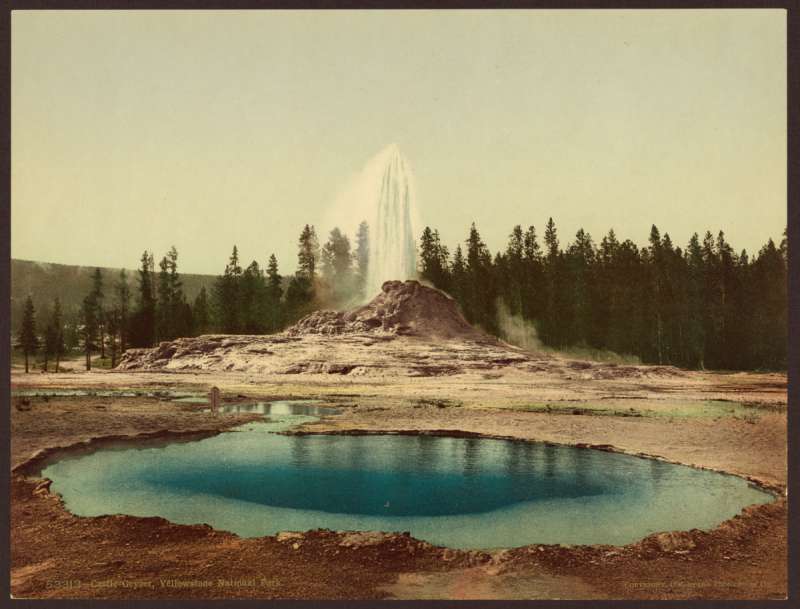
I printed this image at 720ppi. My printer is capable of 1440ppi, so this is half its maximum resolution. This is to minimize ink blowout.
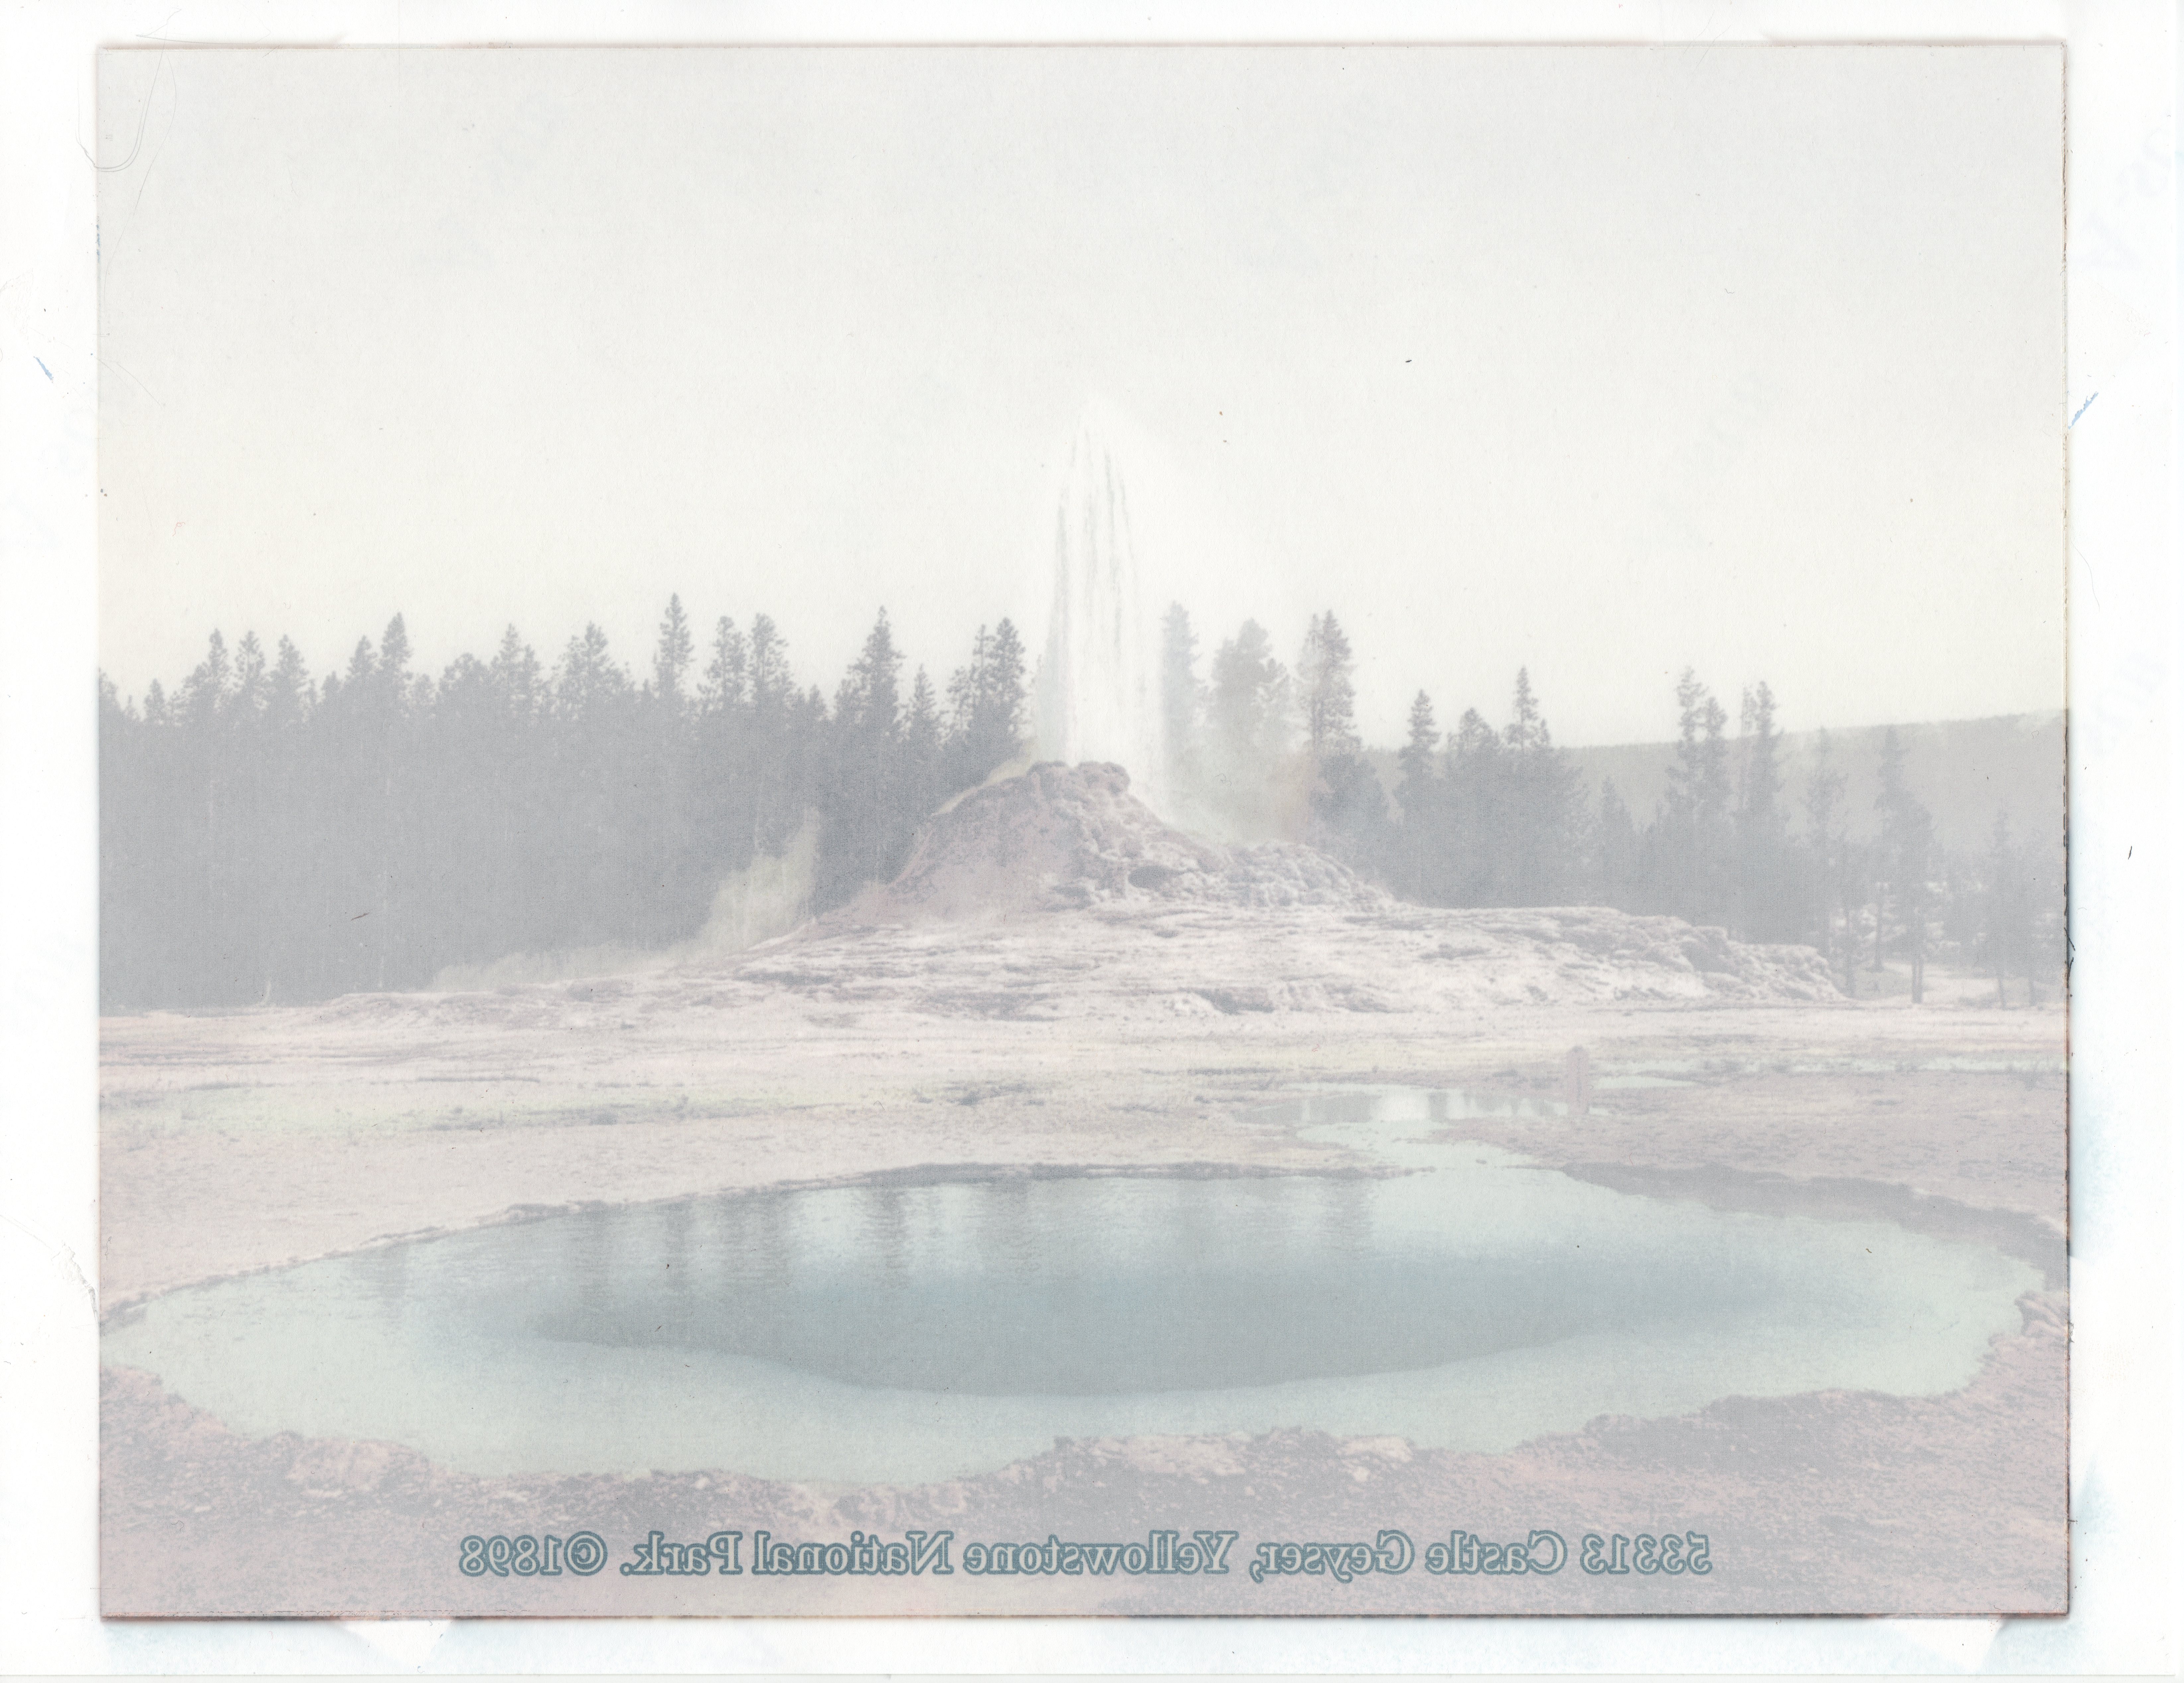
All of A-Sub’s papers release ink really well, with no inconsistent splotches or spots. This is what the paper looks like after sublimation:
I noticed that the 125g paper left residue on the 8×10″ aluminum panels I was pressing for my tests.
This is easily removed with a little soapy water – I recommend using distilled water. Don’t use isopropyl alcohol, as this is a solvent for the sublimation dye!
I still need to do quite a bit of sciencing with my inkjet printer to figure out the best configuration for each sublimation paper, and doing this may give me better results. With my current configuration, I don’t know that the more expensive 125g paper is necessarily the best option. It’s heavier, but this isn’t always a good thing. I really liked how easy it was to wrap and shape the 105g paper around a 20 oz. stainless steel tumbler. I think the thinness of the paper was also an advantage when sublimating some 5mm neoprene coasters.
I think the 105g paper is a good place to start, and if you are unhappy with the results using your particular printer and ink, try the more expensive 125g paper. It might be the superior choice for your specific sublimation setup. For me, I’m definitely switching from purchasing ECO (125g) to A-Sub’s 105g paper.
Final Thoughts
Overall, I’m really happy with the assortment of Koala and A-Sub products I tested for this review. The semigloss paper isn’t great on the durability scale, but it’s very inexpensive at only twenty-two cents per sheet, so it might be a good option if you’re making disposable stickers.
I don’t think I’ll buy the PET film, but I will get more glow vinyl for special projects as I need it. It’s nice material, albeit on the pricey side.
I really like how the glossy vinyl and holographic sticker materials took to sublimating. I’m definitely going to keep experimenting with these materials, along with checking out A-Sub’s sublimation sticker materials in the future.
A-Sub sublimation paper is the hobbyist and maker standard for a reason: it’s affordable and really gets the job done, reliably and consistently. I haven’t tried other brands of sublimation paper, because I haven’t had any problems with A-Sub’s products so far.
Making stickers is fun…sublimation takes sticker making to the next level. It takes some experimentation to dial in your settings and materials for optimal results, but it’s well worth the effort!
What I like about Koala and A-Sub products
- Glow-in-the-dark vinyl looks great with a strong glow
- 105g sublimation paper is great for drinkware
- Sublimation paper is consistently high quality
- Sublimation paper packaging is really nice
What needs to be improved?
- Semigloss sticker paper is too fragile
- Glow sticker vinyl and PET sublimation film are expensive
- PET film deforms very easily
- 125g sublimation paper left residue on pressed metal panels
Price: Varies per product / save 12% with links A-Sub and Koala below
Where to buy: A-Sub, Koala, and Amazon
Discount links:
https://www.koalagp.com/discount/juliethegadgeteer
https://www.a-sub.com/discount/juliethegadgeteer
Source: The sample for this review was provided by A-Sub. They did not have a final say on the review and did not preview the review before it was published.
Check out these other sticker printer reviews!
- Liene PixCut S1 Photo Sticker Printer and Cutter review – Sticker fanatics will want this!
- Canon PIXMA G620 Photo Printer review (Part 3) – We can make stickers!
HP OmniBook 3 17.3 inch Laptop PC, FHD Display, AMD Ryzen 3 30, 8 GB RAM, 512 GB SSD, AMD Radeon 610M Graphics, Windows 11 Home, Mica Silver, 17-dp0199nr
(as of July 14, 2026 01:16 GMT -05:00 - More infoProduct prices and availability are accurate as of the date/time indicated and are subject to change. Any price and availability information displayed on [relevant Amazon Site(s), as applicable] at the time of purchase will apply to the purchase of this product.)