REVIEW – Coffee culture continues to grow worldwide and with it so does the appeal of espresso as a coffee brewing method. The OutIn Nano portable espresso machine is a thermos-sized battery-powered gadget that heats and brews with the press of a button. I have one to review. Read on to see what I think!
What is it?
The OutIn Nano portable espresso machine is a battery-powered portable espresso machine. The machine resembles a vacuum thermos in size and shape. The top of the machine has a stainless steel water reservoir with graduations on the side to guide how much water is added. The base of the machine has a portafilter basket into which is loaded a Nespresso-compatible single-use pod or a filter-basket holding ground coffee. Before extraction, the machine is filled with water. After assembly and filling, and with the press of a button, the machine heats the water to a consistent temperature and pumps the water through the portafilter with up to 20 bar of pressure. The machine may be filled with hot water to skip the water heating step and prolong the battery power or the machine may be filled with cold water and operated without pre-heating. Use times depend heavily on the amount of heating required and the amount of time the pump is used to a much lesser extent. The OutIn is recharged with a USB charger with a capacity of more than 10 watts.
What’s in the box?
- Nano Portable Espresso Machine
- portafilter cover / cup
- ground coffee cup
- Nespresso Coffee capsule holder
- USB type C to USB type C cable
- Contact card
- Instruction booklet
- Tip sheet
Hardware specs
- Light Weight: Weighted Less than 700 g
- Fast Heating: 25°C to 96°C in 200 seconds.
- Rich Crema: Up to 92°C/198°F through 20 Bars Pressure with Richer Crema Coffee
- Long Battery Life: 7500 mAh Battery for 5 times* Cold Water / 100+ Hot Water Brews
- Pro-level Standards: European Certified Materials & Coffee Brewing Center Standards
- Universal Charging: in 12V or 24V Car Charger and USB Charger( >10W)
- 2 in 1 Coffee Method: Feature with Ground Coffee and Coffee Capsules
Design and features
Unboxing
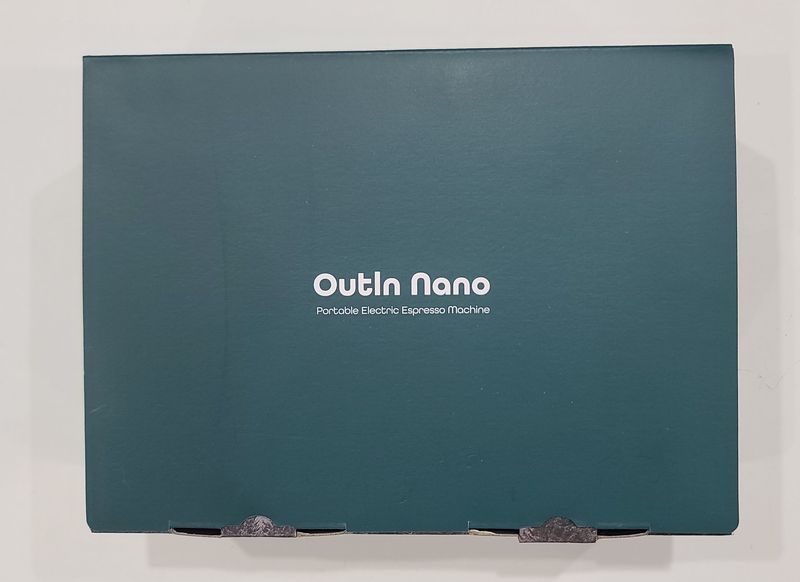
The OutIn Nano portable espresso machine comes in a dark teal self-locking box with an attached lid. The box is labeled with the text, “OutIn Nano portable electric espresso machine” on the top and on the front, it is labeled with the text “Reinvent your coffee habits.” On one side of the box, there is compulsory labeling and contact addresses. On the other side of the box is a list of recommended practices and troubleshooting steps.
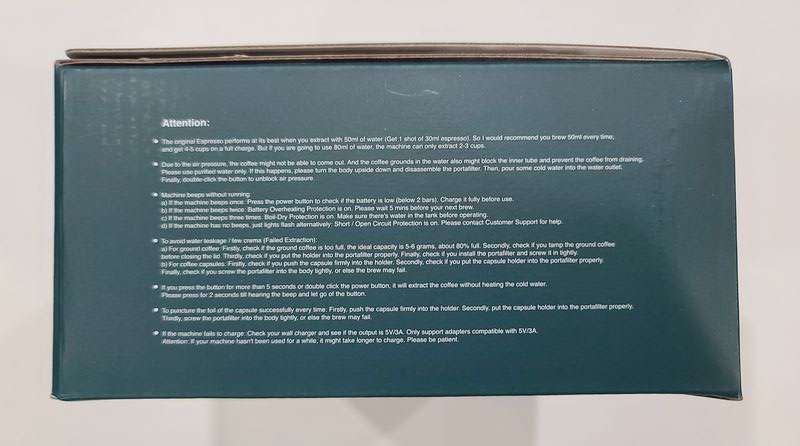
Usually, I am weary of items that have troubleshooting guidances printed on the outside of the box. Hopefully, this is not a forewarning.
On the inside of the box is an inside flap printed with a sepia photo of a mountain in the Kaiser mountain range in Austria and three photos of Instagram users who have photographed their experience with the OutIn Nano. This collage reinforces OutIn’s sustainability efforts. One other commitment they make to the environment is that if in the event the machine stops working after the 12-month warranty period has expired, and proof is provided to OutIn of electronic recycling, they will donate to The Nature Conservancy in the customer’s name.
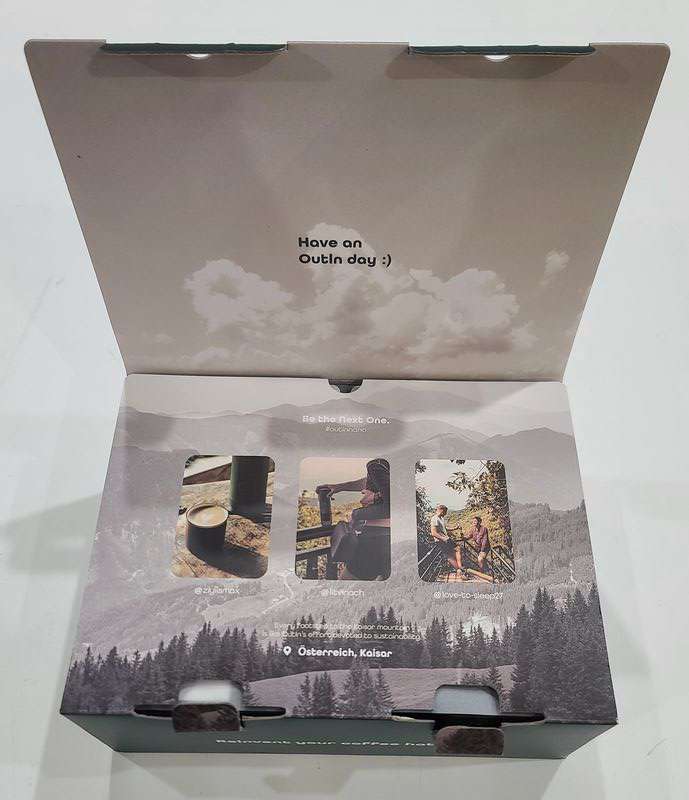
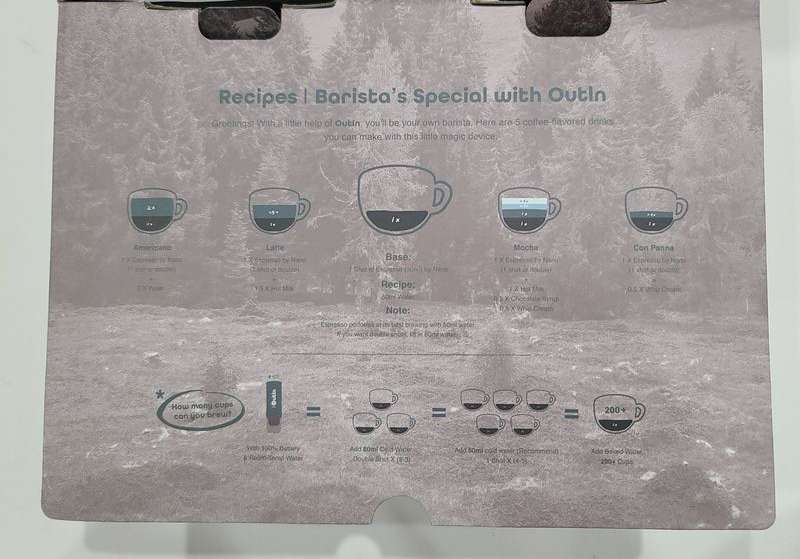
On the opposite side of the inside flap, there is the continuation of the mountain range photo. On top of the photo is a list of suggested recipes that can be made with the OutIn Nano portable espresso machine. These include an Americano, Latte, Espresso, Mocha, and Con Panna. The opposite side of the inside flap also guides the battery capacity of the unit. It states a full battery will heat and brew about 2-3 double shots, heat and brew about 4-5 single shots, and brew about 200 shots of pre-heated water.
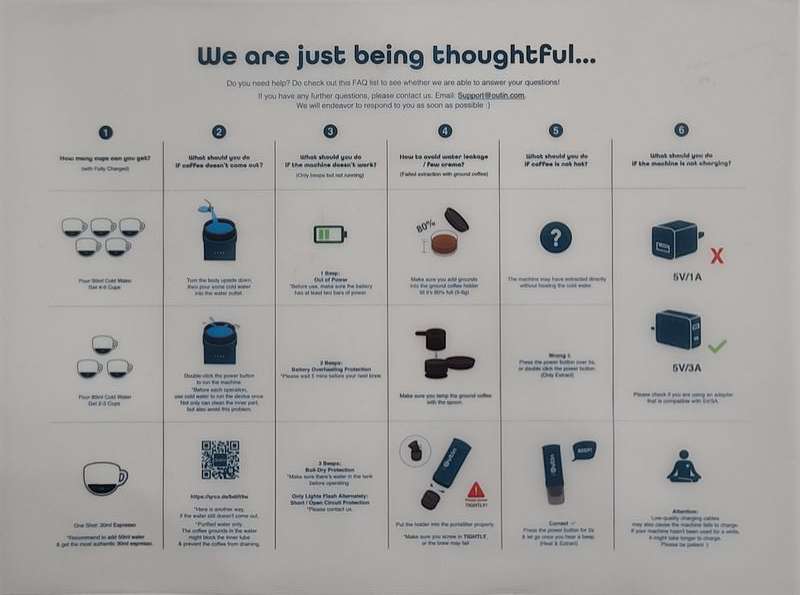
After opening all the flaps there is a velum tip sheet inside the box with six columns of information. The sheet clarifies (with illustrations) How many servings can be made with a full battery, how to remove an air pocket in the pump if the unit is vapor locked, how to respond to various beeps if the unit does not function, how to avoid water leakage, what to do if the coffee is not hot, and what to do if the machine is not charging.
Below the velum sheet is the proper user guide and a warranty and contact sheet. The rear of the warranty sheet also has the 5 step instructions for how to use the device. The user guide has instructions in English, German, French, Italian, Spanish, Korean and Japanese.
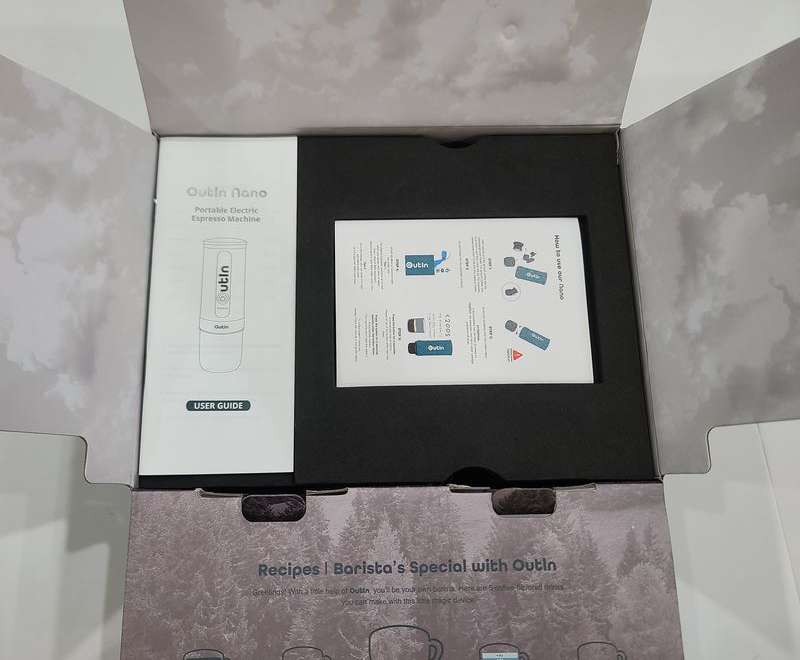
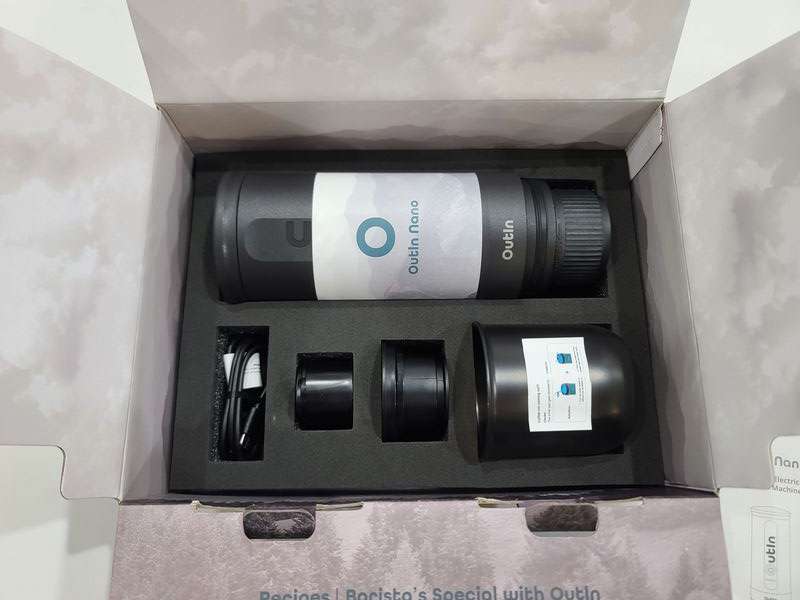
After removing the manuals and the top layer of foam we finally see the OutIn Nano. It is packaged securely in a foam cutout with the portafilter and the Nespresso Coffee capsule holder installed within. The USB cable, measuring cup, ground coffee filter cup, and drinking cup/portafilter cover is secured in the small compartments below.
Setup
The first thing the OutIn requires is an initial charge. The OutIn comes with a USB type C cable but no charger. I tested the charging capability of the OutIn on a standard 12-watt charger, a QC 3.0 charger, a PD charger, and a 20-watt Apple charger and they all worked. Not including an adapter makes complying with international electrical systems easier and reduces electronic waste. But, in consideration of OutIn’s environmental stance, I don’t know why they included a cable; I have a whole box of cables and I haven’t used the one that they included in the package yet. OutIn warns that the initial charge may take longer but I did not find that was the case. From empty, the OutIn takes about 4 hours and 15 minutes to charge to full.
Design
The OutIn Nano portable espresso machine is designed similarly to the Wacaco Nanopresso espresso machine review that I made on The Gadgeteer in 2019. The major difference is that the Wacaco is a completely manual machine that requires hot water and pumping while the OutIn is a battery-powered machine that can heat water and pump the water to brew automatically. The benefit of a battery-powered machine is that there is much more consistency in the brewing process. For instance, the Italian Espresso National Institute requires the parameters listed in the following table to be met for making a certified Italian espresso.
| Parameter | Value |
|---|---|
| Portion of ground coffee | 7 ± 0.5 g (0.25 ± 0.02 oz) |
| Exit temperature of water from the unit | 88 ± 2 °C (190 ± 4 °F) |
| Temperature in cup | 67 ± 3 °C (153 ± 5 °F) |
| Entry water pressure | 9 ± 1 bar (900 ± 100 kPa; 131 ± 15 psi) |
| Percolation time | 25 ± 5 seconds |
| Volume in cup (including crema) | 25 ± 2.5 ml (0.88 ± 0.09 imp fl oz; 0.85 ± 0.08 US fl oz) |
The OutIn can control all of these parameters to make sure that the brewed espresso provides the same consistent experience.
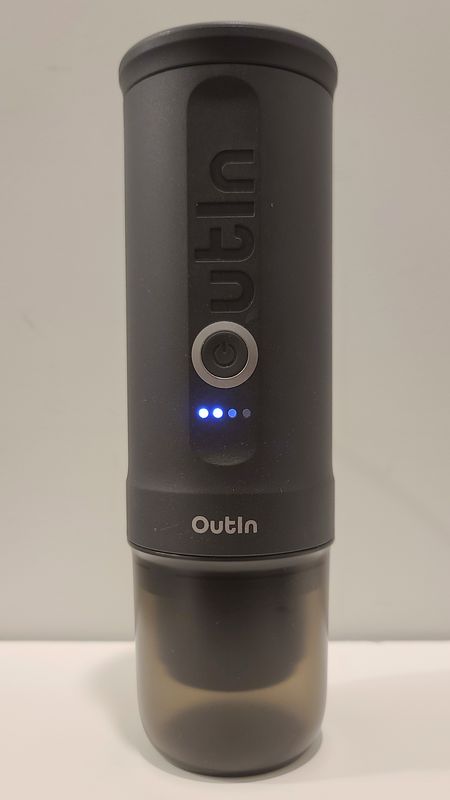
The OutIn Nano portable espresso machine comes in “OutIn” Teal, Space Grey, Forest Green, Pearl White, and Crimson Red. I received the space grey model and it looks very nice. The front of the unit is embossed with OutIn and the power button is placed in the center of the “o” with an aluminum-colored bezel. OutIn is also printed in aluminum above the outlet at the base of the unit. The area where the letters are embossed is a chamfer in the cylindrical body. There is a similar chamfer in the back where the USB port is located. The USB port is protected with a rubber cover and care should be taken to ensure that this is closed when handling the unit with water so the internal electronics are not affected.
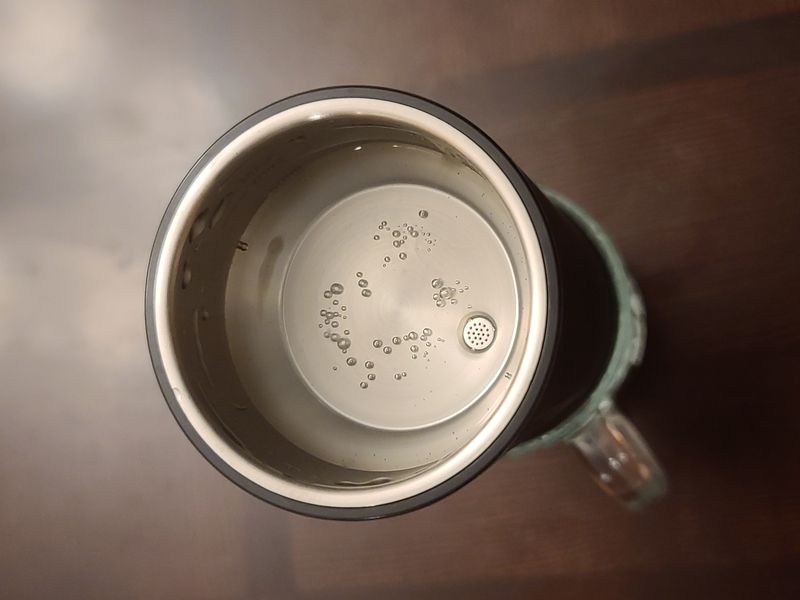
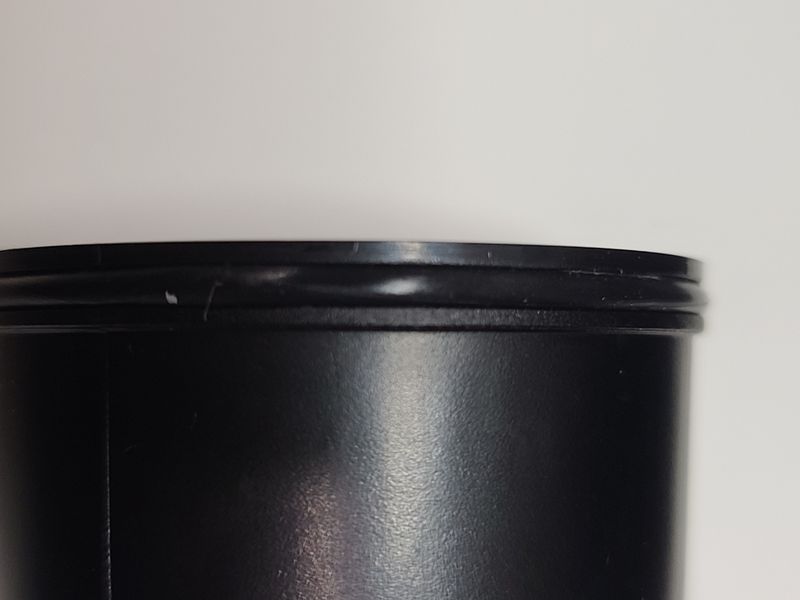
The top of the main body transitions into a water reservoir for the machine. The reservoir is made from stainless steel and has gradations for 50 ml, 70 ml, and “max”, which corresponds to 80 ml. There is about 20 ml of water left in the system after brewing so the volume of espresso made for each of the gradations is 30 ml, 50 ml, and 60 ml. The top of the reservoir has a cover that has a small vent in the top that allows some pressure to escape when the cover is applied but also builds pressure in the reservoir. The design of this cover may help in priming the pump although I have successfully brewed without the cover in place. The cover is not liquid-tight and cannot be used to hold water inside the OutIn until an espresso is desired.
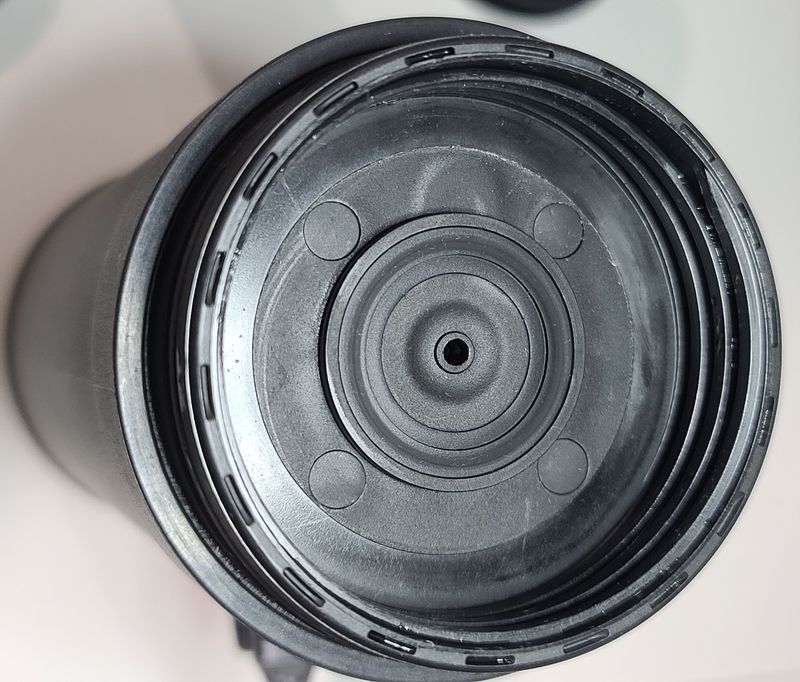
The bottom of the main body is a slightly larger diameter than the top. The Base of the unit has threads to accept the portafilter and a rubber gasket to keep the cup in place. The gasket which holds the cup has gaps to allow air to escape as the espresso is brewed. For this reason, the base cannot be used to hold water while traveling either.
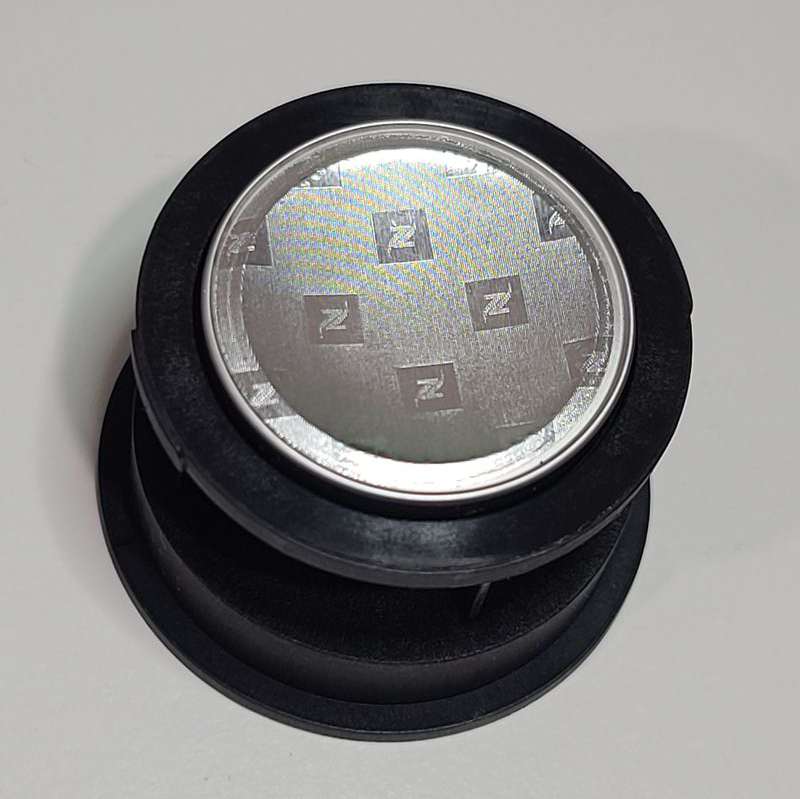
The portafilter that screws onto the base does not serve the same function as a portafilter that attaches with a bayonet fitting onto a typical espresso machine. A portafilter for a typical machine performs the filtration of the coffee grinds as high-pressure water is applied to the top of the grinds. On this machine, there is a thick plastic retainer bowl that holds either a ground coffee filter cup or a Nespresso pod adapter. The thick plastic retainer bowl is only a portafilter for the Nespresso pods; the grounds are filtered inside the cup.
The Nespresso pod adapter has three teeth in the interior that puncture the rear of the pod as it is inserted into the machine.
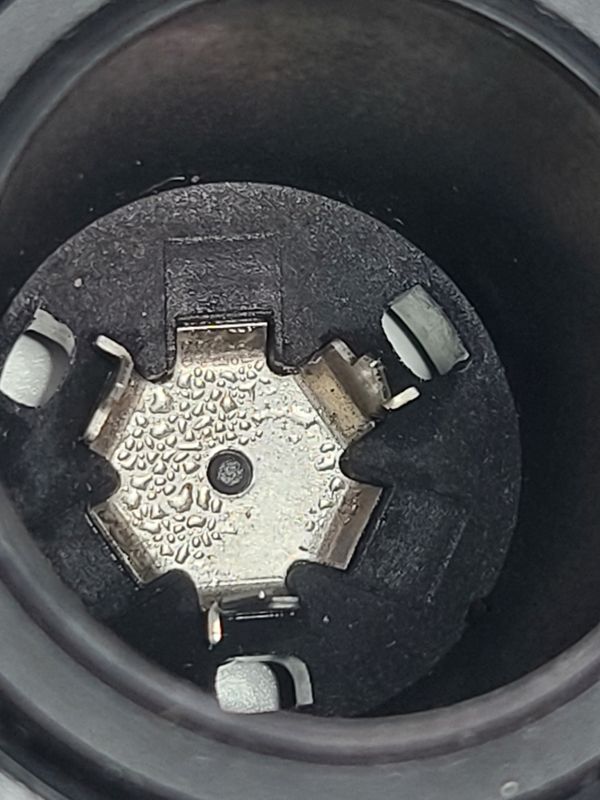
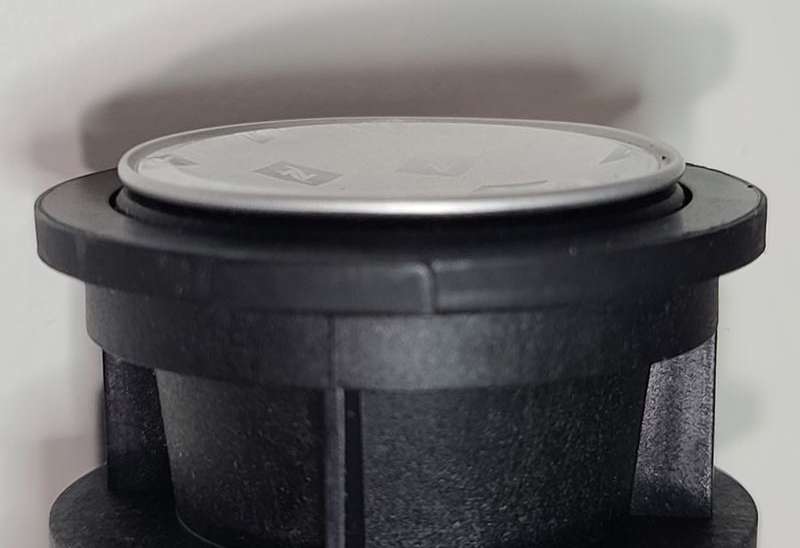
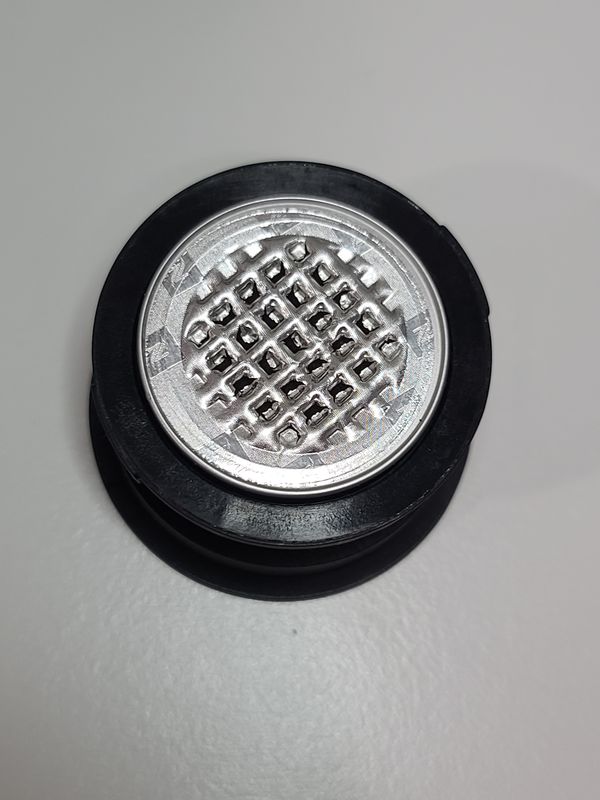
The foil-covered side of the pod is pressed against the waffle pattern at the base of the portafilter and the high pressure eventually causes the foil to rupture against the waffle pattern and coffee is forced out of the foil into the cup below.
The Nespresso pod adapter on the Wacaco Nanopresso worked similarly. The OutIn unit has improved the Wacaco unit by designing the Nespresso holder so that it cannot rotate against the waffle area after it is inserted. The Wacaco unit had a head valve below the ground coffee and below the Nespresso pod but the OutIn unit does not have any valve below the pod.
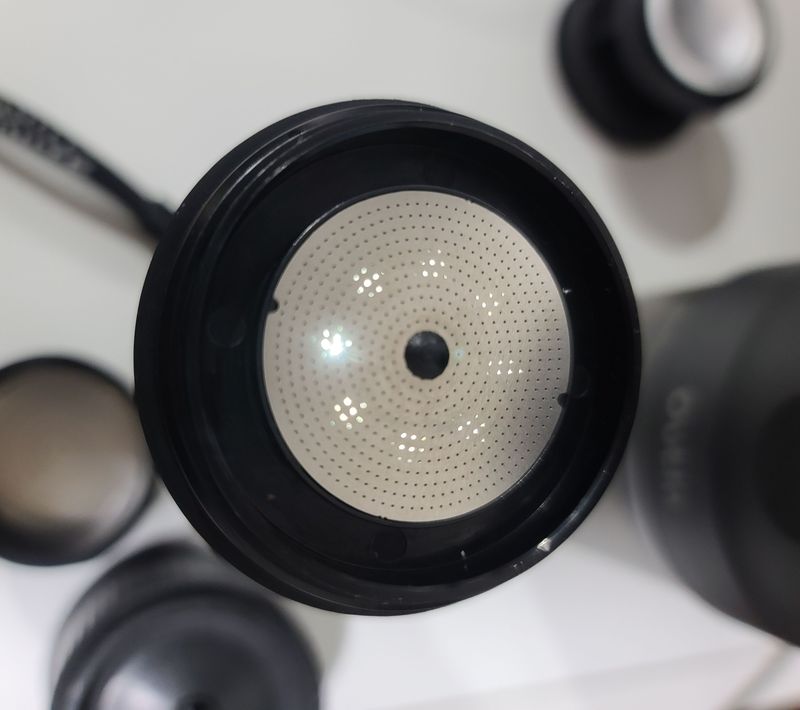
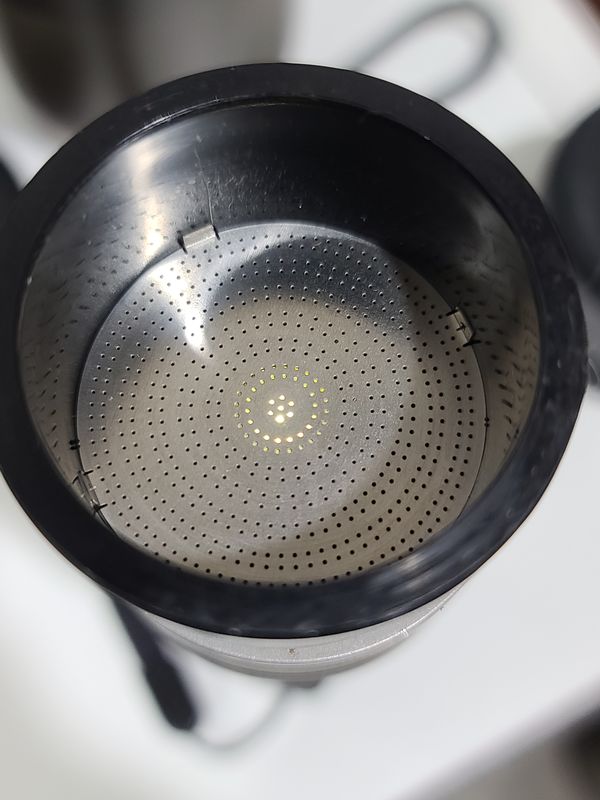
The ground coffee cup is composed of a top cover and a bottom bowl. The top cover has 8 holes in the area of the top that align with where the water is forced out from the pump.
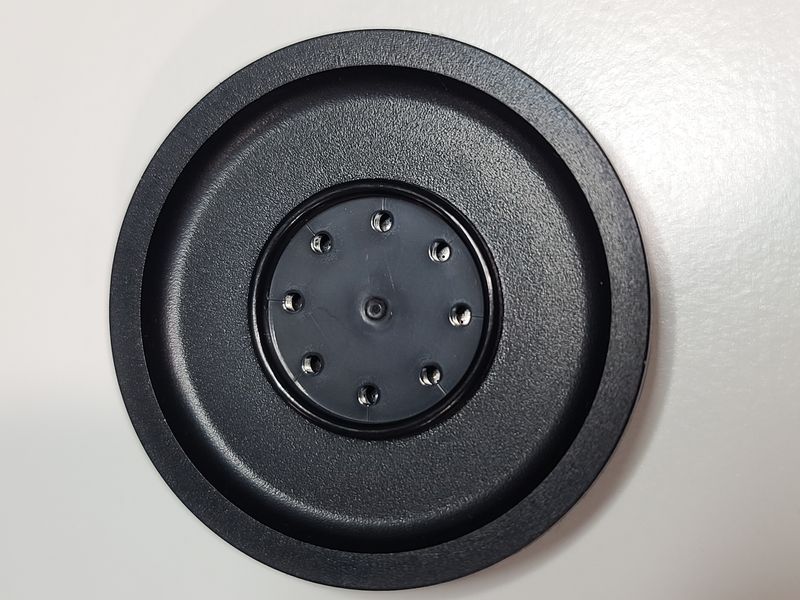
The water is further distributed across the grinds by a screen on the inside of the top cover. This screen also prevents the grinds from escaping through the top during brewing. The flow distribution holes on the Wacaco unit were much larger. The finer holes in the OutIn portafilter may do a better job of evenly distributing the water. The screen is permanently attached to the top with a large plastic weld in the center of the screen. It protrudes about a 1/8 inch from the inside of the cover and sits about this far down into the bottom of the bowl. That is why it is important to not fill the bowl up completely.
The rim of the bottom bowl has a single o ring to prevent water from leaking out from between the top and bottom of the ground coffee cup.
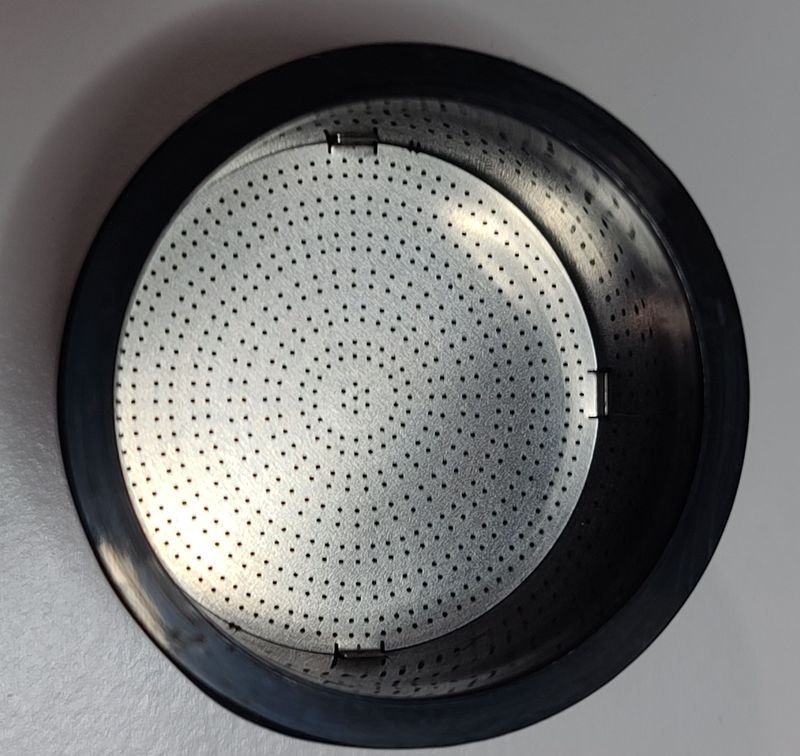
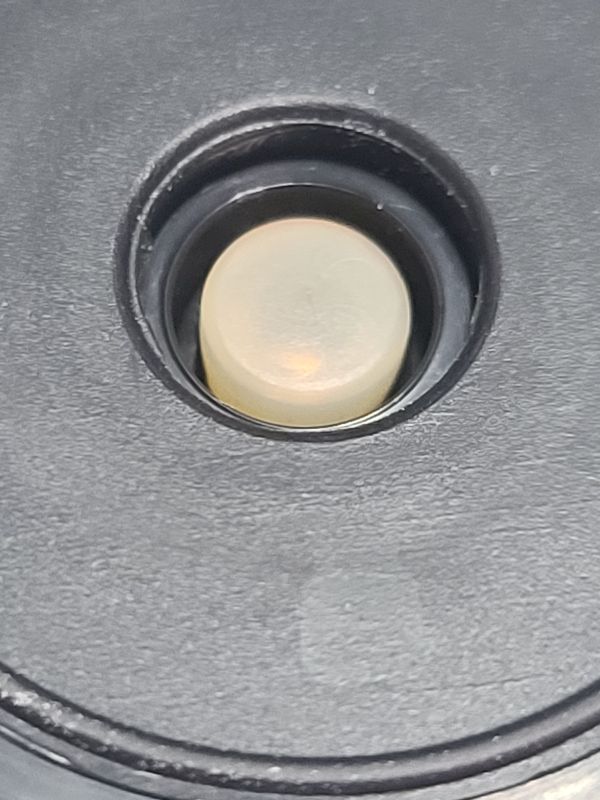
The base of the bowl has another steel filter similar to the one that is on the top cover. It is permanently attached to the bowl with 4 metal tabs pressed into the side of the bowl. Below the screen and protruding through the base of the bowl is a check valve with a silicone seat. The Wacaco unit also had a check valve below the ground coffee cup inside the portafilter. The valves and filter in the Wacaco unit can be fully disassembled for cleaning. The OutIn Nano portable espresso machine parts cannot be disassembled.
Operation
Making an espresso with the OutIn Nano portable espresso machine takes five easy steps. Before starting, press the OutIn button for less than 2 seconds to see what the current charge is. Recharge the OutIn if less than 2 LEDs are illuminated.
- Add a Nespresso capsule or ground coffee to the correct container. If using a Nespresso capsule force the narrow end into the rubber-lined holder until the top lip of the capsule is flush with the top of the holder. If using ground coffee it is best to use a coffee storage container that allows you to get the whole scoop inside the container. Take a level scoop of coffee grinds and mate it with the inverted coffee grind filter cup. There is a ribbed rim that fits perfectly to the cup. Invert the pair and strike it so the coffee is transferred to the filter cup. Next, carefully take the scoop off the filter cup and use the base of the scoop to tamp down the grinds so that the grinds fit into the holder. Normally, a good tamp is necessary to make a uniform cake of grinds so that every section of grinds is extracted equally. In a conventional portafilter, a bad tamp may lead to a cracked bed of grinds, which will cause some of the coffee to be short-circuited and may not result in a brew that is fully flavored or with the correct proportions of heart, body, and crema. The filter basket in the OutIn Nano has a valve in the base that causes the contents of the filter cup to be suspended in the water pumped into it. After tamping securely install the lid.
- Put the holder into the portafilter. If using the capsule the exposed, foil-lined part of the capsule gets installed and faces down. If using ground coffee, put the filter basket into the portafilter with the lid facing up. There is only one way each of these will fit together. The pod holder has teeth on the bottom to prevent the capsule from rotating (and tearing off the foil liner) when it is being installed. Make sure that the capsule holder sits completely inside the portafilter.
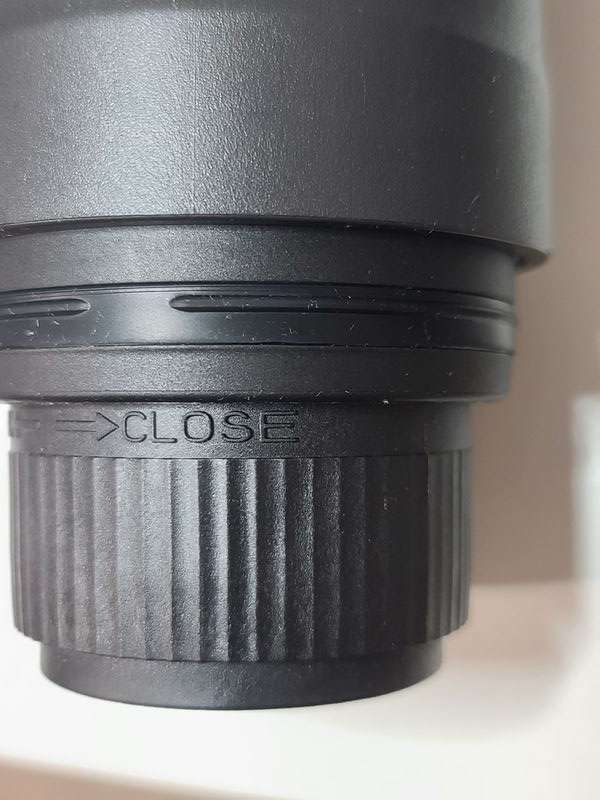
- Screw the portafilter tightly onto the coffee maker. The portafilter must be screwed on tightly because the machine will generate up to 20 bar (290 psi) of pressure.
- Pour 50ml to 80 ml of purified hot or cold water into the water tank. The tank has gradations to make it easy to how much solution is added. Because of the design of the pump and filter cup, there will be some water that remains in the system. Adding 50 ml of water in the water tank will produce a 30 ml espresso and adding 80 ml of water will produce a 60 ml espresso.
- Press the button for about 2 seconds until the machine beeps. If you want to have the OutIn heat the water in the reservoir or press the button for 5 seconds to have the pump start without heating. Alternately the button can be pressed twice in rapid succession for the machine to start brewing without heating.
If using the OutIn to heat the water be sure to have it over a cup or secured to the base if you walk away from it. The OutIn will start brewing immediately after the water reaches the setpoint temperature.
Performance
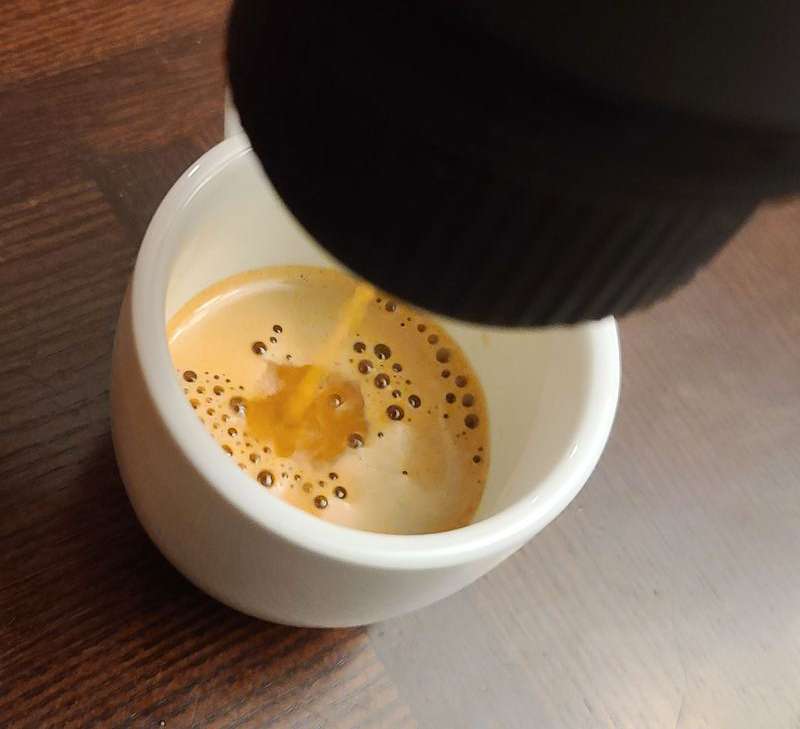
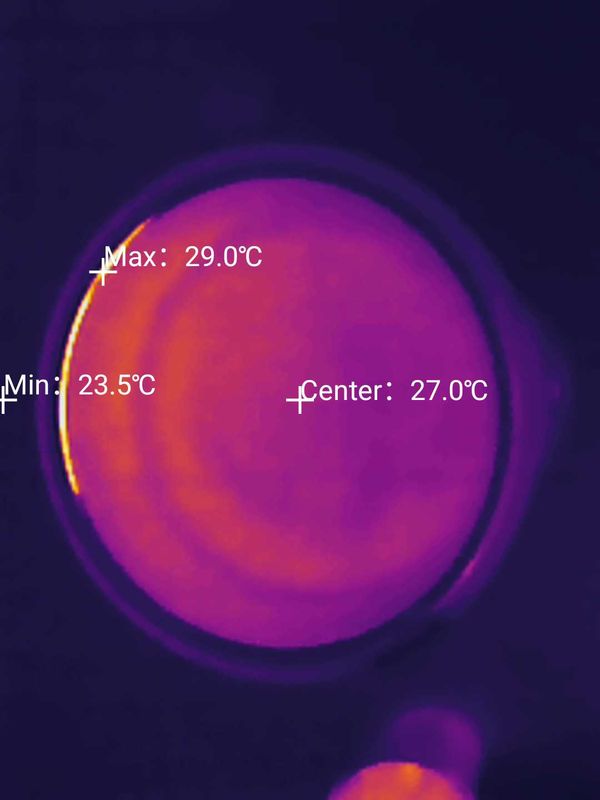
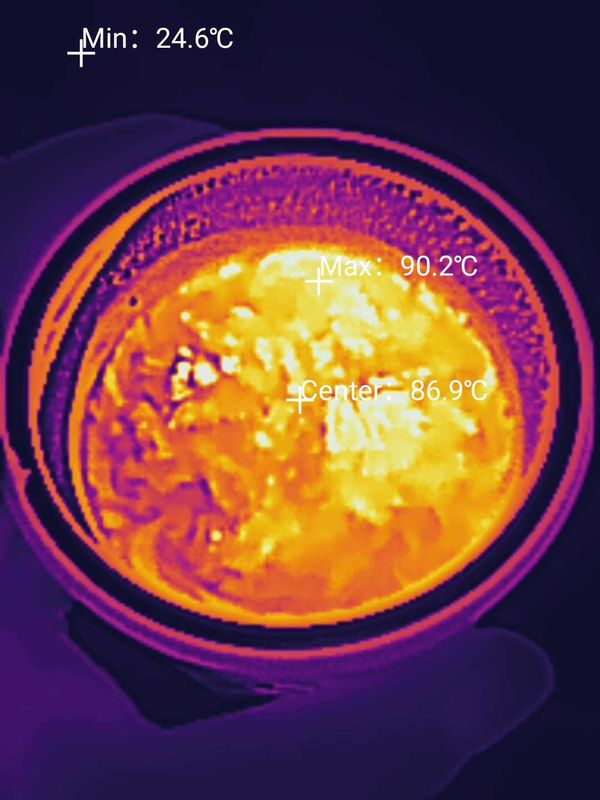
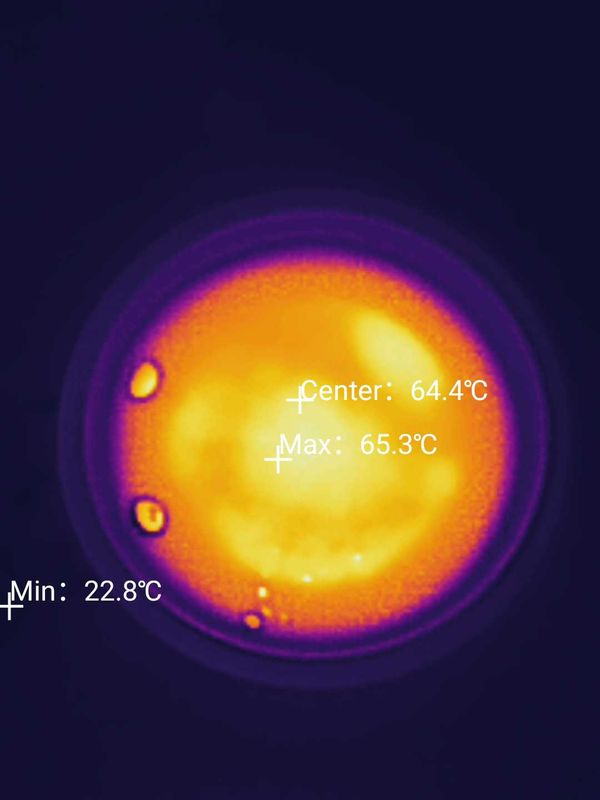
The OutIn Nano portable espresso machine makes a very good espresso. 50 ml of water was added to the reservoir at room temperature. The machine heated the water to between 87°C and 90°C in about 3 minutes. During the brew, the pump operates for about 20 seconds. At the end of the brew, the espresso was about 65°C.
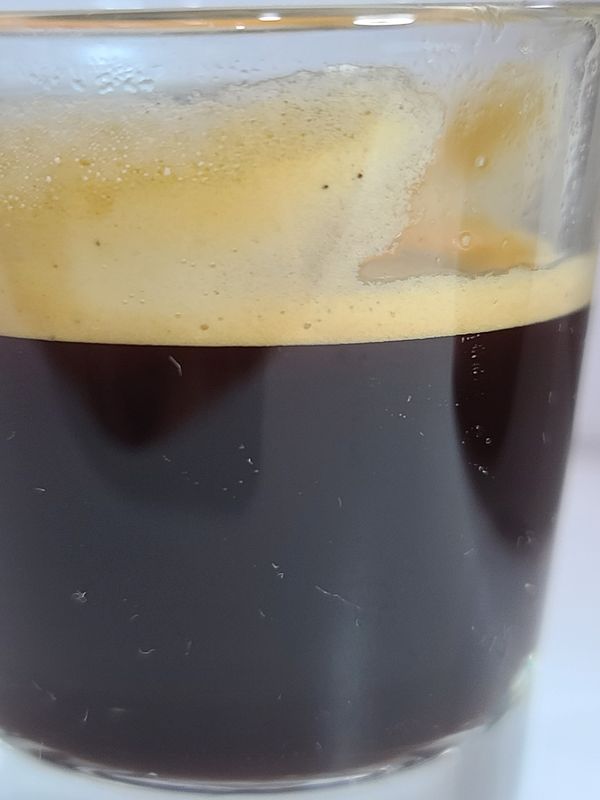
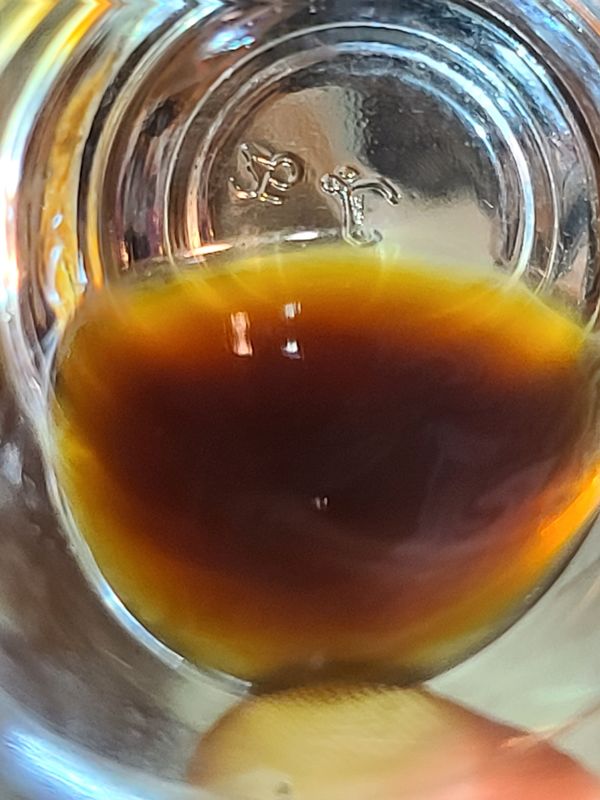
The espresso is brewed with a well-defined heart, body, and crema. The espresso contains notable solids even down to the last sip.
What I like
- makes great espresso
- very portable
- very consistent
What I’d change
- make parts more cleanable
- sell a stand for using a variety of cups
Final thoughts
The OutIn Nano portable espresso machine makes a very consistent and flavorful shot of espresso. Despite all the troubleshooting guidance on the box and in the literature, I did not have a single issue with it throughout the testing period. If you find yourself regularly desiring an espresso in a location where an espresso machine is not an option, consider the OutIn Nano portable espresso machine to make a great shot of espresso wherever to want.
Price: $139.99
Where to buy: Amazon and OutIn
Source: The sample of this product was provided by OutIn.

Now retrieving an image set.
2-Pack LED Video Light Kit, NiceVeedi Studio Light, 2800-6500K Dimmable Photography Lighting Kit with Tripod Stand&Phone Holder, 73" Stream Light for Video Recording, Game Streaming, YouTube
(as of July 14, 2026 14:09 GMT -05:00 - More infoProduct prices and availability are accurate as of the date/time indicated and are subject to change. Any price and availability information displayed on [relevant Amazon Site(s), as applicable] at the time of purchase will apply to the purchase of this product.)
Gadgeteer Comment Policy - Please read before commenting
Excellent, detailed review. I just bought one of these machines and am impressed with its construction and operation. But most of all, I’m impressed with the quality of the espresso it produces.
I thought I would read some reviews as I was curious about what others think (self affirmation?) Yours was the most comprehensive and well written that I found- better even than some of the more well know media outlets.
Thank you,
CARL