REVIEW – For many years, I have been a firm believer in having a home security system not only for protection from theft but also from fires and other important events that can occur without warning. The LifeShield Security System seems to be feature packed and seems to have the potential to be the security system of choice for my home.
What is it?
The LifeShield DIY Home Security System is an all-in-one Do It Yourself security system that offers entry/exit protection, protection from fires and carbon monoxide (not offered as a device), video recording and image snapshots, as well as live monitoring.
What’s in the box
Depending on the package you order, the system comes in a large box that contains designated smaller boxes based on function. For this review, there are 4 boxes within the main box.

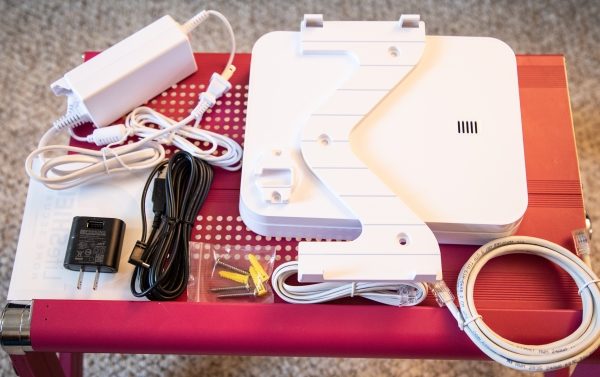
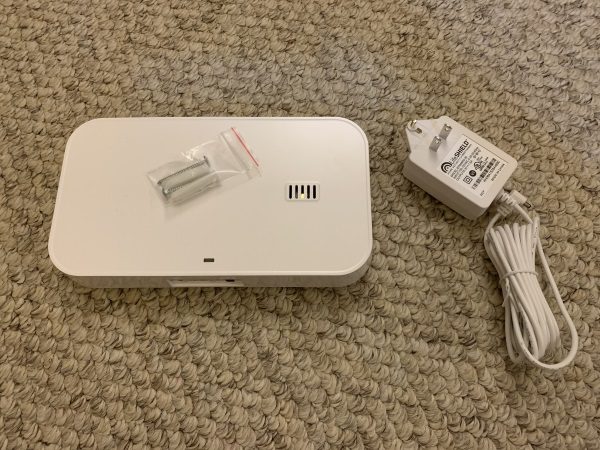
1 x Base Unit
1 x AC Power Supply Adapter
1 x Ethernet Cable
1 x Wall Mounting Bracket
1 x Phone Cable
1 x Wall Mounting Bracket
1 x Packet Wall Anchors and Screws
1 x Power cable and Wall Wart (Actually belongs to a component in Box 2 but came ion Box 1)
1 x Instruction Booklet
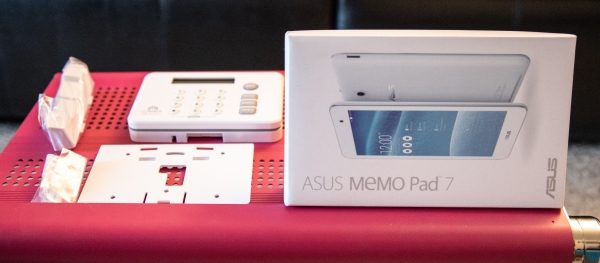
1 x Entry Keypad
1 x Stand
1 x Wall Mount
1 x Asus Tablet (Touch Control Panel)
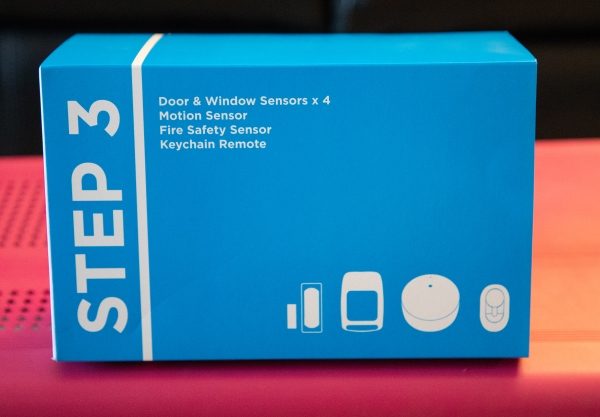
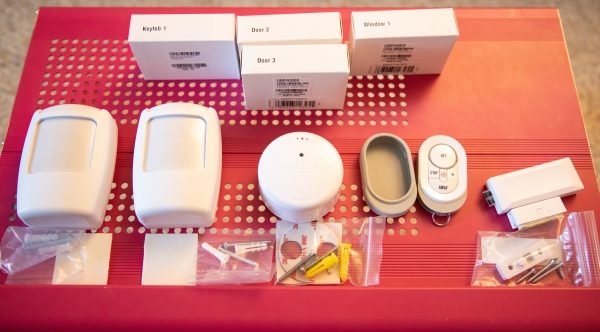
2 x Motion Sensors
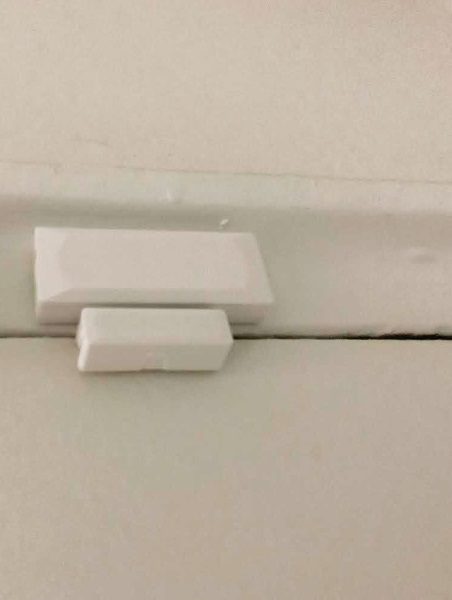
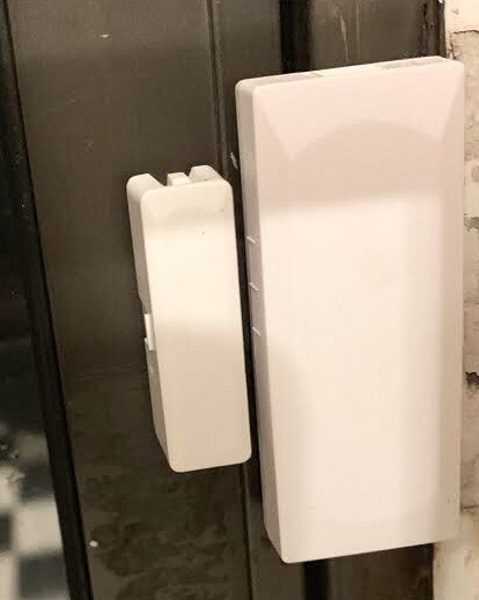
3 x Entry/Exit Sensors
1 x Keyfob Alarm Control
1 x Keyfob Case
1 x Fire Safety Sensor
Wall Anchors and Adhesive Mounting Strips
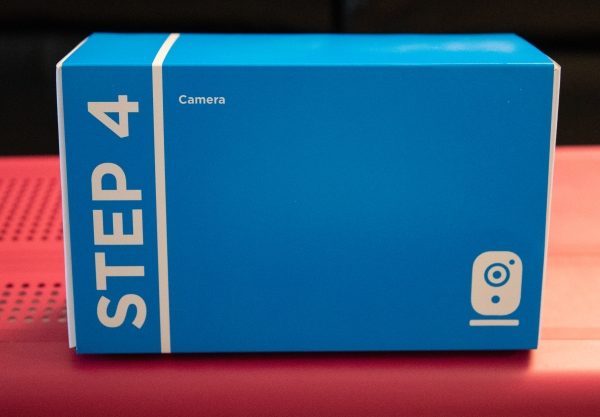
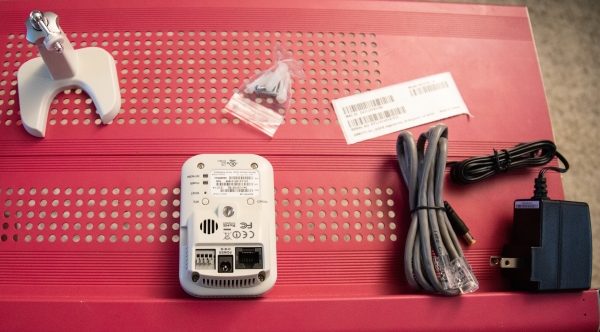
1 x Indoor Security Camera
1 x Camera Mount
1 x AC Adapter
1 x Ethernet Cable
1 x Wall Anchors and Screws
Design and features
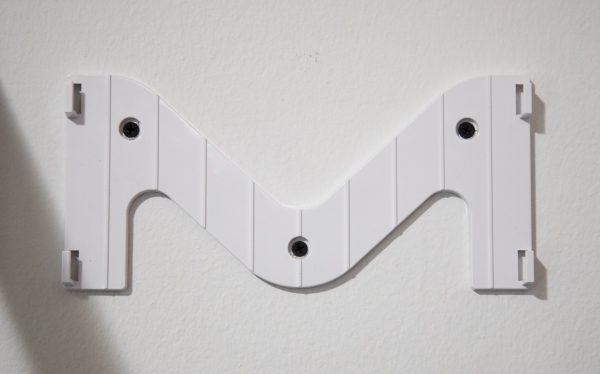
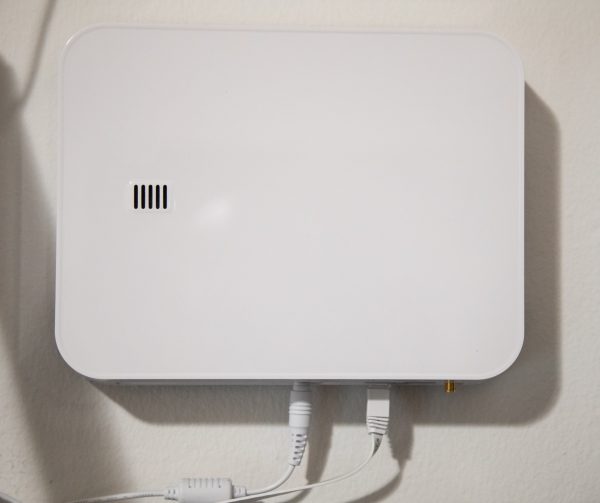
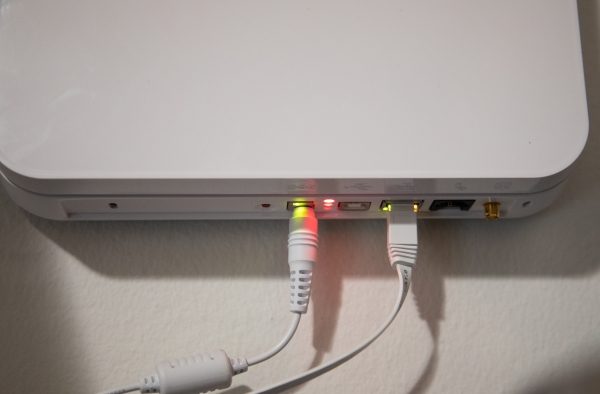
Starting with the base unit, there is a mounting bracket that you attach to the wall and the base unit attaches to the bracket. You can also place the unit on a horizontal flat surface if you prefer not to mount it. At the bottom of the base unit, there is the AC power port, the Ethernet port, a telephone port, and an antenna jack. Neither the telephone port nor the antenna jack was used for this test and review.
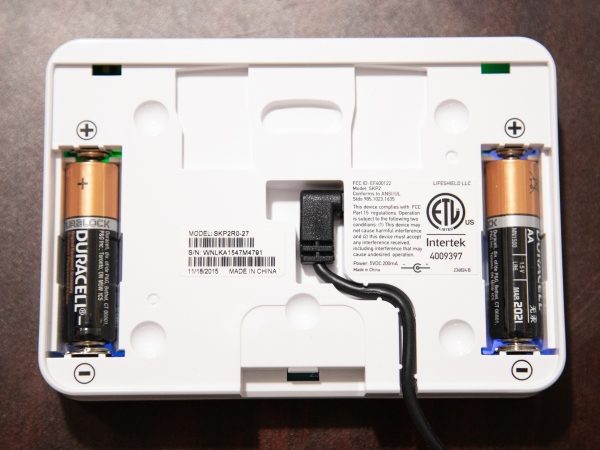
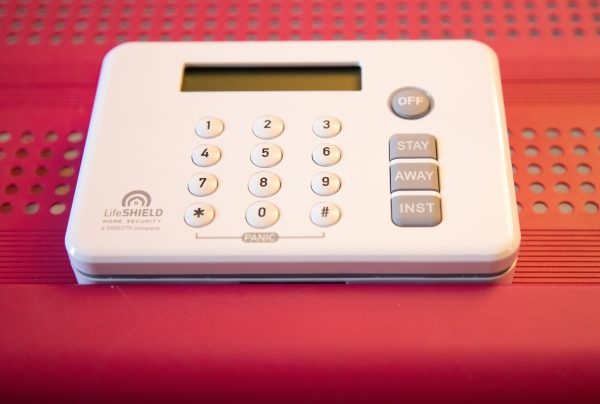
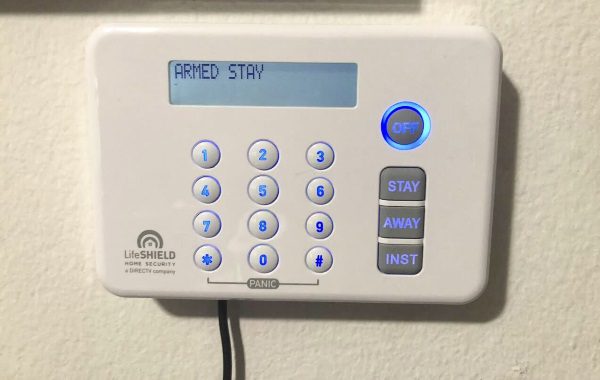
The security pad also comes with a wall mount bracket that I decided to mount as well. I chose an appropriate area near my front door. At the back of the security pad, there are two back up AAA batteries and the AC adapter power jack. Conduits are built into the back of the unit to route the AC wire. On the front of the security pad, there is a numeric pad, one-touch function buttons, and the LCD status display screen.

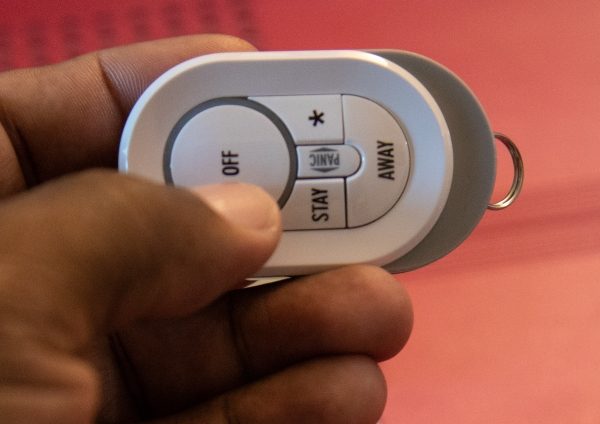
A Keyfob remote control is also included. It allows you to arm and disarm the system, and to trigger the panic mode if necessary.
On the front of the included camera are the microphone, the lens, and the infrared sensor. This camera produces clear HD images that can be viewed as a single image or as a video via the app.
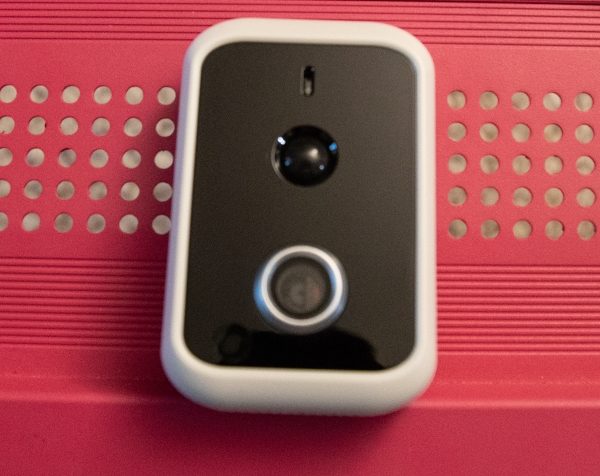
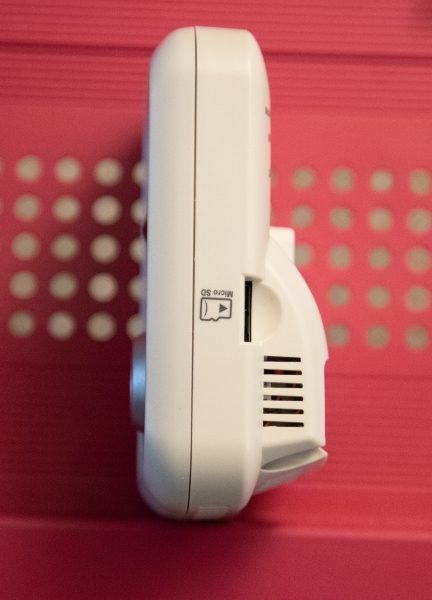
On the right side, there is a micro SD card slot for onboard recording. Much like cloud recording, the onboard SD card records based on your custom setup which can be set to record at specific dates and times or when a sensor is triggered.
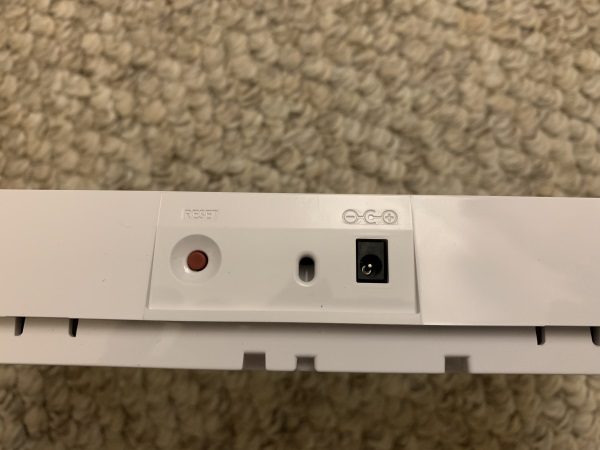
LifeShield also sent a repeater with a built-in sounder to ensure that there is a strong signal from the base unit to all of the sensors and that the alarm is loud enough to attract the desired attention. On the surface of the repeater, there is a status LED and a sound vent. On one side, there is a reset button and the AC jack.
Performance
The alarm system arrived with all of the included sensors already paired to the base unit. The instructions are clear which makes the DIY process simple enough for anyone to accomplish the installation. The hardest part is figuring out the best location in your home for mounting the camera and the motion sensors. The entry/exit sensors go in the obvious places that would protect the exterior access to your premise. Three entry/exit sensors were included. In my case, I installed one on my front door, and one on my fire escape window. Since I live five floors up, the other windows are inherently safe. I decided to use another sensor on the door to my equipment safe. I have a few safes, and I am still contemplating the placement of the third sensor.
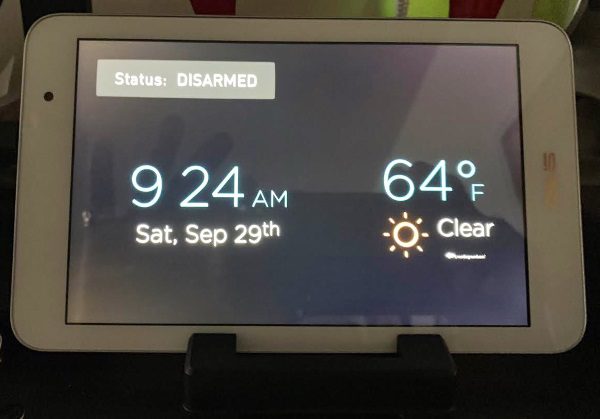
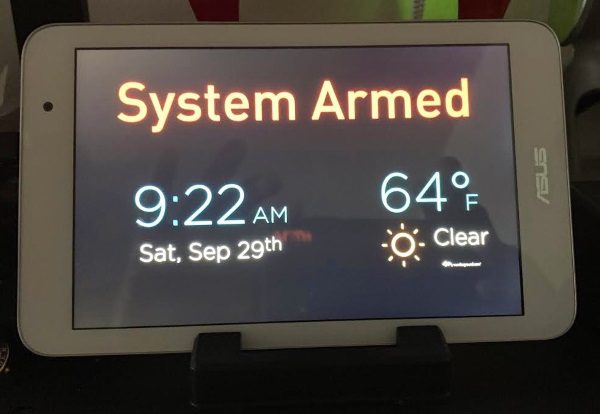
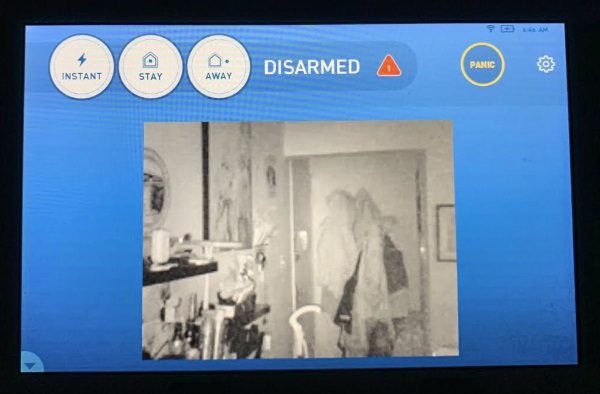
I installed the base unit first, and then in order, followed the instructions to set up the included tablet touchpad. There are packages that come without the Touchpad, so I would assume that if yours does not have the touchpad, you would move right on to the security pad. As you can see in the picture below, when you first install the system is in test mode. It remains this way for the first 7 days while you learn to use the system and become familiar with it. The security pad has the keypad to enter your security code, and buttons to are the systems in the available modes and also to disarm it. As a side note, you are also required to set up an account online via the following link: https://login.lifeshield.com/#/login
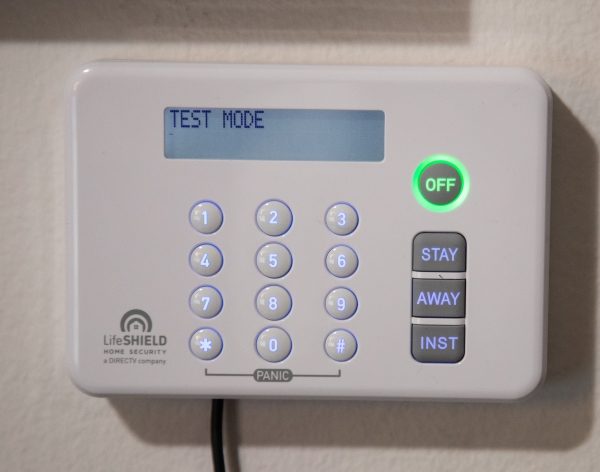
When the system is active, the LED around the “off” button turns blue.
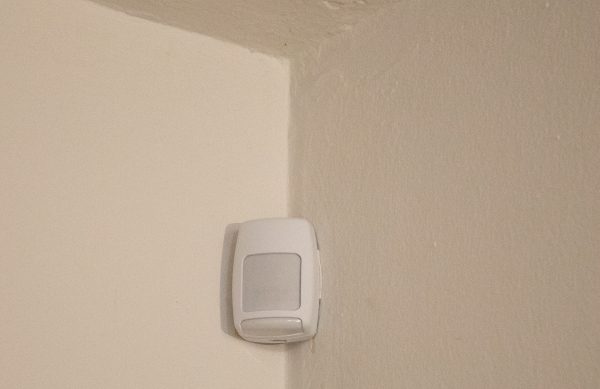
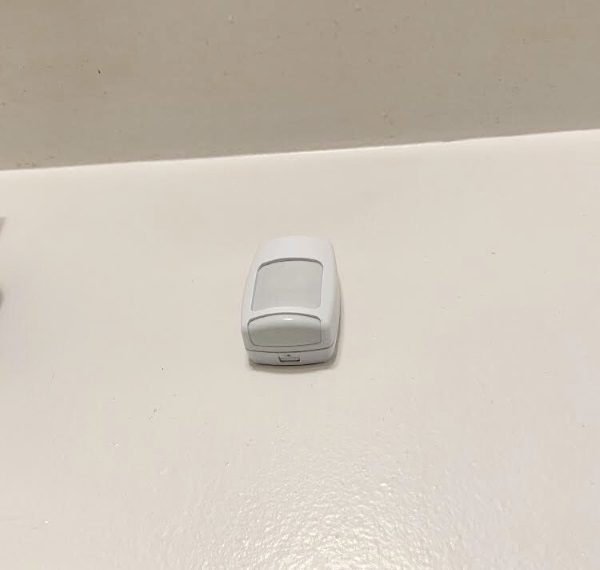
I mounted one motion sensor on a corner wall of my living room and the other in the kitchen.
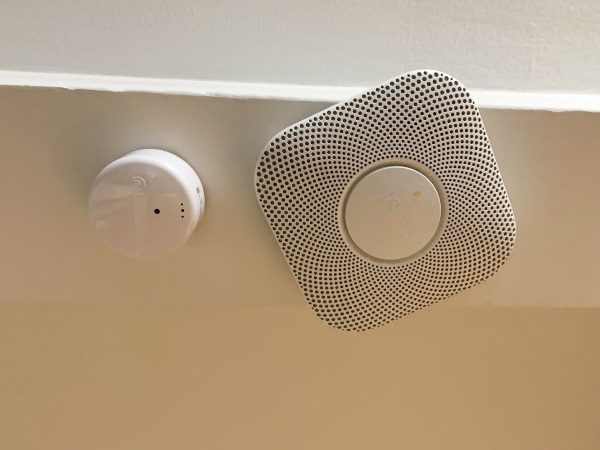
The Fire Saftey Sensor recognizes the alarm sound from your existing fire/Carbon Monoxide Sensor to trigger the Lifeshield alarm and to alert the live monitoring station. I use a Nest system, and I mounted the Fire Safety Sensor next to one of the units. The manufacturer suggests a distance of approximately 3 inches between the sensor and your smoke alarm unit.
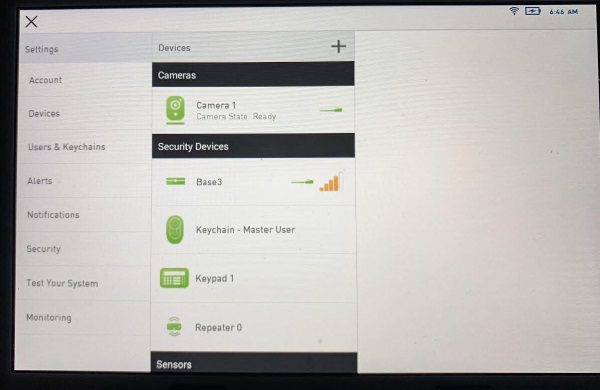
Below are pictures of the touchpad that once setup allows you to control all of the functions and settings of the system.
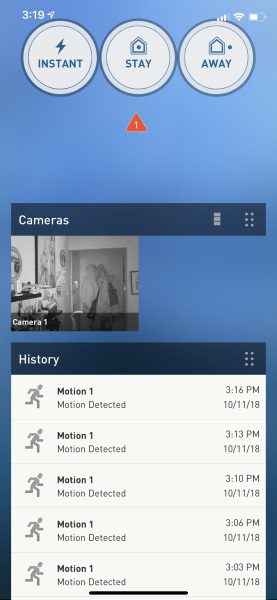
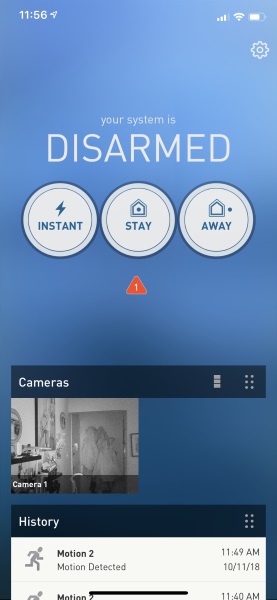
App Screenshots

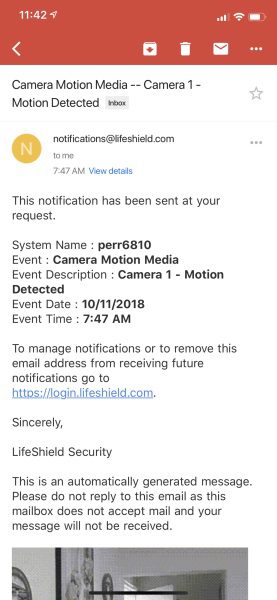
Notification Screenshots

What I like
- The build quality of all of the components
- The capabilities and flexibility of the system
- The professional and prompt customer service
- The types of integrated components that are available, like the Touchpad
- The expansion capabilities
What can be improved
- The package should include an integrated fire/carbon monoxide sensor unit
- Possibly a slightly lower monthly live monitoring cost
Final thoughts
LifeShield DIY Home Security System is really a very easy system to set up and includes all of the necessary functionality to manage the system both locally and remotely via the app. There were a few times when I had to reach out to their customer service, and they were extremely responsive. The system is very responsive and while I did not trigger a real emergency response for obvious reasons, I did test the sensors in Test Mode. I do believe that the live monitoring would work well. This is a very good security system, and the quality of the included components is great. Overall, it gets two thumbs up!!
Price: 24/7 Professional Monitoring at $39.99 per month for 36 months. (Equipment included for free)
Where to buy: Lifeshield Website
Source: The sample for this review was provided by LifeShield.

Google Review Tap Cards (3-Pack) by TapFive - Tap for Instant Reviews - All Phones Compatible - Reusable Smart Tap NFC & QR - Boost Business Reviews - Powered by TapFive (3 Card Pack)
(as of June 20, 2026 22:56 GMT -05:00 - More infoProduct prices and availability are accurate as of the date/time indicated and are subject to change. Any price and availability information displayed on [relevant Amazon Site(s), as applicable] at the time of purchase will apply to the purchase of this product.)
Gadgeteer Comment Policy - Please read before commenting
What size power cord do I need to replace the keypad cord.