REVIEW – I had been toying with idea of getting both a dash camera and a backup camera (to assist with hooking up trailers) for my 2000 Chevrolet Suburban for the past 6 months. When the call went out looking for reviewers for a dual camera dash cam, I thought “Why not try to kill two birds with one stone?” Let’s see if the Viofo A129Duo Dual Channel Wi-Fi Dash Camera can fill both roles.
What is it?
The Viofo A129Duo is a sophisticated dual camera dash cam that include both a primary front camera and a remote rear camera. In addition to the onboard review feature via a 2 inch screen, the A129Duo support direct download to a camera via USB or review using a smart device connected to the A129’s onboard WiFi hot sport.
What’s in the box?
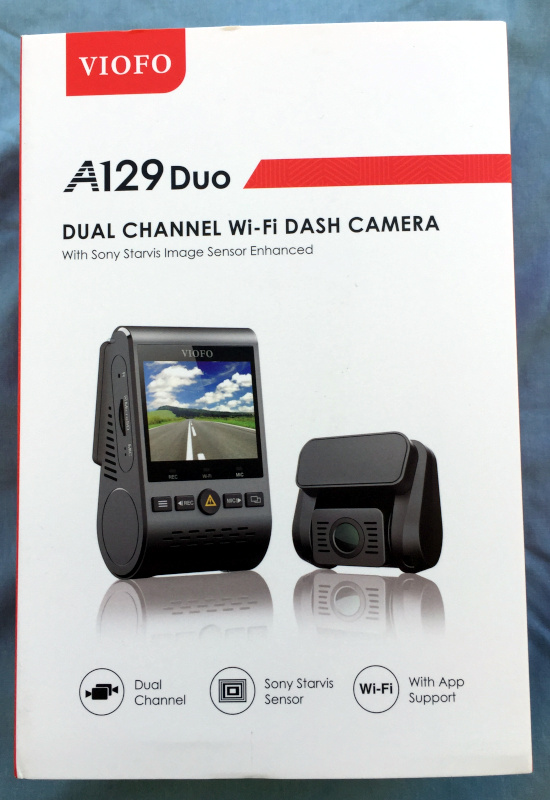
The A129Duo is packaged in a full-color sleeved box that highlight many of the technical details of the system.
Inside the box, the kit includes
- Front camera / control unit
- Rear camera
- USB power cable
- Rear camera umbilical cable (power and video)
- Cigarette lighter power adapter
- Bag of wire clips
- Spare camera-to-window adhesive pads
- Automotive trim tool (to help run cables under the edges of interior panels)
- User manual
- Warranty card
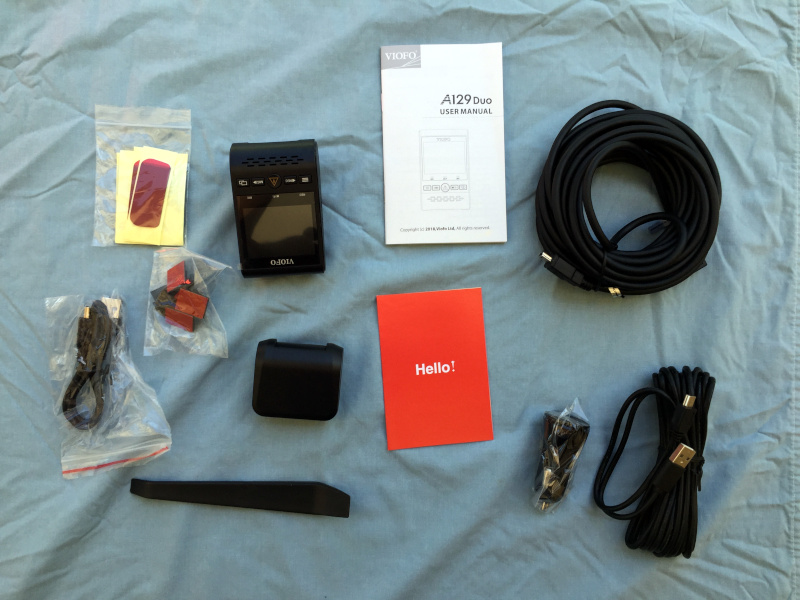
As a user, you must supply your own microSD card. The A129Duo supports cards of up to 256 GB.
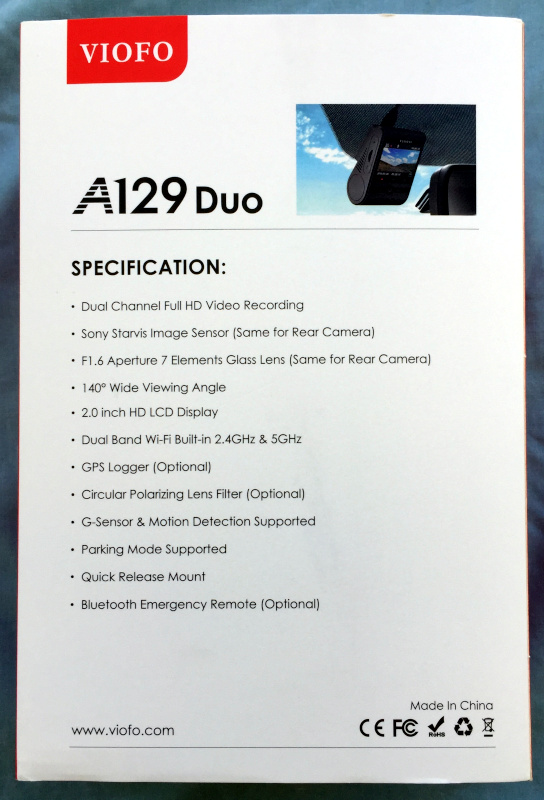
Hardware specs
- Lens: F1.6 Aperture 7 Elements Glass Lens (Same for Rear Camera)
- Sensor: Sony Starvis Sensor IMX291 (Same for Rear Camera)
- Lens Angle: Front&Rear: 140°
- Display: 2.0-inch HD LCD
- Video Resolution: Front & Rear: Full HD (1920 x 1080P 30fps)
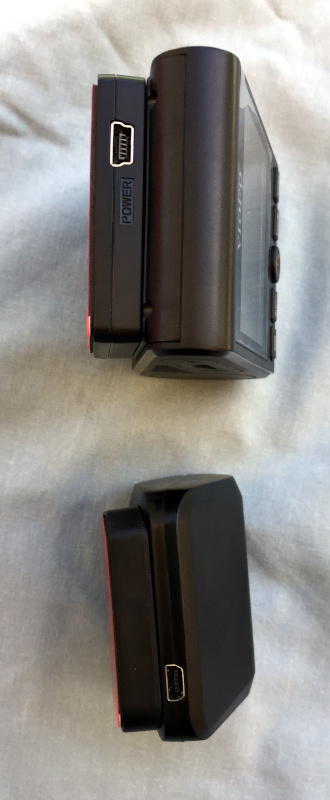
- Input: DC5.0V/3.1A via mini USB
- Video Out: MP4
- Storage: Up to 256GB (microSD card)
- Microphone & Speaker: Built-in
- Wi-Fi: Built-in (2.4GHz /5GHz Dual band)
- GPS logging
- G-Sensor & Motion Detection: Supported
- Parking mode: Supported
- Time Lapse: Supported
- Video Looping: 1Min / 3Min / 5Min/ 10Min
- Size:
- Front: 3.3″×2.2″×1.6″
- Rear: 2.1″ x 1.2″ x 2.0″
Design and features
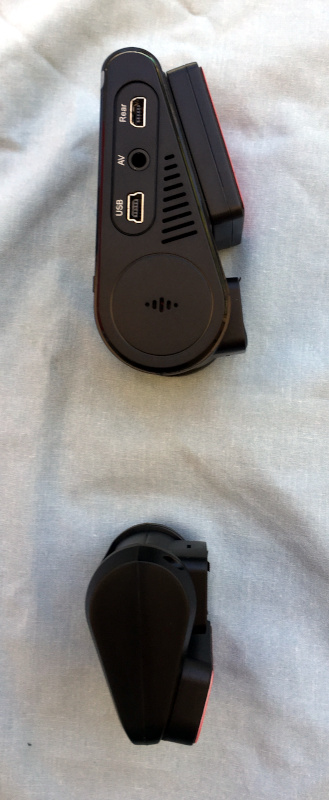
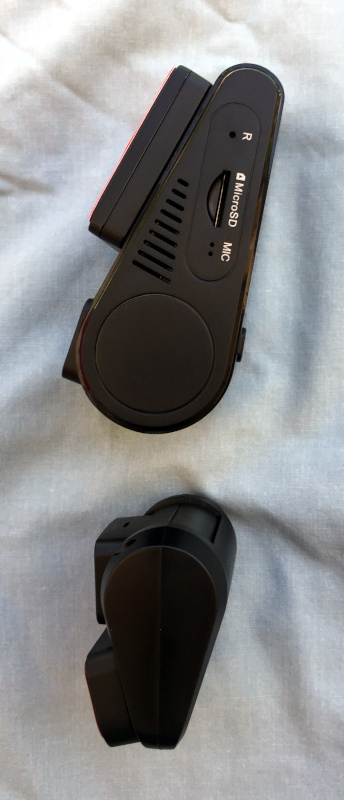
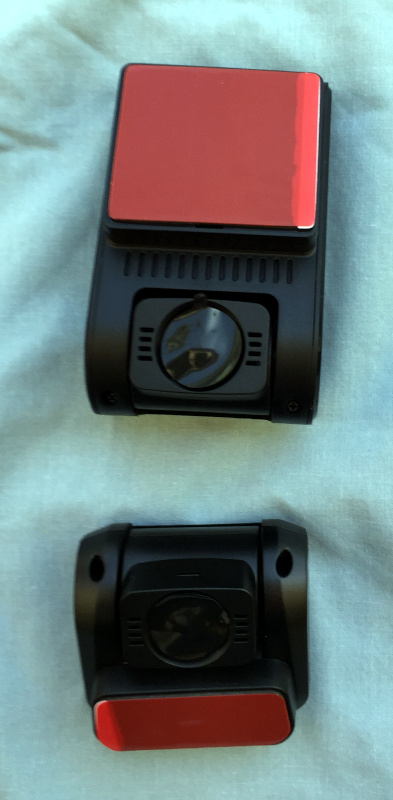
The A129Duo system is composed of two primary pieces: the front camera / control unit and the rear camera. The front unit houses the memory card, user interface, computer interface, the rear camera interface and the main power connection. The rear camera has a single port to connect the umbilical cable.
The front unit has buttons to control the basic features including accessing the configuration menu, starting and stopping recording, reviewing images and recorded video, turning the WiFi on and off, the “incident” button. The incident button marks video clips as “read only” for later review in the event of traffic collisions or other incidents. Files marked “read only” will not be overwritten by the unit as the videos roll over.
The A129Duo may also be controlled from a smart device running Viofo’s app, as long as the device is connected to the A129 via WiFi.

Setup
In a nutshell, setting up the A129 hardware involves installing a microSD card in the front unit, connecting the rear camera to the front unit via the included umbilical cable, plugging in the power cable between the front unit and the power adapter, and finally plugging in the power adapter. Once the hardware is all connected, the memory card must be formatted and the various user preferences, e.g. date and time formats, date and time, image resolution, display settings, and recording options, must be set. The basic setup on a bench takes less than 10 minutes. Putting all of this in a vehicle takes a great deal longer.
The cameras are mounted to the inside of the vehicle using removable (with moderate effort) adhesive pads. Three pads for each camera are included in the kit. The instructions suggest running the cable under the vehicle trim with the assistance of the plastic trim tool. My mileage varied, as running the wires as suggested would have required a proper metal trim tools and the assistance of a pair of screwdrivers.
The included instructions suggest mounting the front unit on the passenger’s side of the windshield behind the rear view mirror and then running the power cable across the front edge of the headliner and down the A-pillar trim and then across the inside of the dash to near a 12V outlet. I have a toll road transceiver installed in the preferred location, so I decided to drop the front unit down a bit and mount it on the driver’s side of the rear view mirror so I had easy access to the “incident” button. This was a relatively easy task because I had previously run a remote microphone for my Pioneer head unit’s hand-free features. The last bit of business was to adjust the camera angle, which is easy to do by using the live view option on the monitor. Please excuse the dirty windscreen. I had recently returned from a camping trip and had not washed my suburban yet (it did get washed a few days later when it rained, and I sprayed down the whole thing with a bit of Simple Green <grin>).
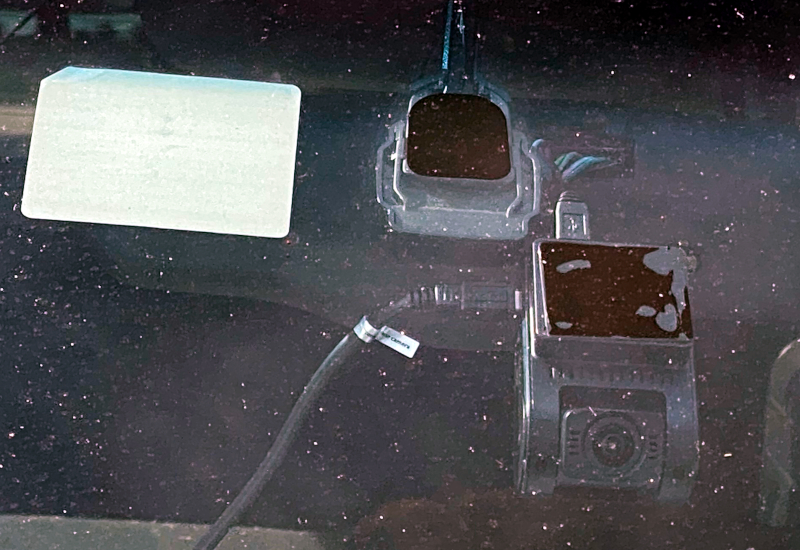
With the front unit sorted out, I turned to installing the rear camera. I found a spot on the rear lift glass where I thought I’d have a good view of both the trailer hitch and the road (I ended up have to manually re-angle the lens to use it to hook up trailers). As there was no practical way to run wires under the lift gate trim panels without modifications, I attempted to use the included wire clips to hold up the cable until I could tuck it into the D-pillar trim. The clips were total failures as they do not latch securely and would not even stay closed long enough for me to even close the lift gate. This leads to the second problem.
As I attempted to feed the long umbilical cable up to the front unit, I quickly discovered that I was going to be 6 – 8 feet short, even if I changed the routing to run along the headliner rather than along the side sill. The included instructions show installation into what looks like a small SUV or station wagon, and this cable would probably work for my wife’s 2005 Subaru Forester, but it doesn’t work for my Suburban. The umbilical was long enough to run up between the second row seats, along the center console in the front seats and the up the windshield. It was an ugly install, but everything worked.
During initial setup, I configured the A129Duo to record both front and rear views and to mirror the rear video so videos display the say orientation as my rear view mirror. I also enabled GPS and timestamp encoding on the video streams.
Performance
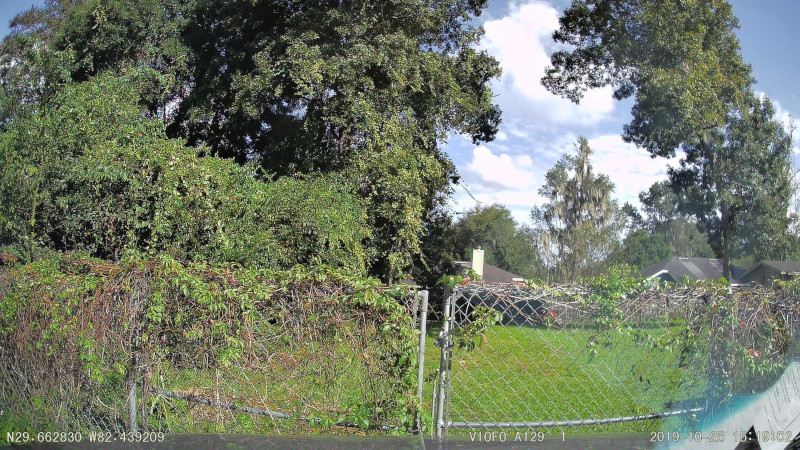
After installing the A129Duo, I took it out for a few test drives and then left it running. However, since I had forgotten to enable the automatic parking mode, I ended up overwriting all of my test footage with lots of day and night videos of my driveway and gate. I did save a few images of those, but ended up having to pull new video of one of my morning runs to Hardee’s for breakfast.
Stills of the riveting footage of my yard and driveway. Notice the location and time stamps. The center also shows the user-configurable name of the camera and vehicle number.

Stills from an after school pick up run
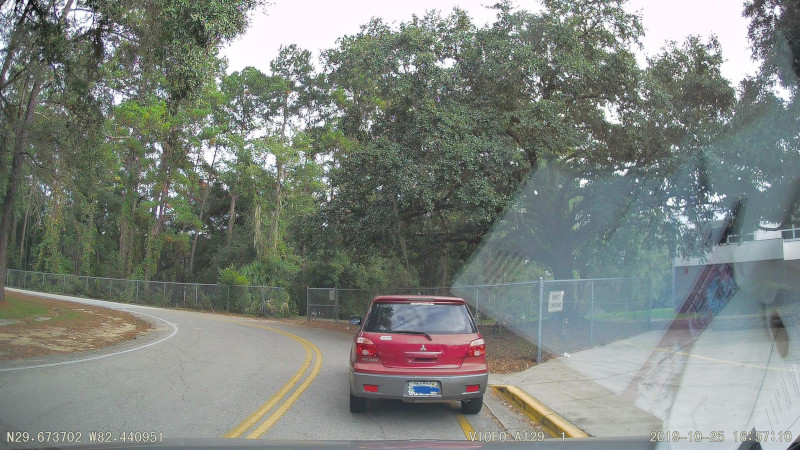
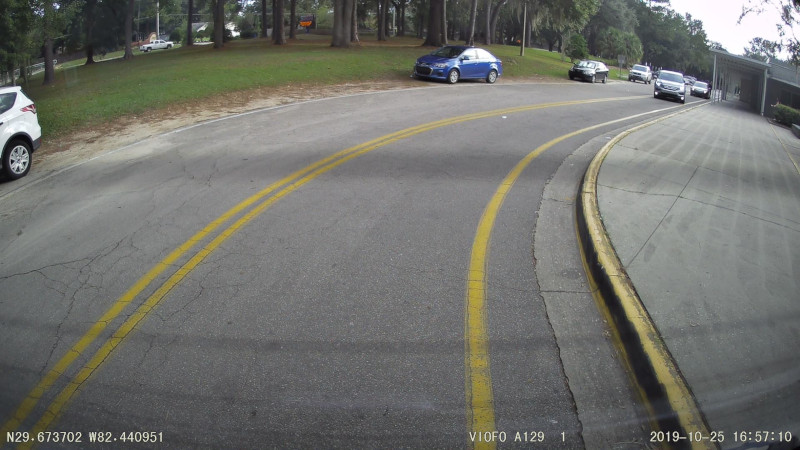
The videos and images are recorded in 1920 x 1080p resolution. Here are the full sized still images. The videos of my breakfast run can be viewed on my YouTube feed.
Other than the pesky cable issue, I was impressed with the performance of the A129Duo system. Once configured, there is nothing to do to the dash cam as long as you don’t witness a wreck. I thankfully did not have any such incidents.
I was able to easily review photos and video from my iPhone and download files to my laptop using both the USB port and by ejecting the memory card and reading it with my laptop’s SD card reader and a microSD-to-SD adapter. The still and moving images are clear and only exhibit a bit of distortion due to the wide angle lenses on the cameras. The rear camera suffers more pronounced distortion than the front camera. The way that I positioned the rear camera to serve as both a rear safety camera and a backup camera means that the lens is looking right through the read defroster surface wires on the rear glass. This leads to a bit of a distraction in both the images and in the rear view mirror. Neither caused any functional problems, but they took a bit of getting used to.
What I like
- Good camera sensor
- Lots of configuration options
- Set-it-and-forget-it simplicity
What needs to be improved
- There needs to be an option to get a longer rear camera umbilical cable or use a wireless link for the video and local power drop
- The number of buttons and the overloading of functions could be improved: add a dedicated button for WiFi and function lock
Final thoughts
As a final verdict, the Viofo A129Duo is a capable GPS-enabled dash camera that is easy to install and configure in cars, crossovers, and small SUVs. It is not suitable for use in Suburban-sized SUVs.
Price: $170
Where to buy: Viofo’s e-commerce site, Amazon.com, and other retail sites.
Source: The sample of this product was provided by Viofo.
Gadgeteer Comment Policy - Please read before commenting
Matt,
A lot of the cameras I’ve been researching automatically save recordings of incidents based on some detection of an accident. The way I read your review, the user must remember to mark to the video. Is that correct?
The dashcam continually takes a series of short clips and will overwrite them as needed unless the clips are manually marked as important.
Pressing the “mark” button, will tag the current clip and the previous one. The length of the clips is long enough to allow you some time to recover without losing valuable video.
There is no automatic event marking.