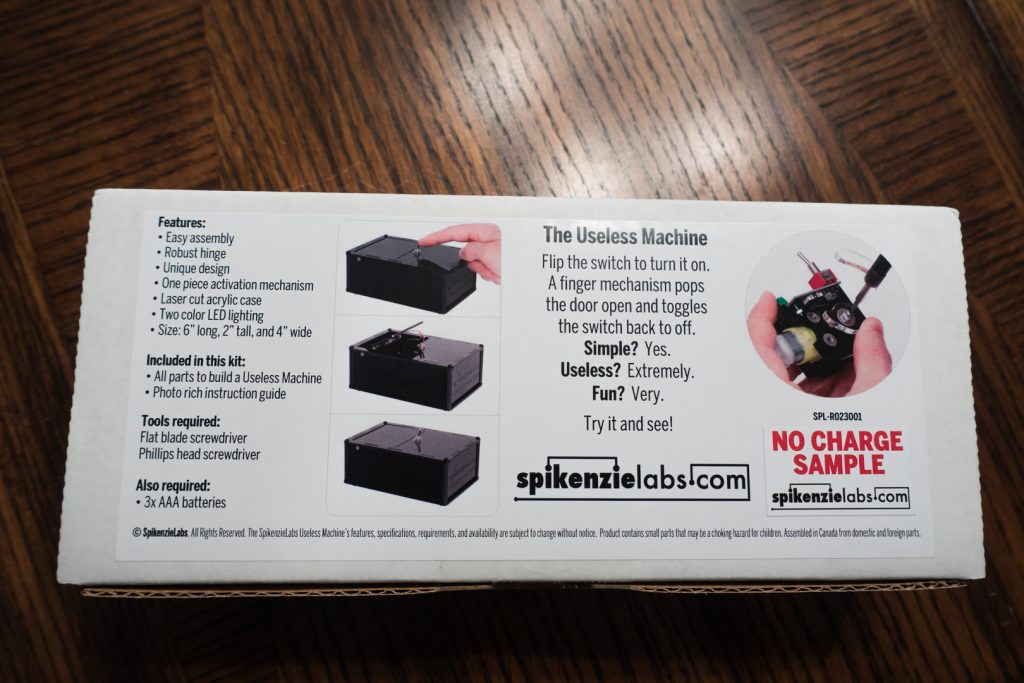
It came in an unassuming box, fitting neatly into my mailbox in a bubble mailer. I took it out and opened it up and lo! There was THE gadget I HAD to get my hands on. Since Maker Faire three years ago I had fallen in love with the Useless Machine. There are so many iterations of this device…in a wooden box, in a solder kit and in a simple screw-together kit. As someone who is hopeless at tasks that require fine motor control, the latter option seemed to be the best option.
What is a Useless Machine? It’s an exercise in philosophy! It’s a machine which, when you switch it on, immediately moves to turn itself off. Makes you think about the universe and our place in it! That’s pretty much all it does. Flick a switch and an armature pops out of the box and pushes the switch back to the OFF position, then pops back into the box. I brought it into school today and I can tell you, it can entertain a teenager for hours! I just set it down and let them figure it out.

Opening the box revealed a passle of parts. A very good instruction manual, a packet of laser-cut plastic body parts, a small motor, a pre-wired PCB, the armature and a battery case.

The first set of instructions tells you to remove the plastic film covering the body parts that protected them from scratching during transport. It’s not easy to catch an edge to tear, but I managed it in short order.
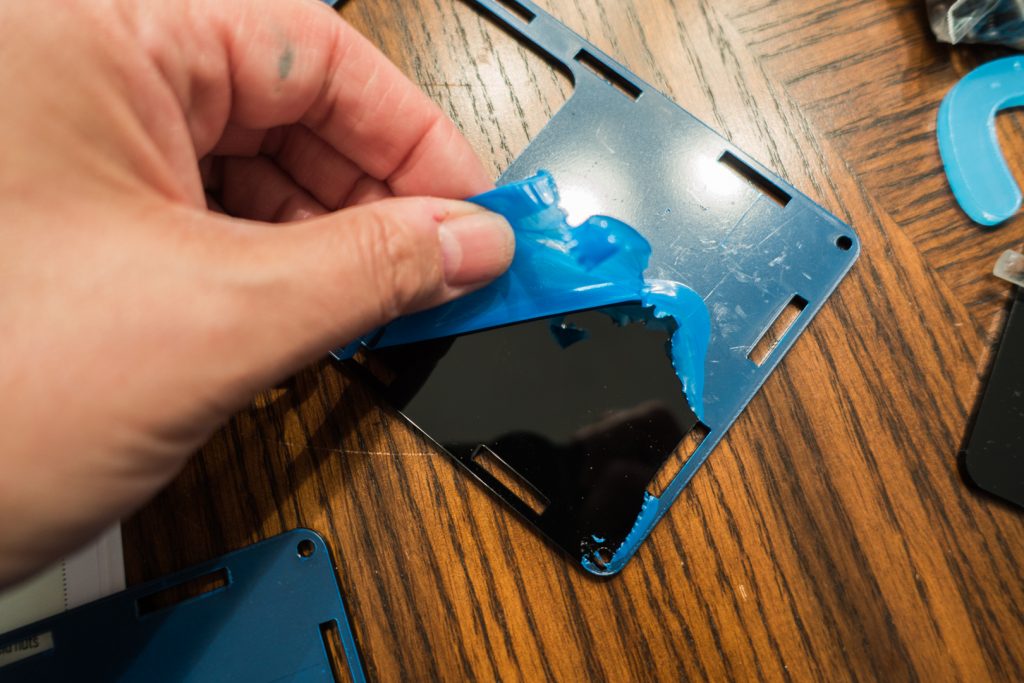
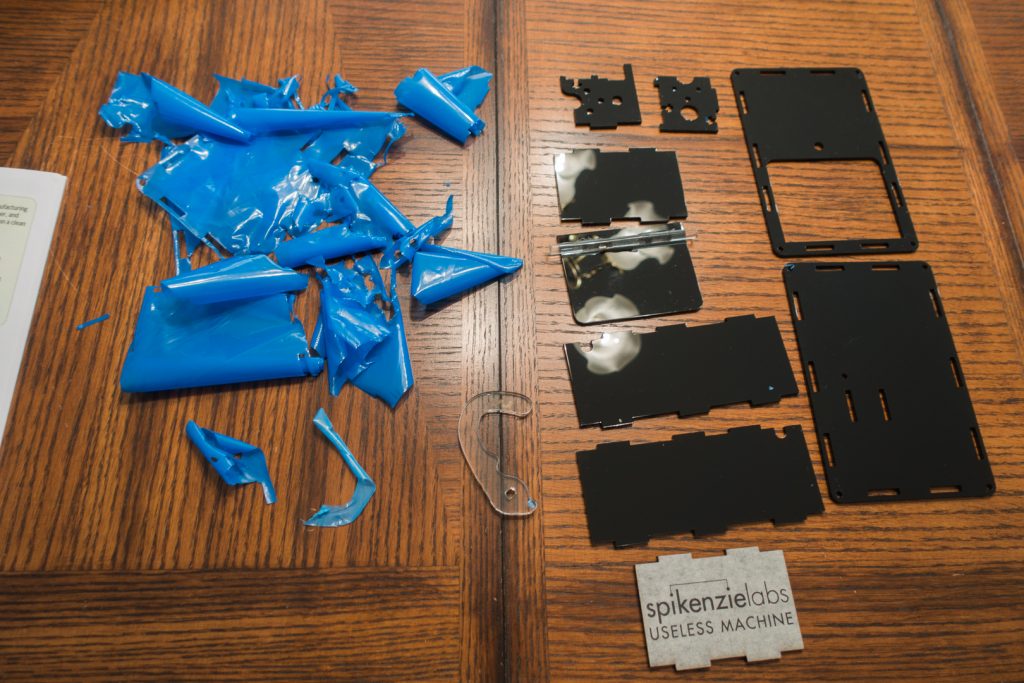
Here is all the plastic lying on the table. Notice how shiny the plastic parts are!
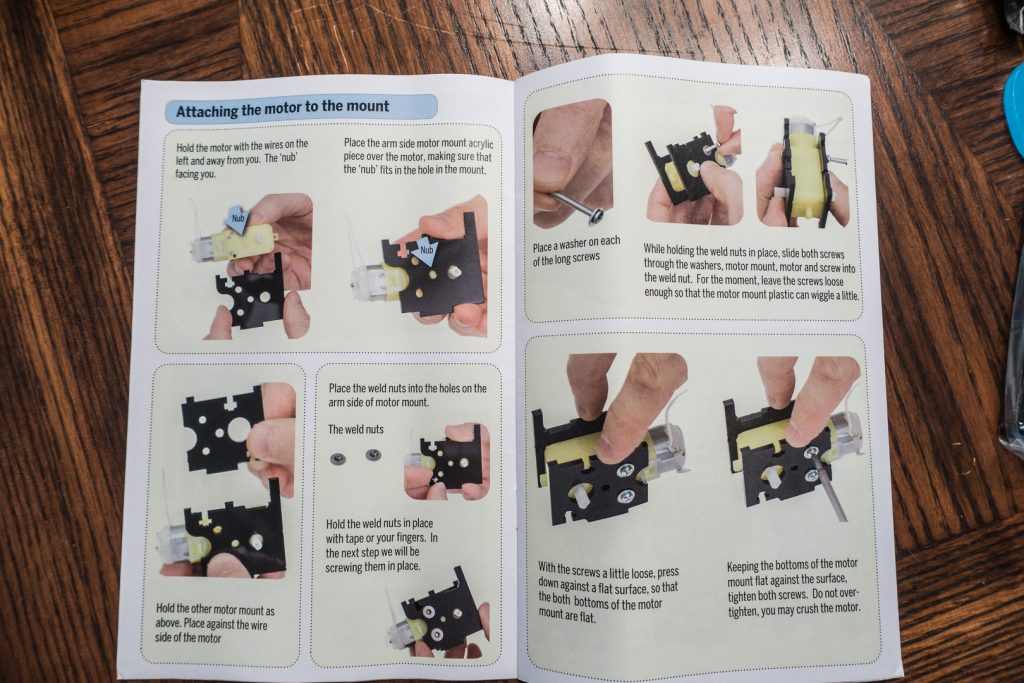
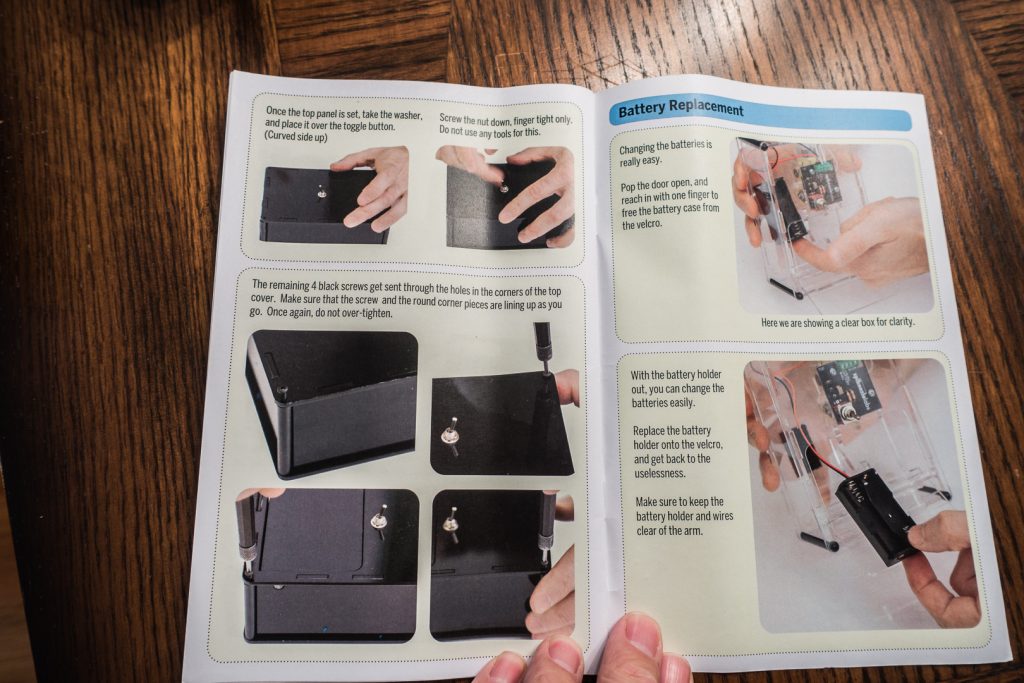
The next part of the instructions directed me to place the motor between two pieces of plastic that would act as the motor housing.
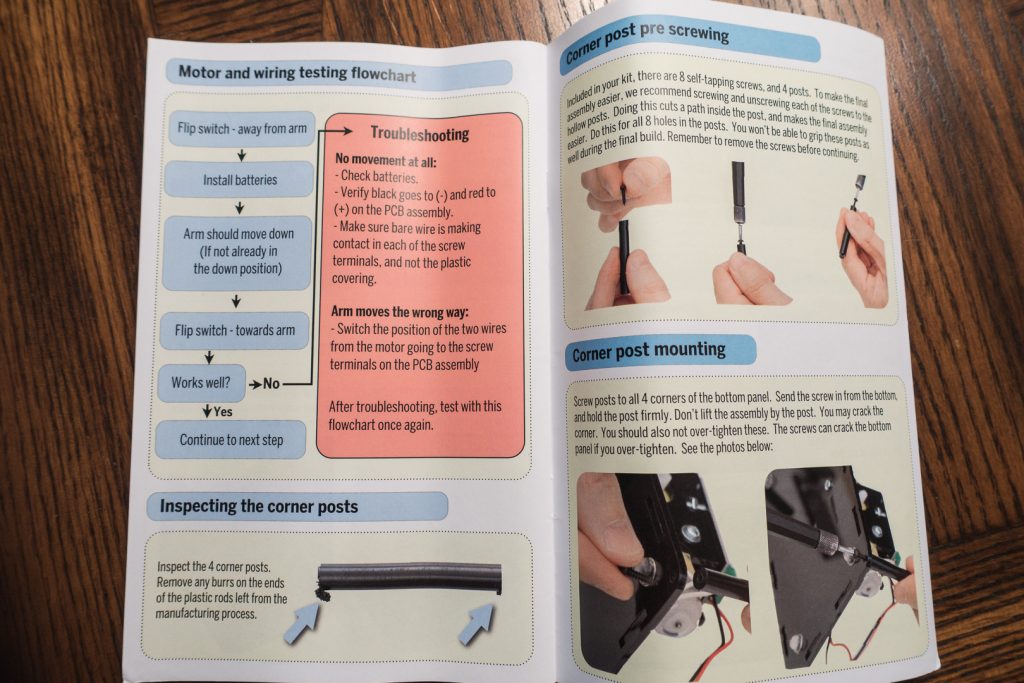
Essentially, you screw it into from one side, into welding nuts on the opposite end.
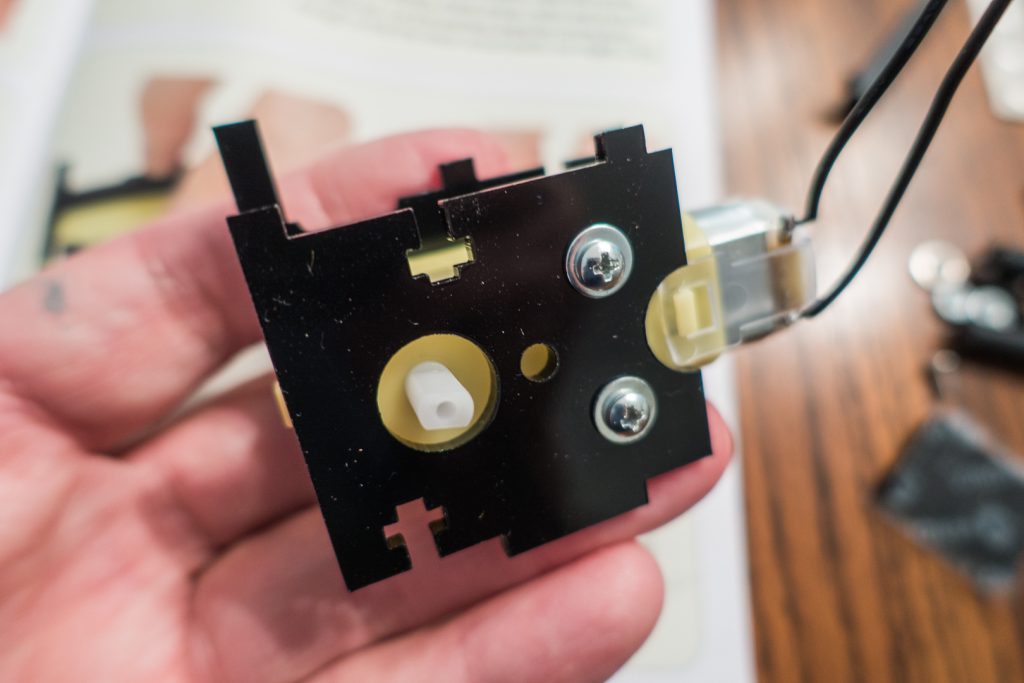
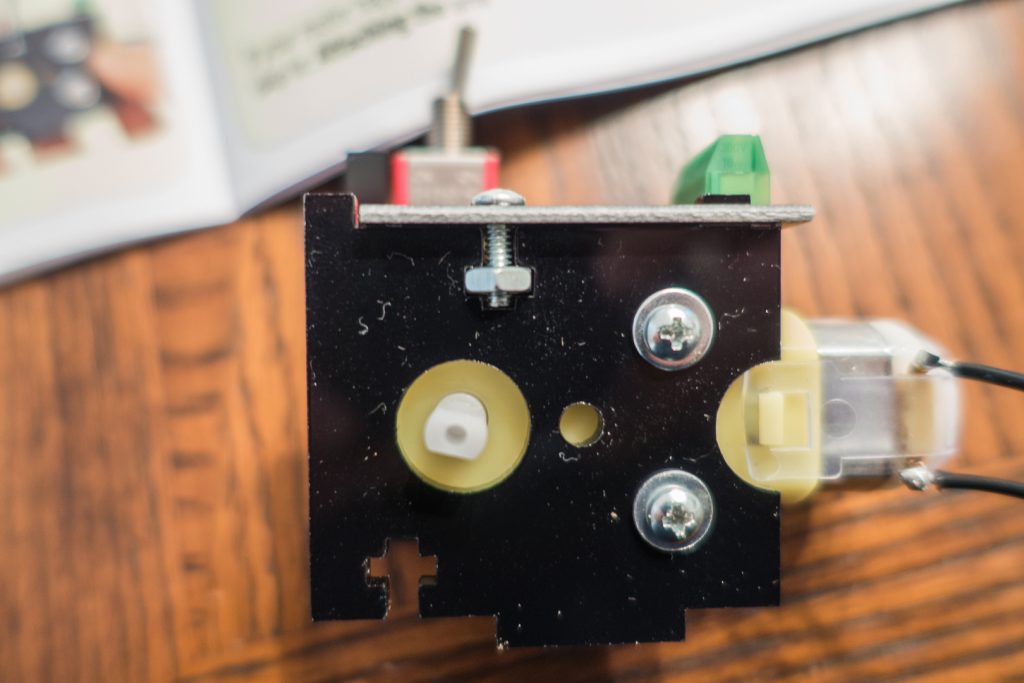
Easy! Now, to mount the PCB on top of the motor assembly!
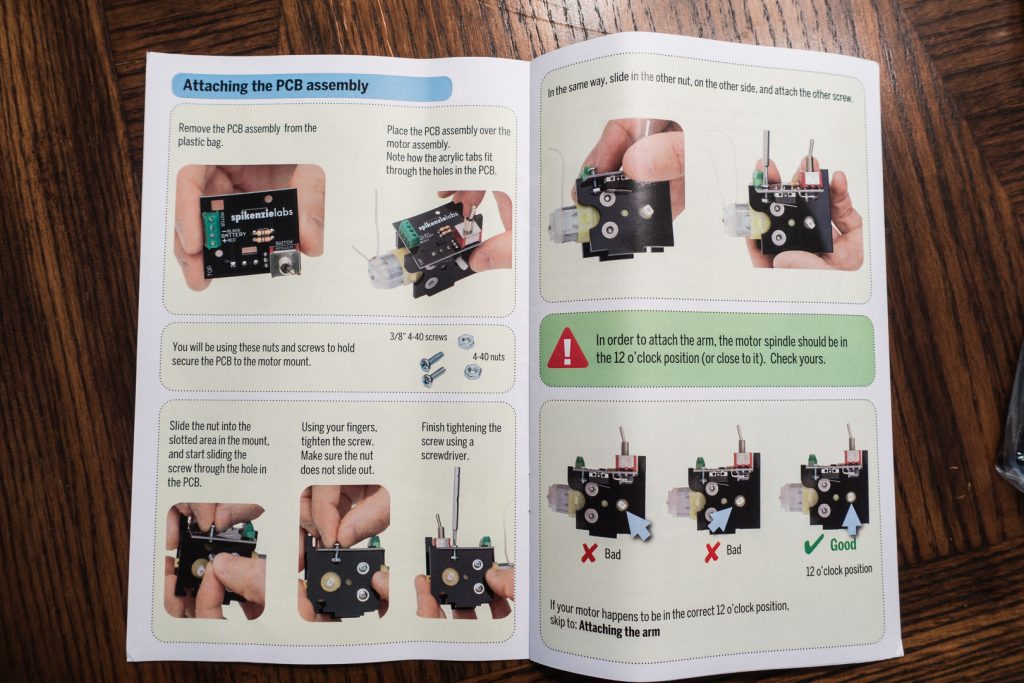
Pretty straightforward. It screws in place with the nuts placed in slots in the motor housing. It is quite secure assembled this way.
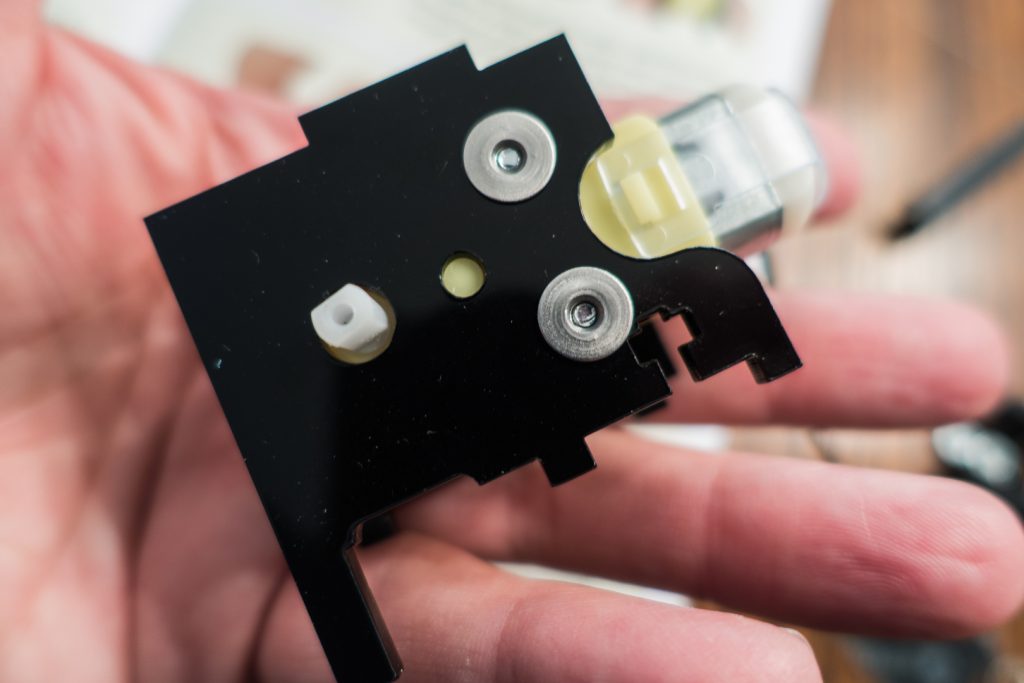
Here is the PCB sitting on top of the assembly, before being screwed in:
And here is a view of each side with the nut in the designated slot:
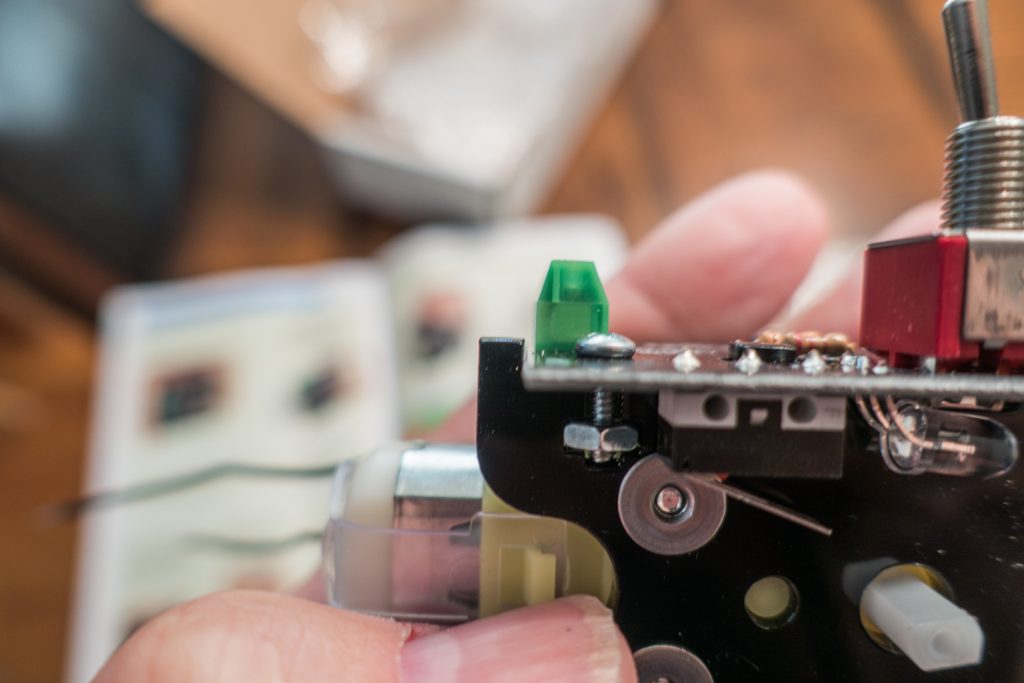
The PCB is now secure! Now it’s time to install the armature that will shut the machine off. The first thing I had to do was make sure that the motor arm was in the correct position. I did this by touching the battery pack to the motor wires until the motor arm was oriented properly.
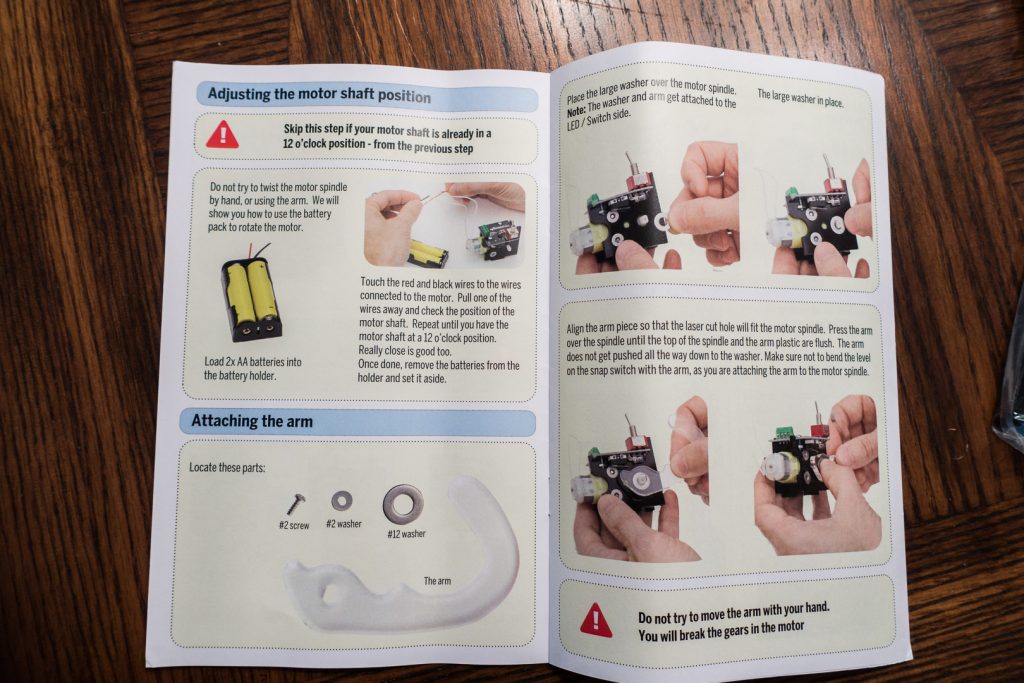
Next, I slid the armature onto the axle and screwed it in place.

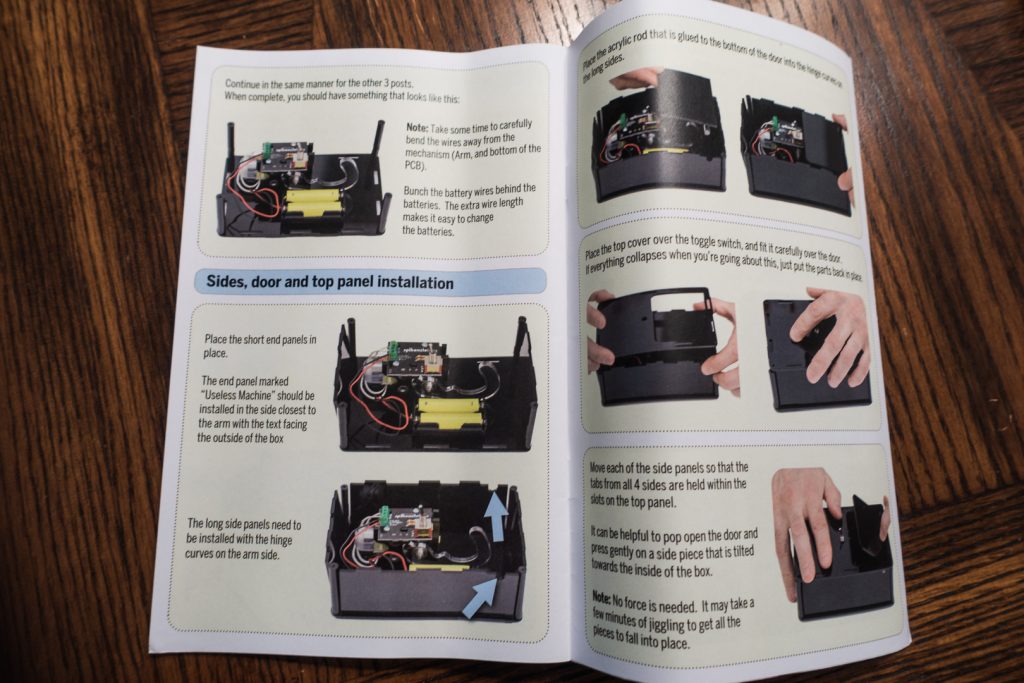
Now that this was accomplished, the next thing to do was to put the assembly onto the base plate of the device:
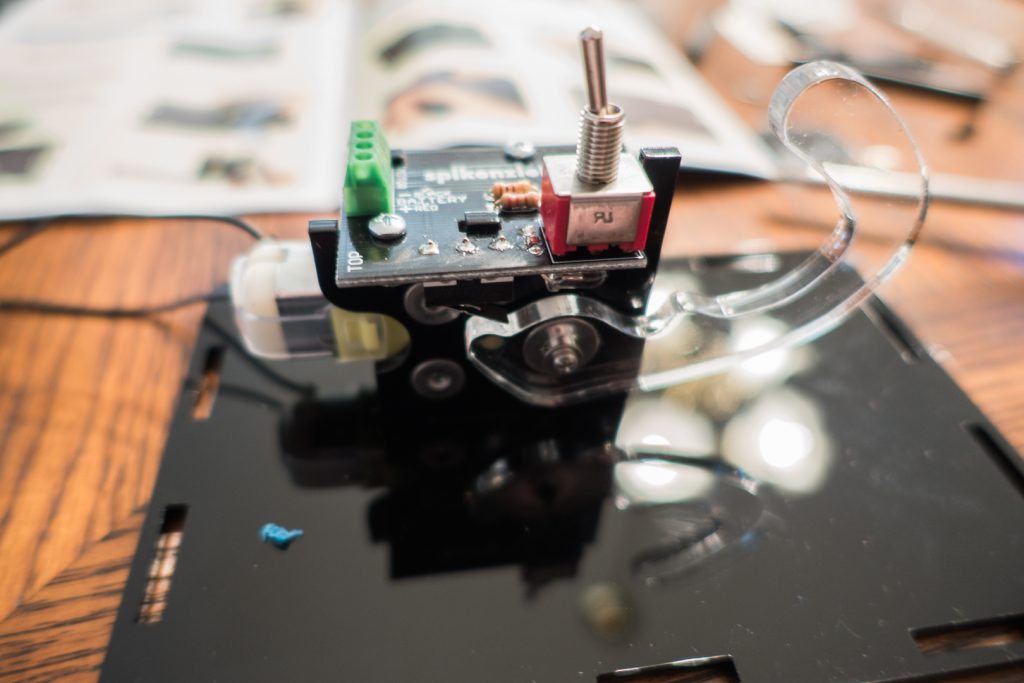
It attached via one screw through the bottom of the plate. I then installed the four rubber bumper nubs on the corners.

Next up was the installation of the battery compartment. It’s cleverly designed to attach via velcro so batteries can be replaced without having to take apart the body of the machine.

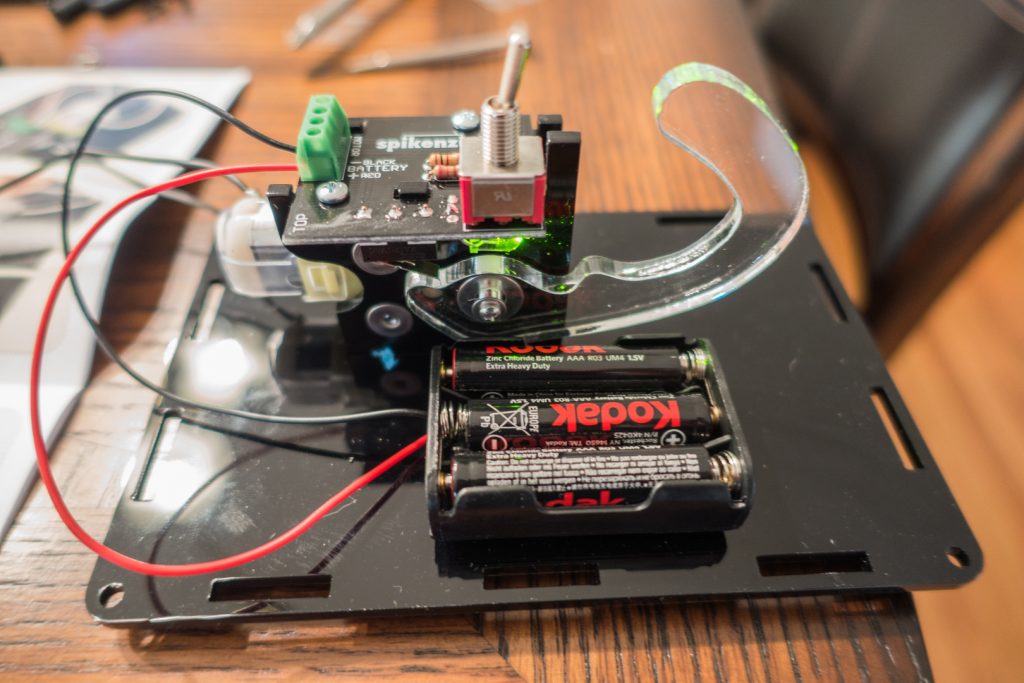
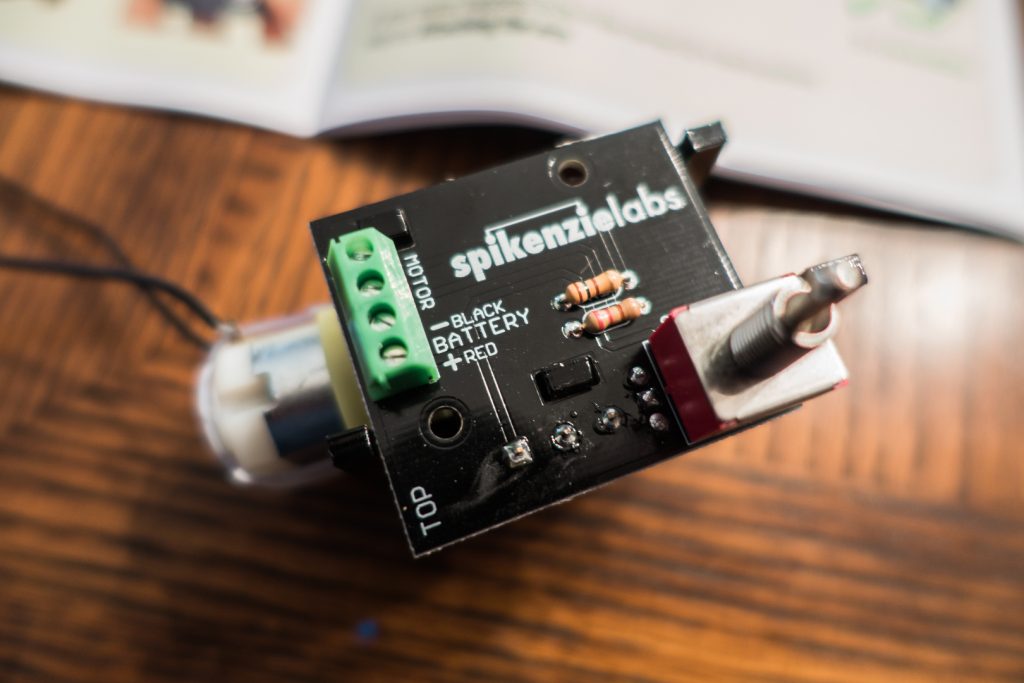
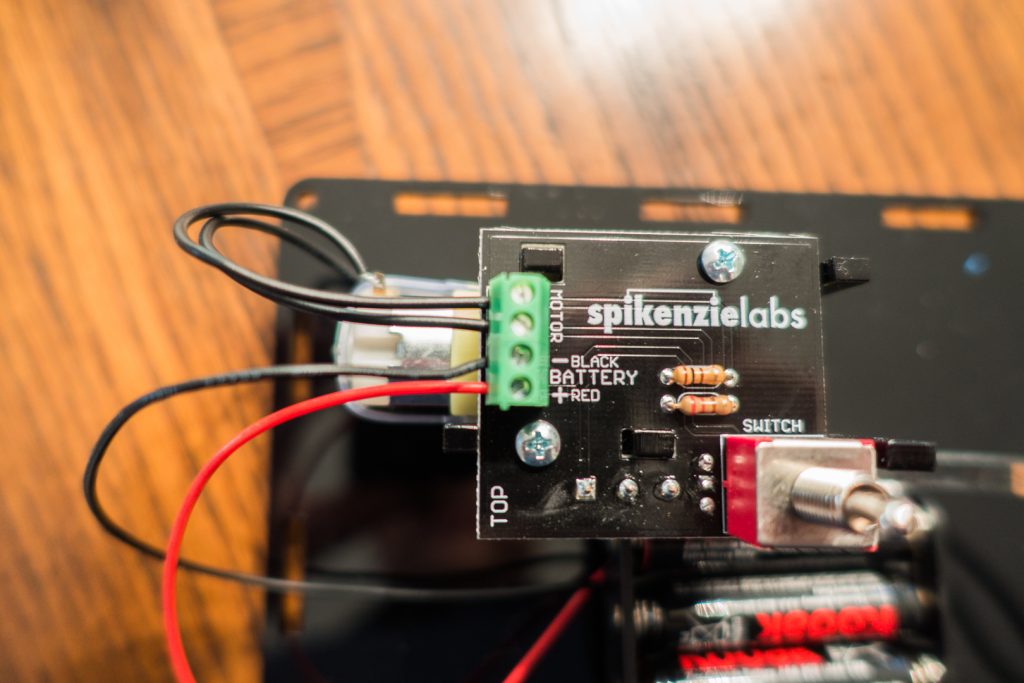
Next, I had to install the wires from the battery into the bus on the PCB. This was as easy as loosening screws and sliding the wires into place. I then did the same with the wires from the motor.
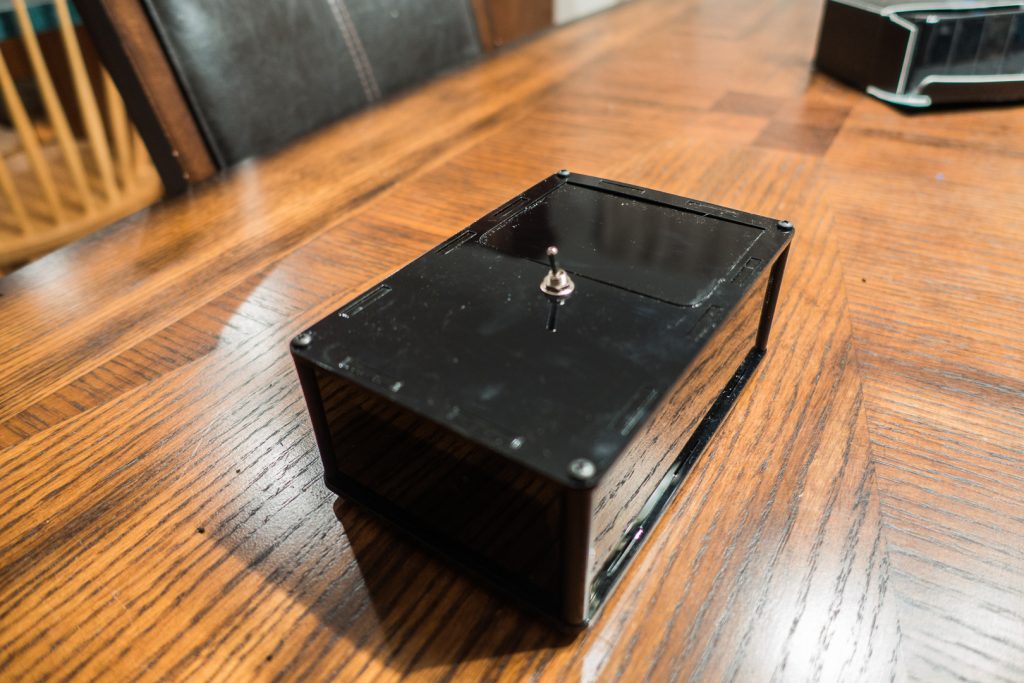
Now the sides had to be put in place. They slid, tabs into notches, into a cohesive cube, with spindles on each corner screwed in to hold the whole thing together. I used an electric screwdriver to make this happen…my hand could not manage the necessary torque.
And voila! The construction was complete! The whole build took about an hour total.
On the back of the instruction book was a list of other kits you can get from Spikenzie Labs!
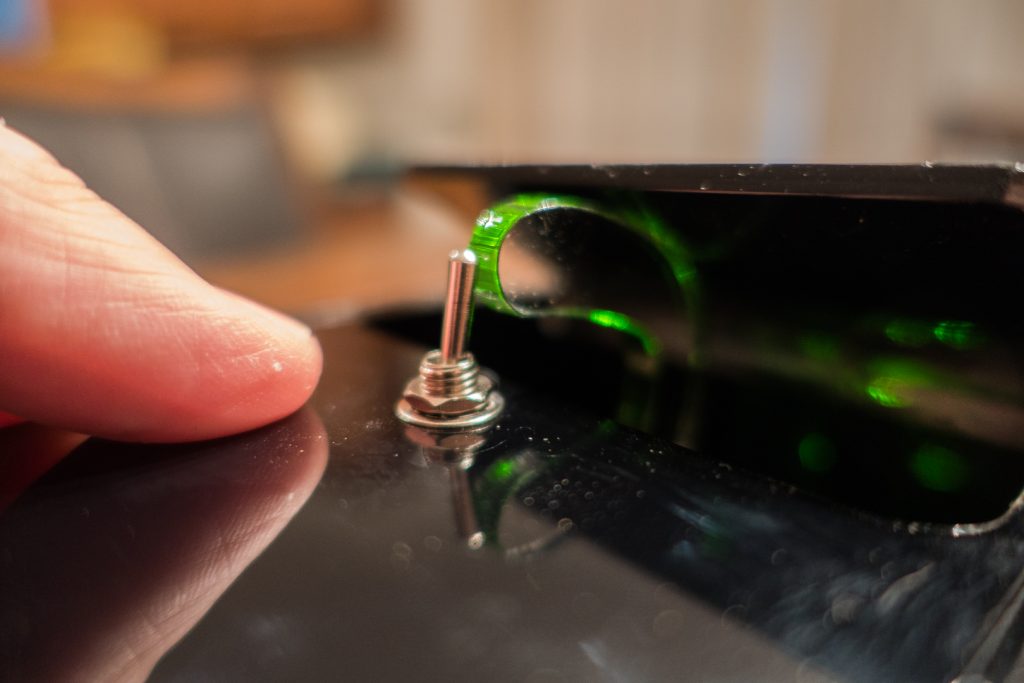
So, how does this work? First, flick the switch on the top of the box.

The lid will open, revealing a clear armature lit in green. It moves pretty fast.
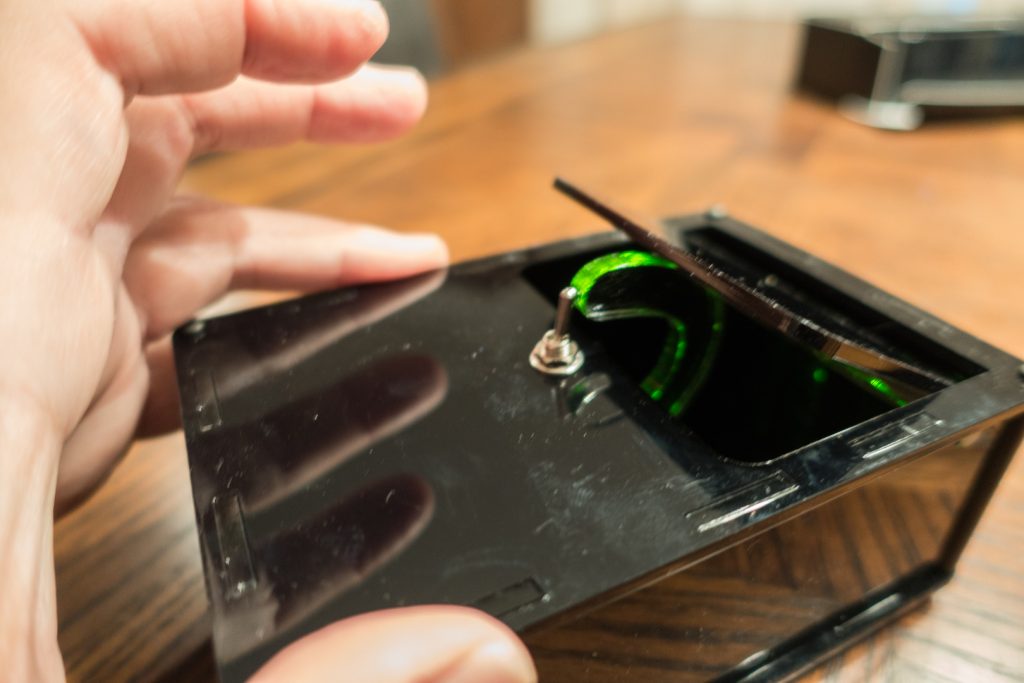
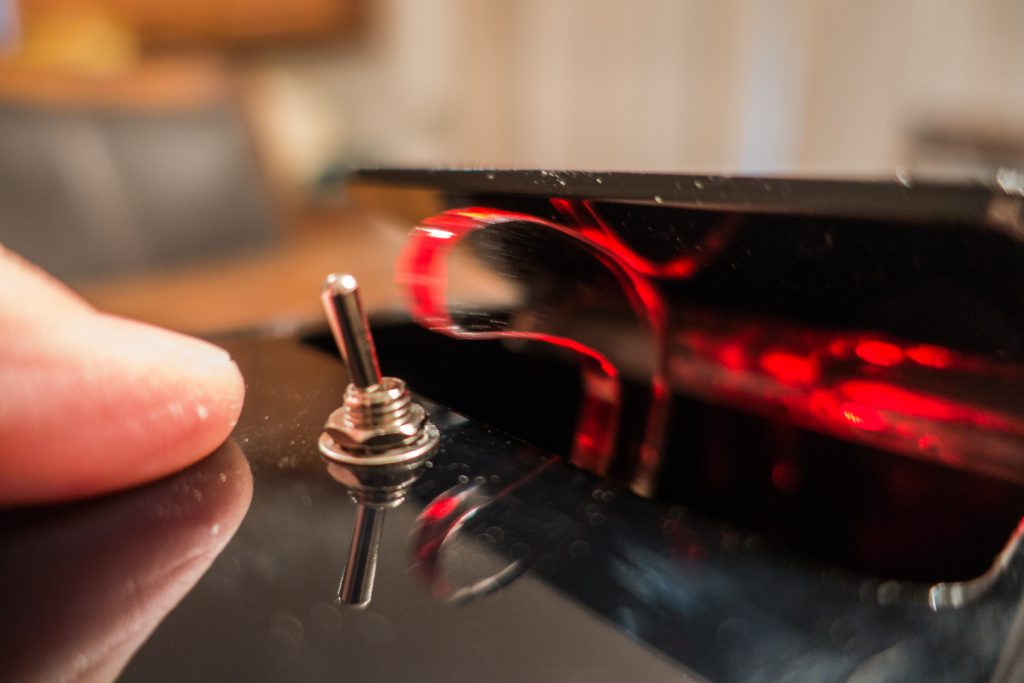
The armature will hit the switch, pressing it back into the off position:
The armature will then turn red and return back from whence it came.
And that’s ALL it does! Leave it out on a counter somewhere…the switch is irresistible. The face of the person who falls victim to its charms is also priceless.

So that’s it! A nice little build for an afternoon which will give you the ultimate conversation piece…and perhaps allow you to delve into its philosophical implications. Is it worth $35 it will cost you to buy it from Spikenzie Labs? Only you can know the answer to that.
Source: The sample for this review was provided by Spikenzie Labs. Please visit their site for more info.
Product Information
| Price: | $35 |
| Manufacturer: | Spikenzie Labs |
| Requirements: |
|
| Pros: |
|
| Cons: |
|
Gadgeteer Comment Policy - Please read before commenting
Back when I was a young teenager, the hot fad toy was the “Monster in a Box.” You flipped the switch, gears whirred inside the box and shook the box, then the lid opened, a hand came out, shut the machine off, and snapped back under the lid.
Later on the company rebranded the product as “The Thing” like Thing in the Addams Family.
This box is similar in appearance.
Wikipedia has a nice write up on The Thing box but no pictures.
http://en.wikipedia.org/wiki/Useless_machine
From Spikenzie Labs:
I didn’t see that in the instructions but it looks so good with it on that I would have never thought to remove it.
I could actually imagine myself losing hours to just flipping the switch. I know it’s a pretty useless gadget (it’s even branded that way), but I think it makes for a good way to kill time, if you have that kind of luxury. If I found myself stuck at home or sick and stuck to my bed, I’d want one of these. xD
It’s great to see these back, but it would be nice if it were more like the original Spencer Gifts version, sold back in the 70s:
Featureless black box with a switch on top. Flip the switch, and the box makes a bunch of noise, the lid -slowly- rises, and a small hand -slowly- emerged, shuts the switch off, withdraws and the lid slams.
The current version moves too fast, and the finger doesn’t look much like anything but a plastic rod — the old “hand” was much spookier.
Otherwise, the basic concept is the same; presentation could be better.