
If you’re a coffee person, chances are you’ve owned a Krups product over the years. They run the gamut in small appliance product offerings from toasters and blenders to juicers, panini presses, and high end pump espresso machines. It was a Krups drip coffee machine that got me through my college years, and although I have upgraded over the years, I personally use the brand as a “go-to” for entry level versions of products.
There was one piece of coffee paraphernalia I’ve never owned–an espresso machine. While the pod-based brewers are experiencing something of a renaissance, the long term cost and inconvenience of finding of pods as well as the lack of control over the brewing process has made me hesitant to invest in one. Patience paid off, and I was given the opportunity to try out the Krups XP1000, a steam-driven espresso machine.
A steam espresso machine, just like the name implies, uses steam pressure to heat the water and force it through the coffee grounds to pull its espresso shots. With that pressure comes a bit of danger, or as I like to call it – adventure. And honestly, what’s better than having an adventure at 6am after roughly three or four hours of sleep? If all that built up pressure is not let out after operation, it can explode. See? An adventure! The instructions are actually very, very clear about this point, and the boiler lid has a printed warning as well. In several weeks of operation, I managed to keep my machine intact and my kitchen explosion-free. I read multiple Amazon reviewers on similar Krups machines complaining about explosions causing scalding grounds to fly all over themselves and the kitchen, but my best guess is that this was user and not device error.
What’s In The Box:
- Krups XP1000 base unit
- Filter and filter holder
- Glass carafe
- Measuring scoop
- Instructions
Let me get my first complaint out there right away – where’s the tamper? The manual states that the back of the coffee scoop or a spoon could be used to tamp down the grounds, but really? If you’re making a single shot, the back of the scoop can’t reach down far enough in the filter holder to even touch the grounds, not to mention that it just does an inferior job, period. $6 or $7 can buy a decent tamper from Amazon, and I personally recommend you get a tamper instead of using a spoon.
Before first use, the instructions suggest running about 8oz of water through the system to clean it out and prime a new or unused system for operation. For my first few operations, there was an unpleasant plastic/rubbery odor coming from the unit, probably from the lines getting their first use and factory coatings burning off, but it quickly went away with further use. My suggestion would be running a second or third cleaning steps through or discarding the first few espresso shots pulled, but why waste perfectly good coffee?
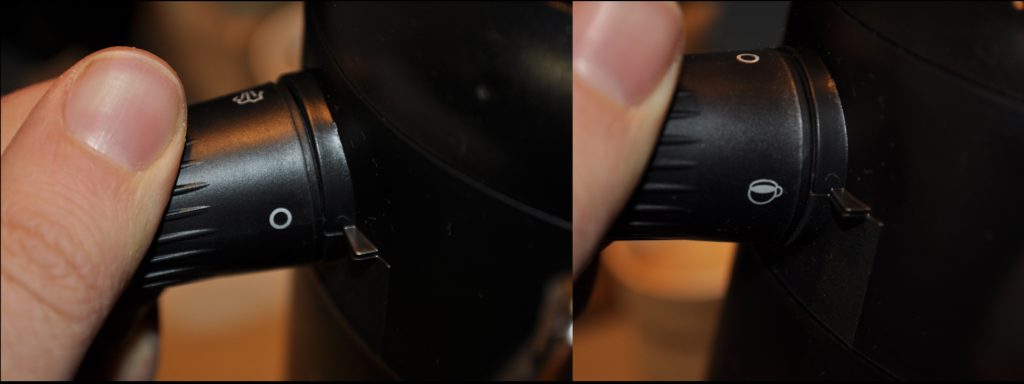
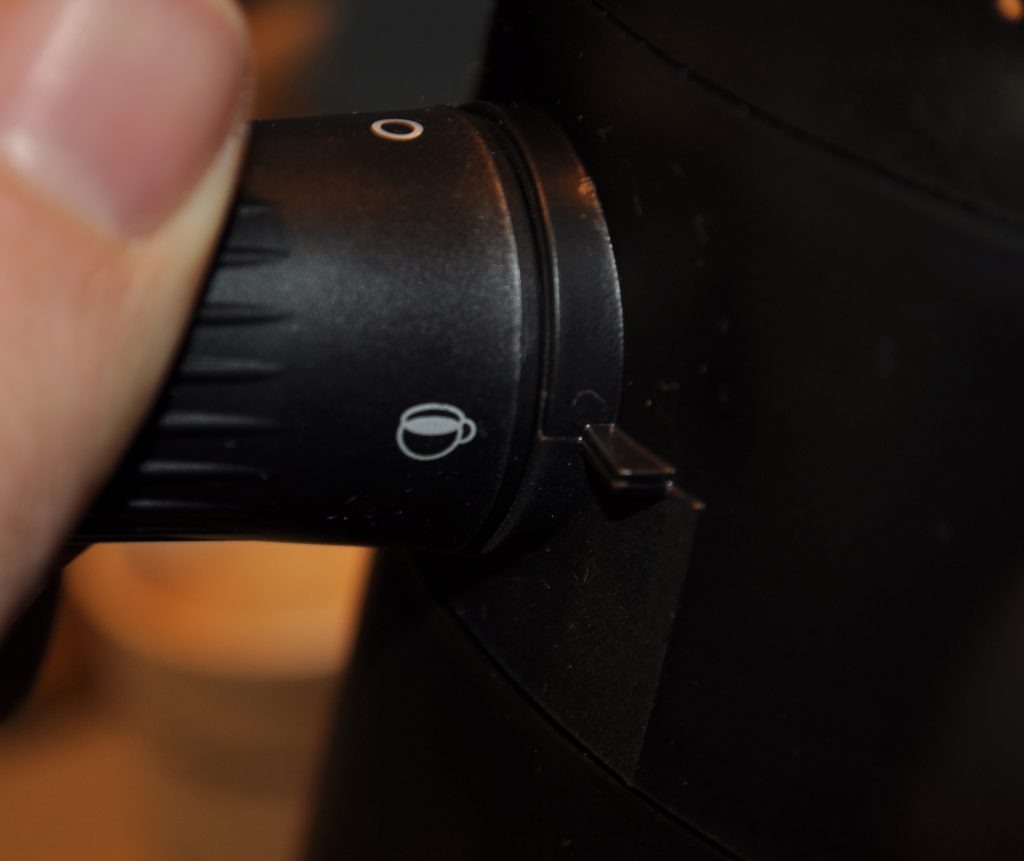
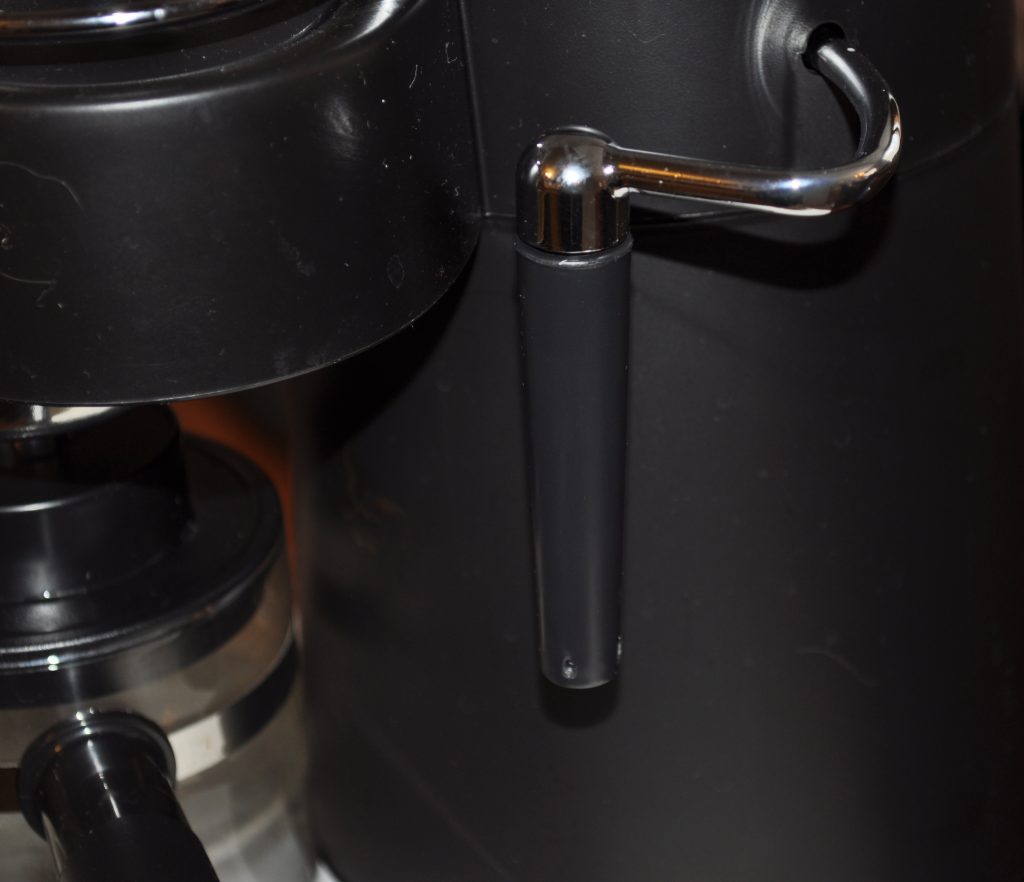
To start the machine, there’s a side dial that must be rotated from the O (off) position down to the little cup for espresso or up for using the steam wand. This is not the easiest dial in the world to rotate; it definitely needs a strong grip and some muscle behind it to rotate, even after weeks of operation. A switch would have been great instead.
Operation is simple, but needs to be precise. First, you must fill the tank with only the amount of water you need for the amount of espressos you’d like. The manual suggests 1-2oz of water per scoop of espresso for a strong coffee and 3-4oz of water for a milder coffee and an additional 2oz of water if you needed to use the steamer for milk. We’re all adults here, so I opted for the 2:1 ratio of water to beans and went with the maximum number of shots, four, and decided to hold off on any frothing for the moment.
Using my amazing math skills, that came to 8oz of water needed for the whole operation. And yet it took me several hours to figure out why I could never seem to pull a full four shots; it always stopped at roughly 3 shots, or 6oz of espresso. Maybe it’s common sense that to produce steam, you’re going to lose water, but in my defense, there are instructions about adding additional water for steaming milk (optional), but nothing about additional water for the steam itself.
Once I made this discovery, I just added an additional 2oz of water to each operation to account for evaporation. The tank holds about 14oz of water, so even if I did decide to froth some milk, there’s still room in the tank to allot for everything.
The tank capacity could prove problematic though if you enjoy a milder espresso in your cappuccino. With evaporation and steam for the milk taken into account, that gives you a maximum of 10oz of espresso available at any one time.

Start to finish, total brewing time for my four shots clocked in at nearly fourteen minutes. This doesn’t include steaming any milk, mind you. From switching the unit on, to brewing four shots, to relieving the remaining built up pressure is nearly fifteen minutes!
The first time I made a cappuccino, I followed the instructions which advised steaming the milk first. I steamed the milk up to about 160 degrees, put it aside, and began brewing the espressos. By the time all was said and done, the milk was down to around 120/130. Definitely do not steam the milk first, unless you’re a fan of tepid beverages.
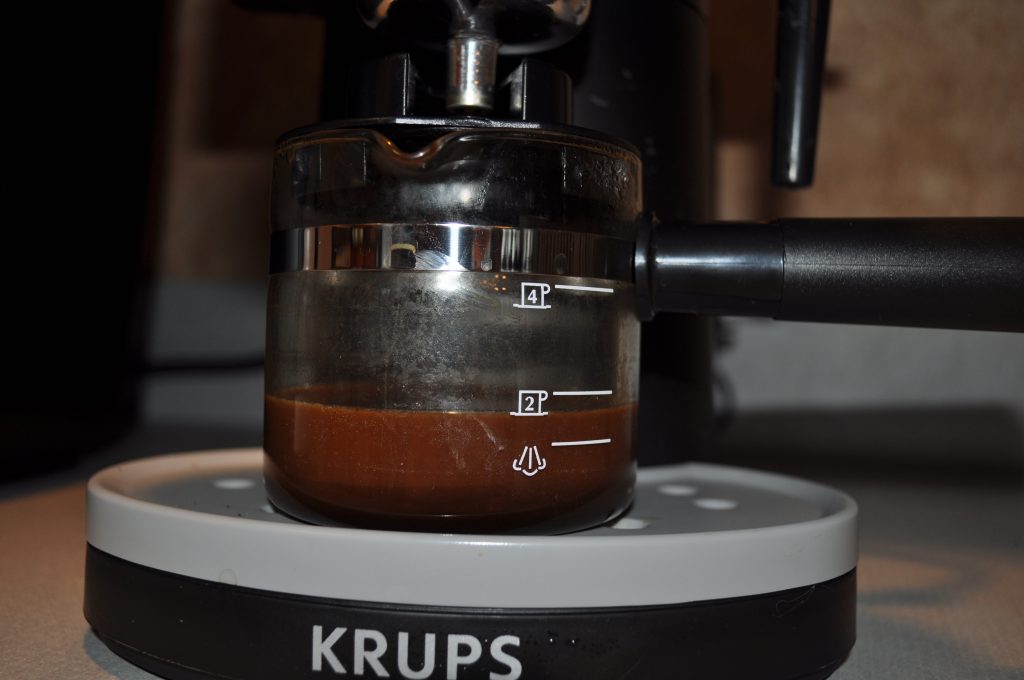
The espresso also doesn’t drip in a nice steady stream. For maybe the first half to whole shot, it’s steady, but after that there are frequent pauses in the cycle, stuttering and spitting of coffee, and so on until the brewing process is complete. The pauses are so frequent that it’s nearly impossible to tell whether it’s finished if you’re not looking at progress on the graduated carafe.
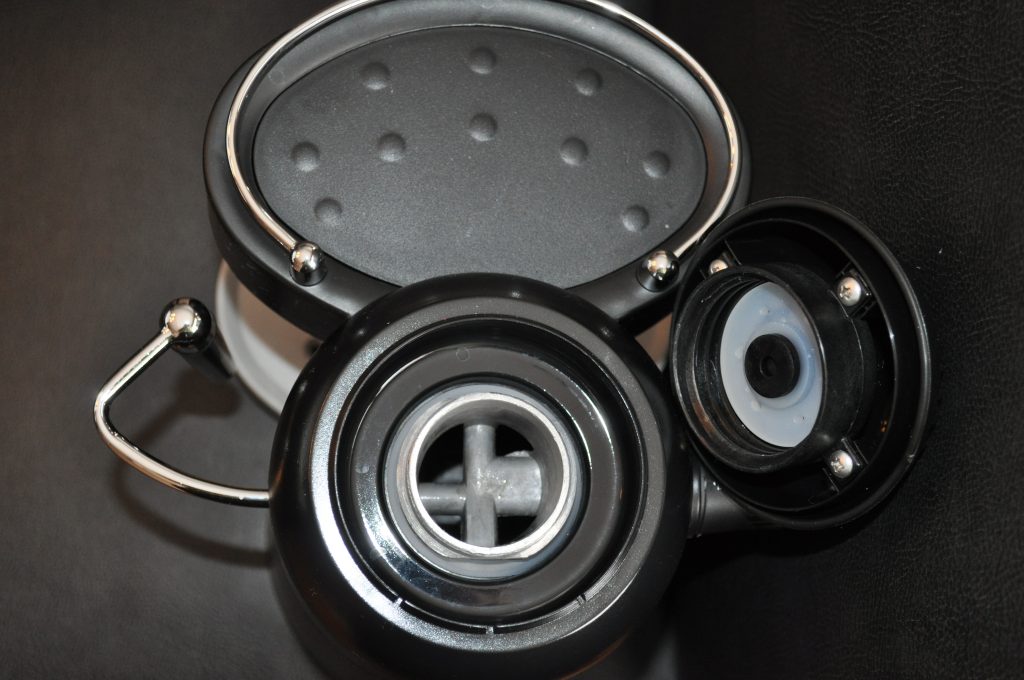
Now aside from the water measurements, I only really ran into one other issue during operation. The cap on the water tank needs to be shut tightly–I mean really tight. During the first few run throughs, steam was escaping around the cap because I didn’t have it shut as tight as possible. So my method I’ve been using to great success is to shut and tighten the lid as much as I humanly can, pause to hulk up, then try to tighten it a little more. Works like a charm!
Steam-powered espresso machines are all going to have the issue of dealing with releasing pressure during operation. It’s no fault of this particular unit, it’s just an annoyance inherent to the design of this type of machine in general. I usually opted for a lazy way and let the machine run until silent. This meant letting the steam out through the coffee grinds until the machine was empty. The plus side to this is that the steam dries out the grinds, producing an easy to dispose of puck. Option B is to switch over to the steam mode and allow all of the steam to escape through the wand. This is also probably a pretty good argument for ending with steaming milk.

I compared a Krups shot to one from a higher end espresso machine and taste-wise, there wasn’t really much difference. The most obvious difference is the lack of crema from the Krups shot. No shot I’ve pulled managed to get this creamy head, and that’s probably just the machine itself and the lack of high enough and consistent pressure. There was a little less creaminess, less complexity to the taste of the Krups shot, but it was still very tasty and impressive to have come from this little machine. The taste difference all but disappears if your end product is a cappocino or latte.
So now let’s talk about that steam wand. I really have no complaints here. It does its job as well as I would expect it to. It takes a little longer to steam milk up to the optimal temperature than the bigger machines, but it works just fine. The wand is in a fixed placement, but it’s still convenient to access and the nozzle is removable to facilitate cleaning. It’s a solid little steamer.
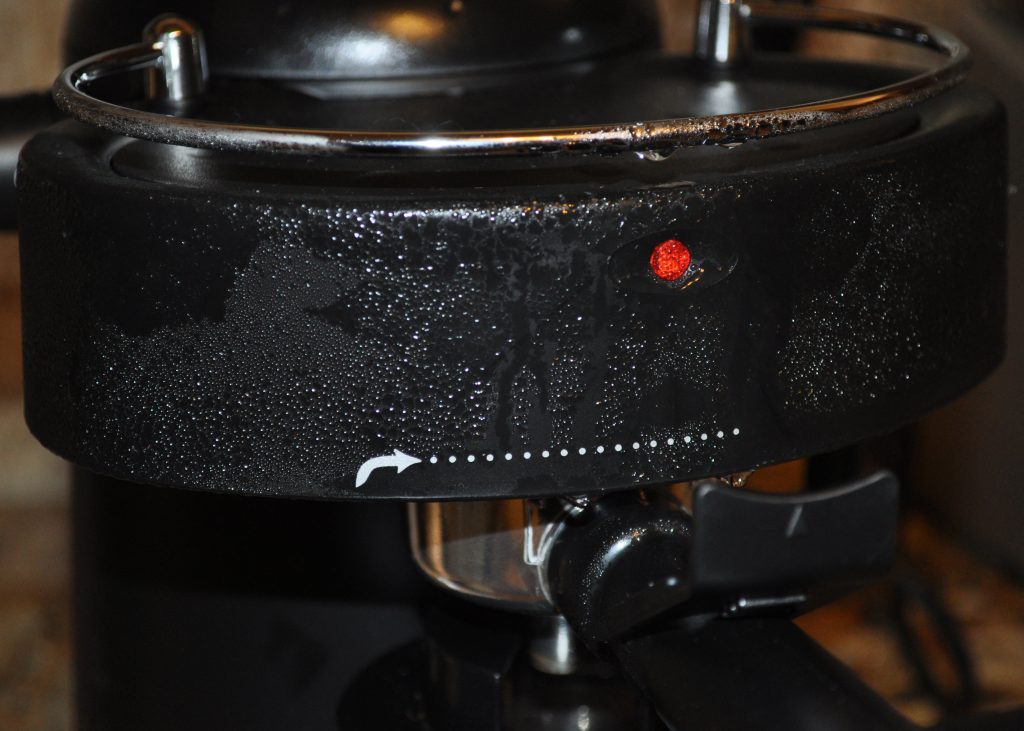
I noticed that during operation, the steam that comes out from the filter will collect on the outside front of the unit. This seems to be normal, and probably doesn’t have any long term implications as the only electronic piece on the front is the “on” light. But it will require a wipe down after each operation.
My main complaint about this machine is just that it’s time consuming and requires vigilance. Fourteen minutes is a long time to wait for a few shots of espresso. Having to pre-measure my water so that I don’t concentrate or dilute my shot is also annoying, but it does allow me a little more customization over the end product.
The trade off for these minor headaches is the price – for significantly under $100, you’ll be able to pull pretty fine tasting espresso shots, and have a built-in milk frother. The shots are on par with similar offerings from coffee chains, and MUCH better than what comes out of a Keurig. To me, this is a very good entry point espresso machine model to cut your teeth on. There is a learning curve to its operation, but once you find your operating sweet spot, you’ll be pulling delicious, consistent espresso shots.
The machine retails for $72 but can be found for about ten dollars less through Amazon.
Update 12/4/14
I replaced this with a Nespresso pod-based espresso machine and have never looked back. Highly recommend Nespresso, but not so much the Krups.
Source: The sample for this review was provided by Krups. Visit their site for more info.
Gadgeteer Comment Policy - Please read before commenting
I think the lack of crema is due to the fact that your ground coffee is too coarse, feed your machine with finer ground and you may get a better coffee with crema.
@Fred: Good suggestion, I’ll continue to play around a bit to see if I can get a different result, but I’m already using a very fine-grind for the espresso. From what I’ve read, steam-powered espresso machines overall lack the amount of pressure needed to produce crema. One of the trade offs for the price of the machine. But I’ll mess around with a few more settings on my Burr grinder and see if anything changes. Thanks!
I just got one of these as a present from my workplace. I’m still getting used to the process, but my initial impression is that the coffee it produces is more akin to a stovetop espresso pot, like a Bialetti, than the sort of espresso you would get from a coffee shop.
I’m wondering if the Krups and the Bialetti are basically doing the same thing – forcing steam pressure through coffee grounds without any additional mechanical assistance.
@Gopal – I reviewed both this machine and a Bialetti. Yeah, at the core they both do the same things. For under $100, I think you’d be hard pressed to find anything that goes beyond the basics. If memory serves, the Bialetti produced a muddier taste, for me, over the Krups and I found the process a little more complicated with room for error.
Neither is going to produce that perfect coffee shop espresso with the deep flavor and distinct crema. I thought the Krups was pretty close, taste wise, to a shot brewed with a higher end pump machine. To me, the difference in taste wasn’t enough to justify spending an additional $500-$600 at an entry level. I kind of see the Krups Solo as your first espresso machine–your basic college/office/casual espresso drinker machine.
Great review, thanks for taking the time to write/post it! The XP1000 is only one of two espresso machines available at my local big-box store, and I think I’m sold on it. I figure the machine will pay for itself after a month’s use. 🙂
My wife picked up this unit for met at Bed Bath & Beyond. With coupon, it rang up to $40. This is my first espresso machine, so I can’t say much except that I like it. I’ve never had major condensation on the outside of the machine. I have noticed that if you pack the grounds too tight, you’re more likely to get over-pressured venting from either the filter cup or the top of the unit. You have to use that “hulk” technique when locking in the filter cup, too. I’ve enjoyed my unit and the price was great.
@Paul – It’s hard to say no to a $40 espresso machine! Glad you picked it up and are enjoying it!!
Thank you for your thorough and entertaining review! I just got this espresso machine as a retirement award choice. I just tried it this morning for a single cup of espresso and steamed soy milk.
One problem I noticed is that there isn’t enough room to put a container under the steam nozzle to make circular motions. What kind of container do you use? You are right about how time-consuming the operation is, not to mention labor-intensive. I am used to making coffee in a regular maker. I don’t expect making espresso and steamed soy milk to be the same, but I probably will just use this espresso machine occasionally or go out to the coffee shop when I want a latte. (After all, I’m retired and can take the time to walk somewhere.)
I did notice the steam leaking out of the front of the screw cap and thought, at first, that I had the threads crossed. But, I believe it is designed that way on purpose. It is how boilers work, there is a safety release so the pressure doesn’t build up too much. (I am a retired electrician who had some exposure to plant boiler rooms.) But, I have not had experience with other espresso machines to see how they are designed differently.
@Shirley – First off, congratulations on your retirement!! Soy milk is one of my mortal enemies but I’ll try to help you out with the steaming anyway 😉 There really isn’t a whole lot of room to get under the steamer, but the same is true for some of the hulking professional machines. You’re going to need a milk frothing pitcher–probably something on the short/squat side to be able to clear the side of the machine but still allow the nozzle to fit inside. Even then, you still might need to manhandle the machine to get the fit just so. Hmm maybe you’re right, it probably could be easier to just head off to the coffee shop! Thank you for the comments though and insight with the cause of the steam leakage!
Hello again Morgan,
I have to say that I am now very pleased with this little expresso maker. I have resolved some earlier problems.
Initially, I was not able to get the “milk” to froth. At first, I thought it was because it wasn’t cow’s milk. But, I knew that the commercial machines can do soy and almond lattes. Too much steam was escaping from the front of the screw cap. The cap was also getting very hot to touch when in operation. I went back to the instructions and looked closer at the picture for tightening the cap. One needs to push DOWN on the cap while turning it tightly. But, caution needs to be taken to push down on the cap with the threads properly aligned. Now, the threads look even from the outside of the cap, no steam escapes, and the cap does not get hot to touch. The steam came out of the nozzle under much higher pressure, and 4 oz of soy foamed to almost over the top of the 12 oz. small frothing pitcher. I am now enjoying my first real cup of soy latte, and it is nice and hot.
It was not difficult for me to adequately tighten the lid. However, the threads on the lid are plastic while the opposing threads on the housing are metal. I can see the plastic threads eventually wearing. I also found it much more difficult to unscrew the lid once it has cooled due to the vacuum that is created inside.
I won’t have to walk to the coffee shop so much after all. Unless, I just need an extra boost for the return home!
Shirley McDonald
What size and/or brand tamper do you recommend for this expresso maker? I could not find a recommendation online for this make and model. I measured both the top and bottom of the metal filter (it narrows) and measured about 52mm and 44mm respectively. There are various sizes advertised. There are also customers with different expresso makers complaining about certain tampers not measuring as advertised. Thanks
@Shirley: I took the lazy (read: cheap) way out and used the back of a spoon to tamp down the espresso a majority of the time. BUT, there are double-sided tampers that should take care of the discrepancies in filter width. There’s one at Crate & Barrel for about $7 that might be the ticket for you!!
And all of your excitement about the Krups has inspired me to write a review of my latest coffee love–stay tuned for that!
Just purchased-my first experience–I am not getting it to steam-what am I doing wrong–brew coffee/turn to off/turn to steam is what i’m doing
@Rich: Could it be you’ve exhausted the water/steam with the coffee brewing? Is the problem that you are trying to dry out the “puck” after brewing the coffee or steam milk after pulling your shots? You might need to up the water ratio; my experience was it was better to have more water than necessary. But if you’re saying the steamer isn’t working at all, even with water in the machine, it could either not giving the machine enough time to pressurize as indicated by the little light or it could be defective. If the addition of extra water before the brew process doesn’t work, definitely call up Krups customer support.
This machine works exactly as it should but here’s the trick I’ve found for good lattes from a cheap machine.
I grind to SBUX number three,
and don’t tamp down the filter can very much at all.
While the coffee is going,
nuke 10 to 12 oz of milk in a 16oz cup for 2 minutes.
Ditch the plastic nozzle that comes attached to the steamer wand and place the tip of the jet about an eighth of an inch into the milk.
You’ll get a hot and frothy mix you can dump the coffee into and it tastes great.
I also get crema heaqd this way.
Don’t tamp down the coffee!
It’s a bad habit for a steam-powered coffee kitchen.
The problem with this machine is definitely in doing cappuccini. The last generation of the older model (XP1020) which it replaced was capable of producing excellent froth every time without resorting to any fine tuning of the amount of water used. You followed simple instructions and reached very adequate results. We used it three or even four times a day until we burned it out after 3-4 years. We had them and used them with great success for the past 20 years or so. The newer machine was not designed or built properly to achieve similar results.
I have used the xp100 for many years, I’ve not had a single problem with them (I’m on my second unit in about 10 years). for about $60-$70 they work very well. we use ours 3-5 times a day. the author’s comment about a possible steam explosion is ridiculous, can’t happen. if left unattended by accident the unit will shut off when the internal resettable temperature breaker trips. btdt many times. and as far as the quality of the end coffee product goes, if you really want $400 coffee drinks then buy a $400 machine. geez, would you expect a $20,000 Hyundai to drive and feel like a $40,000 Mercedes?
@mark: Glad you enjoy your Krups! A few points on some of your criticisms though: the explosion mention was partly to add a little humor to the review, but moreso that it’s a clearly stated warning in the instructions as well as on the unit itself. As for the quality of the coffee, I agree with you that the shots were pretty tasty! Definitely comparable to some of the expensive machines. My only complaints were the lack of crema and the time it took to pull shots–however, neither of those was enough of a con to demand a costly trade up from the Hyundai to the Mercedes 😉 Overall, I thought the unit was a real bargain at 70-80 bucks.
I had the “grandfather” of this appliance, the TYP 963, for 25 years. Looked almost the same and worked on exactly the same principle. Excellent machine. I used to get good tasting coffee with crema. For just 60 Singapore dollars, it was a steal. Unfortunately, it blew a gasket after 25 years. The model had already been withdrawn so I couldn’t get a spare. I think the author of this article is being a little dramatic with his “hulk technique etc. The machine is, er, was quite safe and easy to operate. A rise in pressure above the safe limit was released by the safety valve in the tank lid. A thermostat switched off the electrical circuit above a set temperature. So I don’t expect this model to be much different.
By the way, I thought the XP1020 is the newer version (newer than the XP1000)
Coffee machines vary from single cup to multi cup but all generally do one
thing. This process has been tweaked for many years and the
common machines at most coffee shops all use a similar process to produce
the extract from bean we commonly call espresso.
It also comes with a 3-way solenoid to stop splatter as it grinds and squeezes out your espresso.