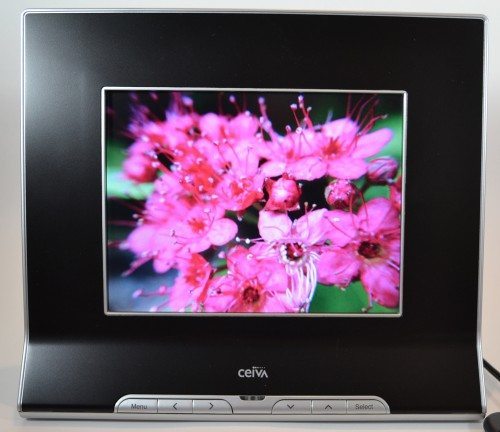
 We’ve talked a lot on The Gadgeteer about ways we can help our older or less tech-savvy relatives get connected. We’ve talked about phones, computers, and email services; see the related posts links at the end of this review to read about some of them. Now let’s talk about an easy way to keep these folks up to date with family pictures with no effort on their part. CEIVA offers a photo delivery plan and digital photo frame that will automatically load up photos sent directly to their CEIVA photo frames by their friends and family members. These frames can be connected to a local network through an Ethernet cable or through an optional WiFi connector. Best of all, they’ll work for folks without any sort of network, because they can dial out through a landline and collect new pictures. I don’t have a landline, so I asked for and received the Pro 80 model, which comes with a WiFi connector. Let’s take a closer look.
Many of the photos in this review can be clicked to see a larger view.
The most important thing you need to know about the CEIVA products is that you are not getting a digital frame that can connect to the internet. You’re getting a PicturePlan Photo Delivery Service and a digital frame. The CEIVA Pro 80 frame includes a year’s subscription to the PicturePlan service. You must renew – and pay for – this service at the end of your free year if you want the frame to continue working. It won’t even display photos from an installed memory card if you don’t renew the service.
You may think that this sounds like a bit of a rip-off, but I don’t think it is after I’ve given it some thought. If you wanted just a digital frame to give to Grandma, you can get one. She’ll only be able to get new photos added on to her frame when someone visits, brings along their laptop, and copies some new pictures to the frame’s memory card. Or you could snail mail her a new memory card, and she could swap out her current card to see the new pictures. With the CEIVA frame, she won’t have to do anything; new pictures will be waiting for her each morning when she gets up. And she can get photos sent to her by anyone she wants to invite. One perk of maintaining the PicturePlan is that your frame will stay under warranty and will be fixed for free for as long as you maintain the plan. Another perk is that you’ll receive unlimited online storage of your photos.
Currently, CEIVA is offering two frames. The CEIVAshare comes with accessories to hook the frame to a landline; a WiFi wireless connector is optional. The CEIVA Pro 80 that I received comes with the landline kit and with the wireless connector.
Tech Specs for Pro 80
Screen: High resolution, 8-inch active matrix digital LCD screen
Aspect Ratio: 4:3
Display Resolution: 640 x 480
Height: 8.5″
Width: 10″
Depth: 3″
Weight: 3 lbs
Media Server Support: PC with Vista, Windows Media Player 11, Macintosh with additional media server software
Memory Card Support: Compact Flash®, Memory Stick®, Memory Stick PRO™, Memory Stick Duo™, Memory Stick PRO Duo™, Secure Digital™, SmartMedia™, MultiMedia Card™, Microdrive®, xD-Picture Card™, miniSD™ Card (some cards require an adapter)
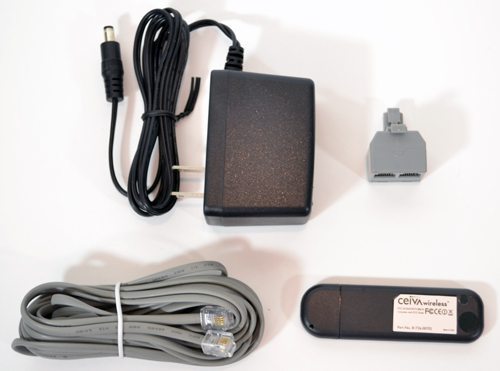 In the Box:
1 CEIVA Pro 80 Digital Photo Frame
1 AC Power Supply
1 Dual Jack Adapter
1 QuickStart Guide
1 QuickTips
1 Media Server Instruction Book
1 CEIVA Wireless Adapter
2 Interchangeable Frame Finishes in Black and Wood
No manual is included, but you can find one at the CEIVA website by clicking here.
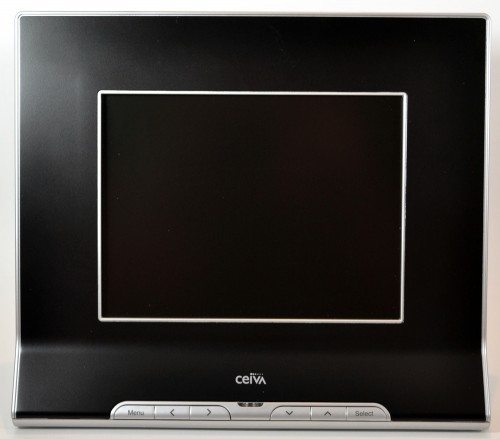
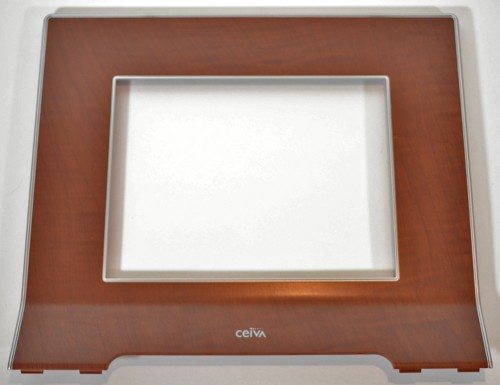 The CEIVA Pro 80 comes with two snap-on fronts. A black one was installed when the CEIVA arrived. I really liked the way this one looks, so I left it on. The second frame is a plastic piece with a faux woodgrain in a medium brown. If you want, you can also order skins from SkinIt for a completely custom look.
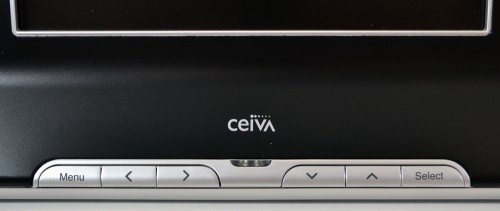 The front has controls for navigating the setup menus and for seeing the photos currently on the frame. The light in the center of the controls blinks to notify you when you have new photos.
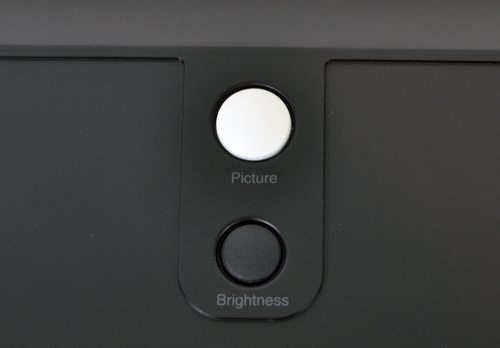 The top button on the back of the frame shows you the photo’s info when pressed. The bottom button adjusts the brightness of the screen.
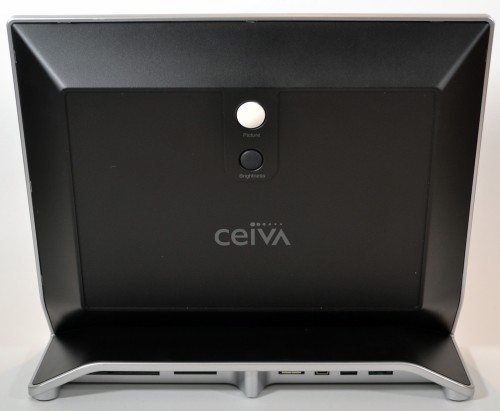
 All connectors are found at the bottom of the back of the CEIVA. Left to right, they are CF I / CF II card slot, SD / MMC / MS slot (or other cards in an SD adapter), C-Port 1 to connect the wireless adapter, C-Port 2, power port, and phone port.
The Quick Start Guide directed me to go to the CEIVA website and set up an account and register my frame before I did anything with the frame itself. I simply entered my name, a sign-in name (also used as the frame’s name), password, email, and the serial number of my frame to create the account and registration. I could actually do this for a frame I wanted to gift to someone, so I would have control over the account to do the maintenance, and the recipient would only have to enjoy the photos.
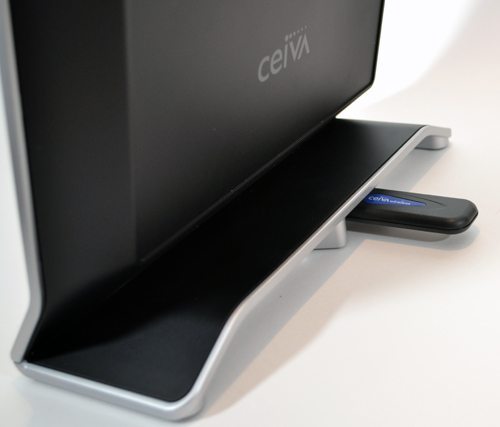
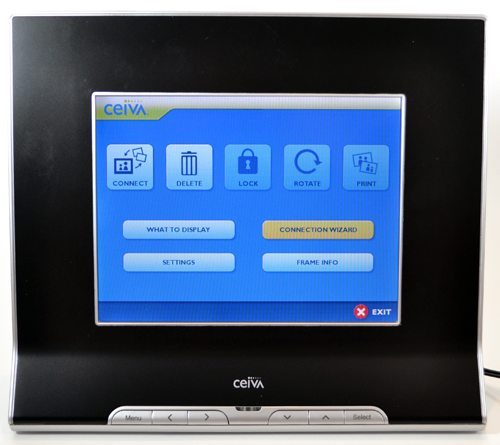 Next, I plugged in the included wireless dongle, attached the AC power cable, and waited for the frame to power on. It only took a couple of seconds to come up. I used the on-screen connection wizard to guide me through finding my network, entering the password, and connecting. The Pro 80 connected very quickly the first time.
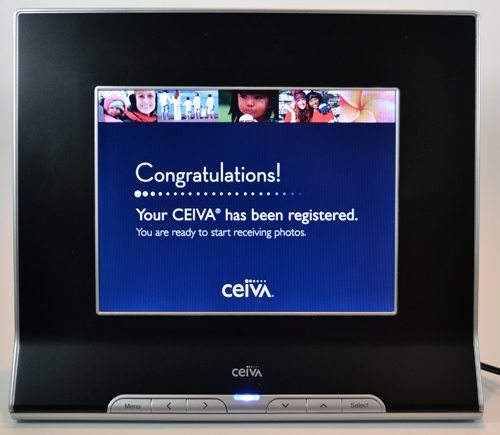 The Pro 80 did come with a landline connection kit, but I don’t have a landline. I couldn’t test this function at all. You can also purchase a broadband connector from CEIVA, if needed.
When I was sent the frame, our contact at CEIVA had told me to give her a call so she could walk me through the setup process. After thinking about it, I decided I’d do the connection myself. I wanted to experience the process exactly as I would if I had gone out and bought the frame for myself. I wanted to be able to discuss any problems I encountered and tip you off to things that make the setup process go easier. I didn’t have any problems, so I don’t have any special tips for you other than follow the instructions in the setup guide and the on-screen prompts in the frame.
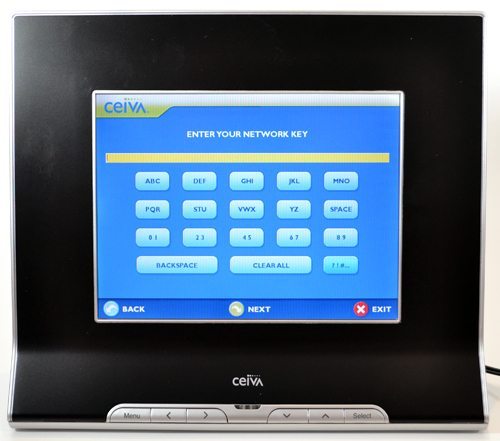 Speaking of on-screen prompts, you’ll notice a funny on-screen keyboard for entering your network password. You use the front arrow buttons to move to the appropriate key and use the select button to toggle to the letter you want. I don’t like these types of non-touch on-screen keyboards, but this one worked well.
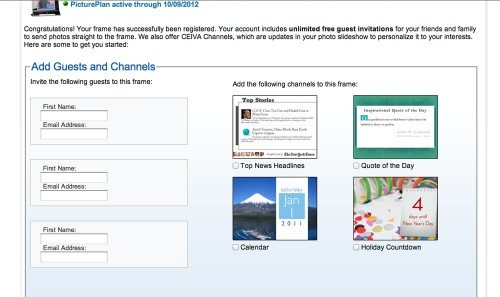 Once the frame was set up, it was ready to accept pictures. When I was setting up my account, I was prompted to invite people to send me pictures. I sent invitations to another of my email accounts and one to my husband. I already had a CEIVA account that I just set up so I didn’t have to do anything but accept the invitation, but my husband had to create a guest account at CEIVA so he could send photos to my frame. Your invitees can also use their Facebook accounts to setup their CEIVA guest account and easily send their Facebook photos to the frame. You can invite an unlimited number of people to send photos to your frame. There are other ways they can send photos to you, which we’ll mention later in this review.
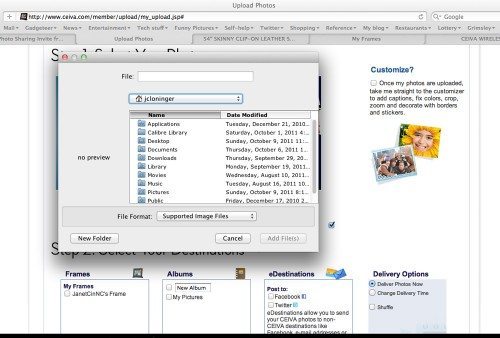
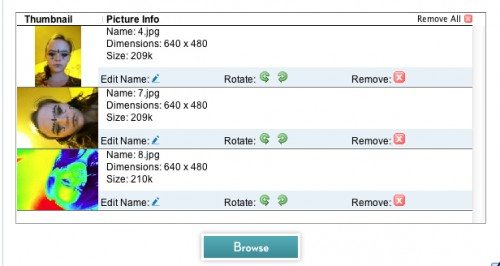 I moved to my computer to select some pictures to send to my CEIVA frame. I have a MacBook Pro laptop, and I had to install a Java plug-in to get the photo browser to work in my account. Once it was installed, I was able to browse through files on my computer to select the file or files I wanted to send. Before uploading them, I was able to rename them or rotate them. I was also allowed to choose the frame to deliver them to in case I was invited to more than one, and choose which album they were inserted into on the frame. They uploaded quickly and were queued up, waiting to be downloaded to my frame.
Most of the setup functions of the frame are handled through the CEIVA account. This makes it easy to fine-tune the function of a frame, even if it’s far away in Grandma’s house. In addition to photos from your friends, you can set the frame up to receive information and special photos from CEIVA. I could select holiday galleries to send custom greeting cards to the CEIVA frame. I could select channels to deliver a calendar, local weather (requires a zip code), ESPN news and standings, news headlines from ABC or the New York Times, or get financial news. Other channels give me a word of the day, a holiday countdown, this day in history information, or a pet or flower picture of the day. I set up the word of the day, weather, and calendar channels for my frame. These channels are updated daily.
The frame doesn’t continually check for new content. One of the setup options is to define how frequently the CEIVA frame checks for updates. Because the frame can be setup to dial out over a landline, you might incur a phone charge for downloading the pictures. In this case, you’d want to restrict the frame to check only once a night or even once a week. If you’re connected to the internet through WiFi like my frame, you could even set it up to check multiple times per day.
My frame was set by default to check once per day, and this apparently occurs at midnight. You can manually connect and check as often as you like through an in-frame option. At this point, I manually checked for pictures; it quickly found and downloaded the pictures Butch and I had each sent to it. It also started up my selected channels. The Pro 80 has a limit of 60 images received per day. It’s not clear to me if the channels I have selected will count toward the limit of 60.
Various setup options let you define hours you want the frame to be on and off. Mine went off at 11:00 pm; it was on at 9:00 am this morning when I got back from dropping my daughter off at school. It had the pictures I’d already loaded on it last night, and it had a couple of new pictures I had sent it via a couple of other methods.
If you go to your CEIVA account online, you can request an email address that people can use to send you photos without them being one of your invitees. I requested and received an address that I used to email myself a picture from my iPad 2 using its native email program. There’s also an iPhone app called CEIVA Snap that lets you take pictures with your iPhone and automatically mail them to this email address. You can also keep a copy of the picture in your iPhone’s camera roll. Be aware that this app controls the camera, and it apparently doesn’t use the iPhone’s HDR capabilities. I installed that on my iPhone 4, used it to snap a picture, and had it send it to my frame. Both of these pictures were on my frame when I got up this morning.
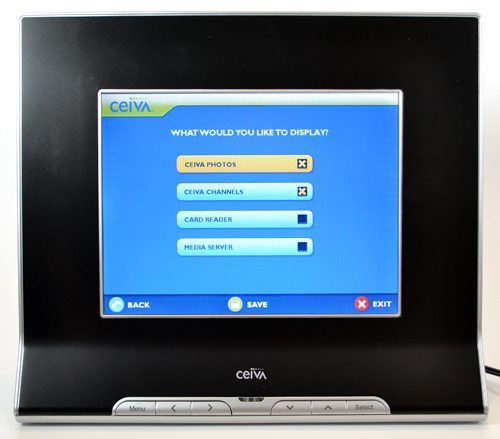 You can display pictures over your home network via a media server. You can limit the photos to be displayed on the frame by a folder, date taken, or other criteria. You can also display photos from a memory card. You’ll use an on-screen option to tell the frame to display photos from the media server or the memory card. I don’t have a media server set up in my house, but I tried displaying some photos on a microSD card in an SD card adapter. The pictures displayed so long as the card was in the reader, but they disappeared from the slideshow when I removed the card. Photos on the memory card must be JPEG files with resolution under 12MP.
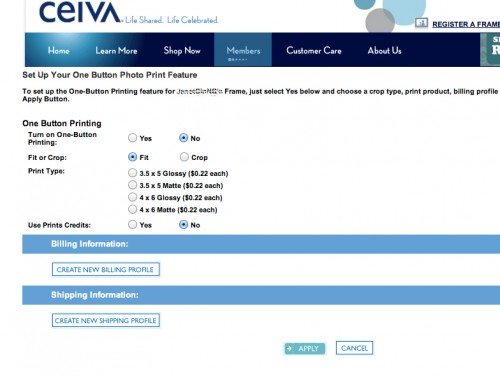 The CEIVA frame will delete photos from your frame as you receive new ones, but you can use an on-screen option to lock a photo so that it always stays in your frame. If you see a photo you’d like to have a print of, you can use the print option in the on-frame Menu to order prints. This option requires you to have first set up One-Button Printing in your online CEIVA account; it will require a payment option to be stored in the account.
This isn’t a manual, so I won’t go into detail about all the setup functions both on-screen and online. The on-screen menus and the online setup functions seem simple and straightforward. There’s plenty of help available in the manual I mentioned earlier, in all the FAQs and help found on the CEIVA site, and from customer service.
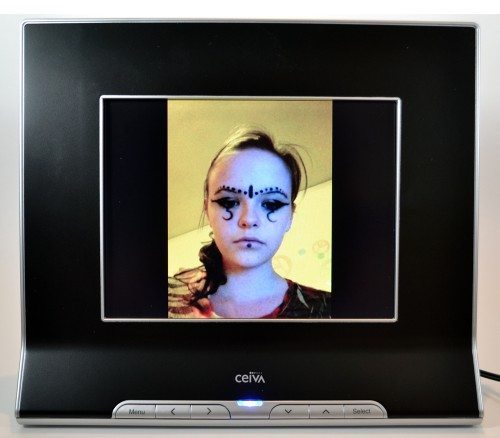 I think the CEIVA Pro 80 does a good job displaying the photos. The pictures are clear and sharp. Although you can change the setup option, the frame defaults to displaying your photos without shrinking, stretching, or cropping. You’ll see this portrait-orientation picture of Rachel shows a lot of blank screen on each side, but I can see the entire picture without distortion. The landscape photo of the flower (top photo) that Julie emailed to my frame fills the screen beautifully.
I’ll briefly mention another universal iOS app called CEIVA Photos, which is free in the iTunes store. This app lets you log in to your CEIVA account (or the one you manage for someone else) to see all the photos that have been sent to the frame or stored in your online storage. You can even display those photos in a slideshow on your iPad or iPhone.
I was a bit shocked when I realized that I couldn’t use the frame at all without paying for the PicturePlan delivery service. I had assumed that I’d at least be able to use it as a standard digital photo frame after the first year when the free service that comes with the frame purchase has expired. After I thought about it, I realized that CEIVA isn’t offering a digital photo frame. They are offering you a service to send photos to someone who may not have a computer or any other method of receiving digital photos. This service happens to come with a digital frame to display the photos CEIVA delivers.
The frames are very reasonably priced when you consider you’re getting a year of service for free. Renewals are as low as $6.95/month if you renew for 36 months at $249.95; a single year is $99.95. Monthly renewals are available, starting at $9.95 a month. If my parents were still with us, I know they would love it if my sisters and I chipped in for a CEIVA frame and a PicturePlan renewal each year as a Christmas gift. There’s nothing they would have loved more than constantly getting new photos of their daughters, sons-in-law, and grandkids. When you consider how much a computer would cost, plus the cost of internet service, plus the effort of showing them how to use the computer (and fixing problems), the CEIVA frames and their annual PicturePlan service renewal seem like a very good deal.
Product Information
| Price: | $147.99, plus an annual contract after the first year |
| Manufacturer: | CEIVA |
| Pros: |
|
| Cons: |
|

Gadgeteer Comment Policy - Please read before commenting
I love this idea for some situations. I did something similar; sent the grandparents Roku boxes and then shared a library with photos through Plex. The photos are arranged in albums by event (birthday party, trick or treat, etc.) and they can view them on the big TV screen individually or as a slideshow. Works great and they love it.