Do you have shoe boxes full of 35mm slides and or negatives that you don’t know what to do with? Would you like to share memories with your kids or grandkids? Do you want to remember what you looked like 20,30 or 40 years ago? If so, the ImageLab Slide and Negative Scanner might be for you…
Before we begin, let me set expectations. If you’re a photographer for National Geographic and need to scan your photos for an upcoming edition of the magazine, this device is not for you. If you’re looking for an easy way to archive those hundreds of slide and negatives, then read on.
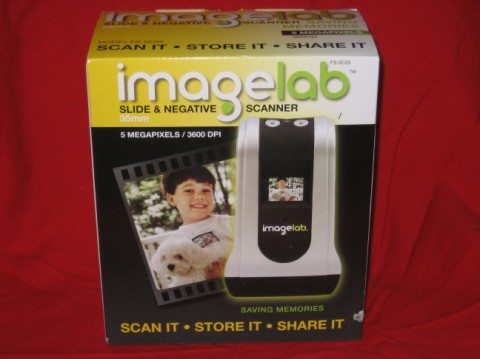
Specifications:
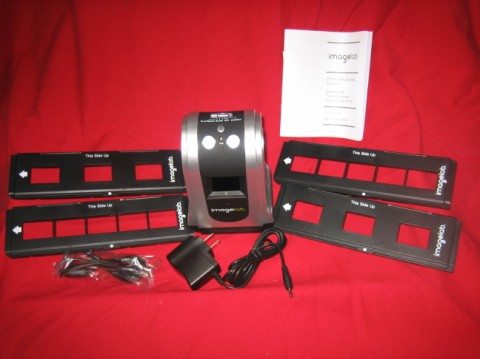
What’s in the box:
 The front of the unit has an LCD display.

On top you find 3 buttons and a slide switch.
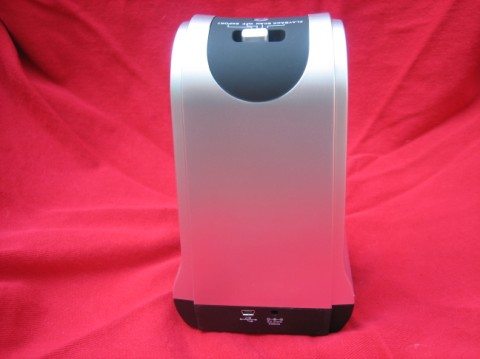
On the back you have connections for the USB cable and AC power.
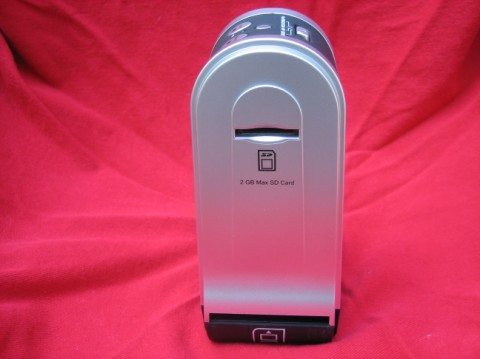
On this side you have the SD card slot. The other side has nothing of interest.
The scanning process on the ImageLab is very simple. You have trays that accept either slides or negative strips. The tray for the 35mm slides worked perfectly, but the negative trays seemed to be a little narrow and my 35mm negatives, from several different years of picture taking, did not fit within the grooves nor over the centering sprockets.
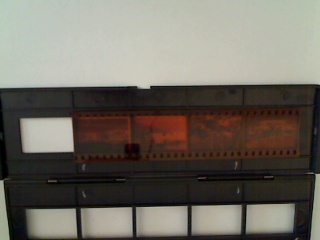
It may be a little hard to see the problem in the photo, but I was able to carefully position the negative so it would align correctly.
After loading up the tray, turn on the unit and slide the tray through the slot and watch in the LCD display for the image. When the image is centered, press either the slide or negative button and your photo will be scanned and saved in the on board memory or the SD card if you have one inserted. Push the tray until it “clicks” for the next image and repeat the process.
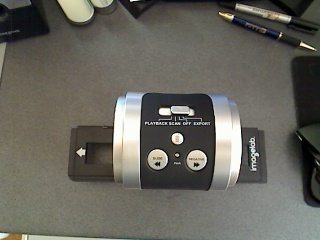
Here’s my setup for scanning. You’ll notice that the tray has arrows so you don’t insert it the wrong way. It’s pretty much fool proof.
I grabbed several hundred 35mm slides and the same number a negatives and had a scanning marathon. Here’s some things I learned.
- Using it on battery power is an asset. I could scan while doing something else or moving around the house with the scanner. I wasn’t tied to an electrical outlet.
- The LCD screen is only good for telling if your slide/negative is inserted correctly. It’s too small to see any features and the review function is essentially useless because of the limited resolution.
- If you don’t remove the dust from your media, it WILL be apparent on the scan. I used canned air, but it wasn’t enough. I’ll have to look into some other way to clean them.
- The scanned images have too much contrast and the colors are over-saturated. Remember, this device doesn’t come with any software and at first I was very discouraged with the results. Running the images through a photo editor and auto correcting them, made a big difference
- The trays are only for cardboard mount 35mm slides. I have hundreds of glass mounts and large format slides that cannot be scanned by this unit.
- The USB cord seemed redundant. It’s used to connect the scanner to a computer to download the images. The device shows up on the system as a removable drive. I found it easier to remove the SD card and transfer my images using a PC card reader.

This slide is from 1982. The contrast is way too high and the colors are off. You can also see what I mean about dust.

This is a scan of a negative from 1974, before I ran it through the photo editor.

Here it is after and although not great, it is good enough for snapshots and family photo albums.
I’ve been looking for a way to archive the hundreds of slides I’ve accumulated over the years. At one point I thought about sending them off to a scanning service, but found the costs somewhat steep, especially since many of the photos are not worth saving and most scanning services charge whether you want the image or not. Using the ImageLab scanner allows me to scan all my slides and negatives. Those that are worth preserving I attempt to fix using my limited skills with photo editing software. For those really important photos, I can send them off to a professional service and let them remove the dust, scratches and dirt and adjust the colors and contrast.
There are similar devices out there. Two others I am familiar with require a connection to a computer to operate the device, but they do come with software for image enhancement. The prices are about the same, so the trade-off is portability versus a software package. I’ve decided I like being able to take the Imagelab with me and when I have some free time, I scan some slides. Later in the day I upload the images to my PC and batch enhance them using Microsoft Digital Image Suite. I can then view them on my flat screen and keep the interesting ones and toss the rest. All in all, it’s a pretty handy device.
Gerber Gear 22-47162N Fast Draw Folding Assisted Opening Pocket Knife, Fine Edge, Black
(as of June 8, 2026 18:45 GMT -05:00 - More infoProduct prices and availability are accurate as of the date/time indicated and are subject to change. Any price and availability information displayed on [relevant Amazon Site(s), as applicable] at the time of purchase will apply to the purchase of this product.)
Gerber Gear EVO Jr. Folding Knife - Serrated Edge [22-41493]
(as of June 9, 2026 10:30 GMT -05:00 - More infoProduct prices and availability are accurate as of the date/time indicated and are subject to change. Any price and availability information displayed on [relevant Amazon Site(s), as applicable] at the time of purchase will apply to the purchase of this product.)Product Information
| Price: | $99 |
| Manufacturer: | ImageLab |
| Requirements: |
|
| Pros: |
|
| Cons: |
|
Gadgeteer Comment Policy - Please read before commenting
I’m finding that most scanners out there have the limitation “The trays are only for cardboard mount 35mm slides.” I have a ton of slides that my Dad took during my and my sister’s childhood that I’d love to scan in. My Cannon all-in-one will scan negatives and slides, but has the same limitation. The slides I have are the same outside dimension of the mount, but the transparency inside is much bigger than a 35mm, and it’s square. Don’t know what that’s called. I’d love to find something to scan these that didn’t cost an arm and a leg.
Hi, it looks like that scanner did an okay job, which is cool. I noticed a few hangups that you had, and I can give you a couple recommendations. I have been doing slide scanning as a business for several years, and after a lot of trial and error, I have decided to share my knowledge on a new website. So, for example, to clean the slides, get a scratchproof cloth made specifically for cleaning eyeglasses. Use this to wipe off each slide just before scanning. It seems to work pretty good for lint. Also, I noticed that fingerprints rarely show up. They usually only show up if they have been on the slide for years and years, and the oil has burned a fingerprint likeness into the image. Also, for glass slides, there is a slide to digital technique where you lay your slide down on a lightboard, or even held up to a sunlit window, and take a photograph of it with a digital camera. This works surprisingly well. I will be outlining the technique on my website pretty soon. I hope this helps you!
I have some of those larger slides too. So far I’ve been unable to find a home solution, but I did stumble across a company called Scancafe.com.
From their FAQ:
“Q63: Do you scan medium format slides?
Yes. We scan 120/220 medium format slides. We also scan 35mm, 110, 126, 127 slides.”
I have not used them, but if you give them a try, I’d be interested in the results 🙂
Bill
>Lisa,
Thanks for the tips. I’ll give them a try.
Bill
I’ve used ScanCafe a little, and have a co-worker who has done some huge number (like 15,000) scans with them. Good service, although a little slow.
They do have the added benefit that you only have to choose 50% (or more) of the slides to “keep”… that helps solve part of the problem with not wanting all the scans.
Worth checking out…
I have a lot of slides I’d like to put on SD cards. How successful has that been using the Imagelab?
Joyce,
It is time consuming, so I scan while I’m doing some other activity, such as watching TV. I have over 2000 35mm slides and I’ve only done a couple of hundred. The scanning process is fast and easy, it’s the color correction on the computer that takes time.
Bill
I have one of these scanners and find that the entire 35mm image is not scanned. I have to shift and scan twice. Am I doing something wrong?
-> Tom,
What you’re experiencing is a mismatch of aspect ratios. 35mm slides/film have a rectangular shape and the scanner has a square sensor. I haven’t found it to be a major problem. There’s a little slop between the slide carrier and the Imagelab, so I center the the image and capture. I do believe that the $600 slide scanners address this shortcoming, but that’s a little more than I’m willing to pay 🙂
Bill
i have the scanner too. i have been scanning some of my 35mm negs with the unit. but I find that it is not as good as I had hoped. the negs come out overexposed and very soft and grainy. if I scan the negs as a 35mm slide and invert and level correct in PS I get better results. but still not so great. nowhere near archival quality, but just okay for having the neg digitized. I don’t think I would buy one again nor would I really recommend one to anyone.
BTW Bill, regarding the 1974 pic above, i actually prefer the original scan to your edited version.
I use the Imagelab scanner with good results but I now have dust and dirt inside the scanner. The same pattern shows up on almost every slide. I really don’t want to photo edit 1000’s of slides. Anybody experience this?
Thanks for all the comments. I agree this is NOT for quality archiving. I use it to save snapshots that can be displayed on the TV. And to Bernie: I have very limited photo editing skills 🙂
Bill, I did not mean to insult your PS skills. just noting my preference.
there are lots of sites and books to learn PS skills better. believe me, I am no expert. websites have lots of info, but for books, just about anything by scott kelby has great info to get you started. he pretty much has a book for every version of PS there is. his writing style also makes it fun to read. he is a bit goofy and has fun with his writing, but again the info is good and really gets you started on making your photos better with PS. worth checking out for sure.
in the meantime, have fun yourself!
Bernie
Bernie,
No insult taken. Tha’s why the smiley face. I appreciate readers comments because I always learn something from them.
Cheers,
Hi
Just gave this to my husband and he does like it but it seems to be cropping off the sides of the picture. (using it for scanning slides) Is there anyway to stop it from cropping the picture?
Terry,
Take a look at my comment from Feb. 2. It’s something you’ll have to live with because of the aspect ratio of the 35mm slides vs the Imagelab sensor. I personally haven’t found the slight cropping to be a big issue.
Bill
I have the same problem as ray puff – dirt on the scanner plate. Does anyone have a good way of cleaning the unit?
I am fortunate to have an air compressor and I found that blowing out the slide slot removed the dust and hair from the scanner plate – at least for this first time……….
I just bought the unit and I’m dissapointed with the “cropping” of the sides. Why put a square sensor in a device made to copy 35mm slides or negatives that are rectangular???
I just scanned a family picture an two people are missing on each side…….
side tray very difficult to open. Unable to get FULL digital result of picture. If you want the whole frame; you must scan it twice. Once to Left side and then the Right side of slide.
Could anyone post more image results from this scanner? From what I see the low quality (high contrast/saturation) is present in any negative scanned, not only those from the 70’s and 80’s …
Could anyone confirm this info?