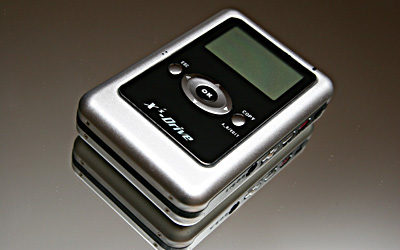
I have found what may very well be the perfect device for unloading flash memory cards on the road. The VP3320 XS-Drive by Vosonic has every feature that I need as a photographer and includes at least one seemingly inconsequential feature that you might not know you need … but you do.
Hardware Specs
Material: Aluminum/plastic
Size: 12 x 7.7 x 2.6 cm
Weight: 274g
Internal Battery: Lithium Ion Rechargeable
External Power: 110V AC Adapter
Hard disk size: 2.5in/9.5mm
External Interface: USB 2.0
Card Formats Supported: CF (Type I & II), Microdrive, Memory Stick, Memory Stick Pro, SD/MMC, xD, SM(with adapter – not included)
Package Contents
VP3320 Shell (can be purchased with hard drive installed)
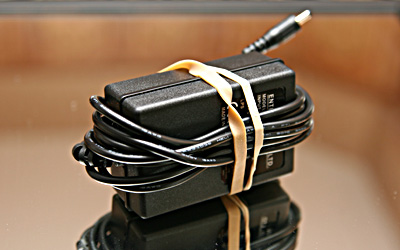
AC Adapter
USB cable
Carrying case (nicely padded with belt loop)
CD with drivers
Quick Start Guide
Screwdriver & screws
Ear Buds
Audio Cable (to connect to stereo or speakers)
I will not tease you anymore (that is not the way I roll), the special feature is a simple little smiley or frowney face. I used to use a similar device, the Sony HDD Photo Storage HDPS-M1. At the time I was thrilled by the HDPS-M1’s simplicity, but not so happy about the short battery life. The other main problem I had with the Sony product was the auto power off. I understood that this was necessary to preserve battery life, but, after setting it to copy a card, I would get distracted. After a while, I would look down at the device and see that it had shut down.
Did the battery run down? Did it copy all of my files? I had no way to know.
With my Vosonic XS-Drive (which also shuts down automatically after a short period of inactivity), I need only turn on the unit to determine whether or not all of my files were copied from my card.
If the last operation (e.g., the card copy I initiated before seeing something shiny and becoming distracted) failed to complete, the device will display the little frowney face shown above.
If the previous operation was successful, the device will display the smiley face shown above.
A copy can fail on occasion. I think that jostling the device during a copy operation is the most likely cause for failure. Either the connection to the card gets broken or, most likely, the laptop hard drive trips out because it doesn’t like the vibrations.
While I am on this subject, let me drift for just a moment. The VP3320 uses a laptop drive. Although laptop drives are designed to stand up to a certain amount of abuse, you are going to need to keep the device as still as possible while it is actually operating. Otherwise the copy will fail; or worse, the hard-drive may fail altogether. This happened to me once with my Sony portable and the first hard drive that came with my Vosonic.
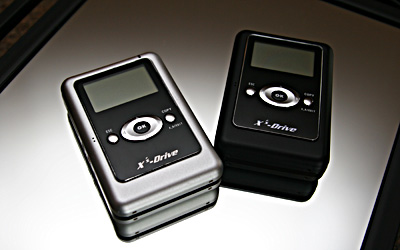
I recommend that you buy the Vosonic VP3320 as a shell (no hard drive) and then purchase a laptop hard drive from solid manufacturer (e.g., Western Digital or Seagate). I fear that any drive that comes included will be the cheapest drive available the day they were assembling your unit. I am using Western Digital’s Scorpio 60GB drives in both of my VP3320’s.
So far these drives have performed flawlessly. Although I try to keep the shocks, bumps, and dings to a minimum, I shoot sports for my website, iphotosports.com, and these drives get beat around some. I have been using one for over a year and the other for just under a year.
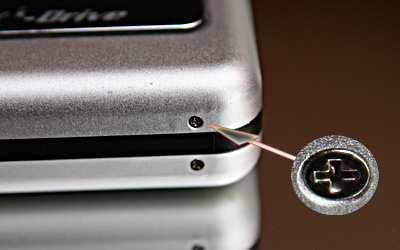
Installing the drive is pretty easy. You just remove the four tiny Phillips head screws (see below) with the very decent screw driver that ships with the VP3320 and remove the cover.
Inside you slide the drive onto the pin connectors and then (don’t forget this step) put the little rubber block included with the unit between the inside of the case and the back side of the drive. The block keeps the unit connected and provides a bit of shock absorption as a bonus. Put the cover back on and replace the screws and you can move on to formatting the drive.
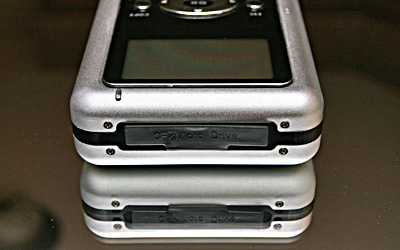
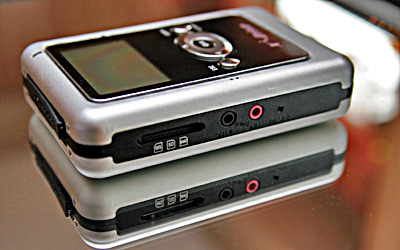
Using the included transformer, connect the VP3320 and charge the unit. A red light displays on the upper right hand corner of the drive’s face. It goes out when the unit is fully a charged. A green light might have been nice here, but why quibble? The transformer plugs in to hole indicated by the red arrow below.

After the device finishes charging, connect a USB cable from the port indicated by the blue arrow above to any open USB port on your computer. Before we go forward, I am going to give you some information I learned the hard way.
The VP3320 comes with a utility that allows you to beat the 32GB limit for FAT32. It was pretty cryptic, but I was eventually able to apply formatting to my 60GB drive using a single all-encompassing partition. It seemed to work this way, but it was flaky. Windows didn’t always want to read it and I could not reformat the drive without the utility. This turned out to be fairly important because the drive needs to be reformatted occasionally – particularly if you ever make the mistake of filling it to capacity.
Whatever internal operating system is used for operating the VP3320 in stand alone mode just will not recognize free space after deleting some or all of the files. The drive must be reformatted to correct this issue. I recommend reformatting the drive on a regular basis. After several aggravating issues and even lost data, I also decided to repartition my drive so that the first partition had 32GB and the remaining space was put on a second partition. This second partition is not available in stand alone mode, but I use it plenty as portable hard drive space. That way I can reformat the drive with any Windows XP or Mac and I have not experienced any issues reading data on my Windows PC.
The Vosonic VP3320 comes with instructions for partitioning and formatting the drive using Windows XP. If you have trouble, post your questions on the review forum and I will provide detailed instructions. This review is getting away from me, so I won’t include instructions here.
Moving on.
Once you have charged and formatted the VP3320, it is time to disconnect it from AC power and your computer (the built in OS will not function while tethered to your PC via USB). Press and hold the red power button next to the unit’s USB port for about 3 seconds and then release.
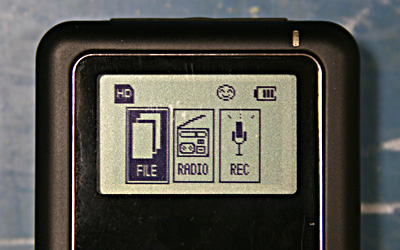
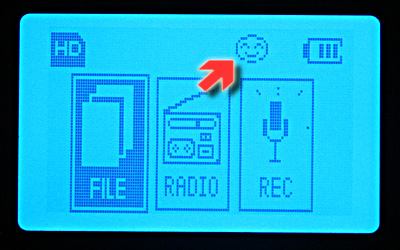
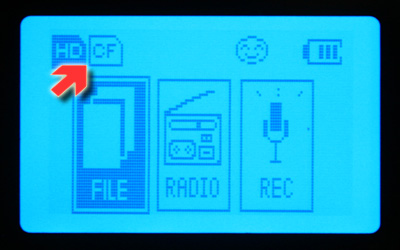
The initial screen shows the three basic functions – File, Radio, and Voice Recorder – as well as battery charge status, hard drive status, and the result of the last operation (smiley – good or frowney – bad).
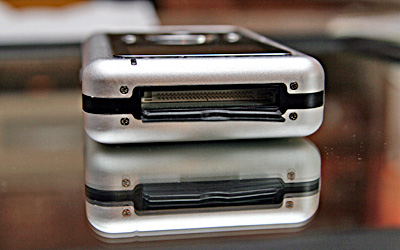
The Vosonic VP3320 can read Compact Flash (CF) types I & II (using the covered slot on the top as shown in the previous two photos), as well as Memory Stick (MS), Memory Stick Pro (MS Pro), Secure Digital (SD), MultiMediaCard (MMC), and xD cards using the multi card slot on the side (see below). For Smart Media you will need to purchase a Compact Flash slot adapter.
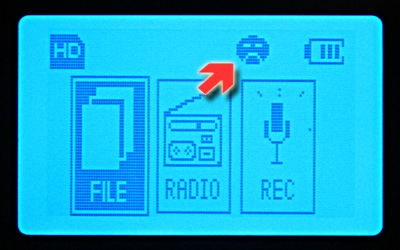
When you insert a flash card in the appropriate slot, the display will display the card format (see red arrow indicating Compact Flash card insertion below).
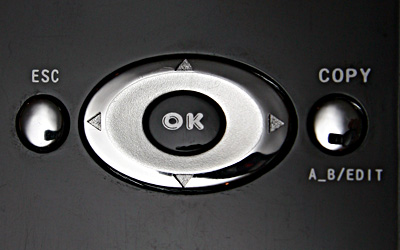
To copy the contents of the card over to the portable drive, just click the “Copy” button.
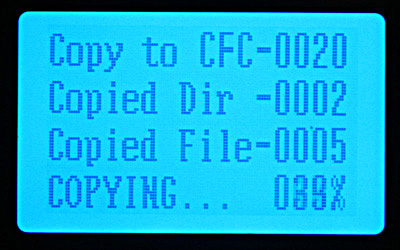
The display will change to the following dynamic dialog to show you the ongoing progress of the copy operation.
When it completes, for those of you who are still paying attention, the unit either displays the following “OK” screen for a successful copy …

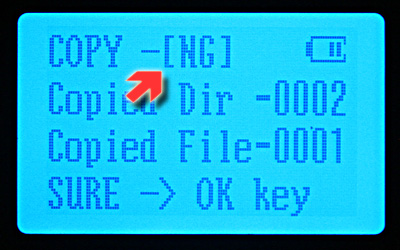
… or this “NG” (No Go) screen if something bad happened (I pulled out the card in mid-copy to generate this error). Either screen is only displayed for a short time to conserve the battery, but you can get the same information by powering the unit back on and checking for the smiley or frowney face.
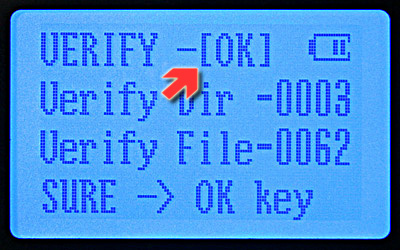
Looking back to the illustration before the No Go screen, you will notice the words “Sure-> OK key” at the bottom of the screen. This brings up the verify screen shown below.
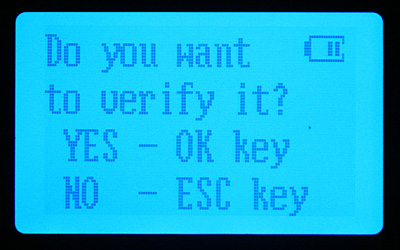
If you press the OK key, the unit will compare each copied file the counterpart on the flash card as sort of an extra verification. Then you get the progress screen …
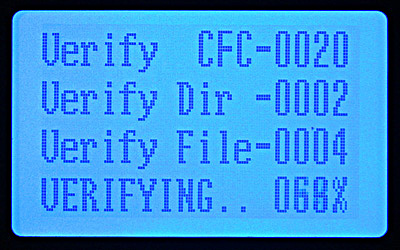
… and hopefully the successful verification indication when this operation completes.
I found this last feature to be a bit redundant. After all, the unit has already told me that the copy operation was successful – either with the “OK” screen or the wonderful smiley face. When I first started using the unit, I ran the verify, but I don’t use it anymore As far as I know, I have never lost a file.
The VP3320 automatically creates a new folder every time a copy operation is initiated, so there is no need to worry about overwriting an existing photo with the same name. In fact, if you initiate a copy of the same card, you will end up with two complete identical copies of the same card in separate folders.
As if the VP3320’s abilities as a portable file card reader and storage unit were not enough, it can also function as an FM radio (and recorder), a voice recorder, or an mp3 player! Below are a couple of screen captures from the FM radio mode and the Voice Recorder mode.
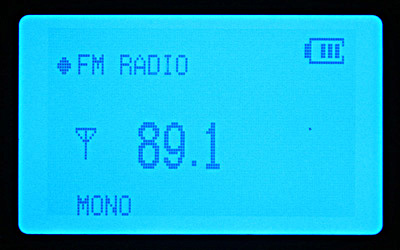
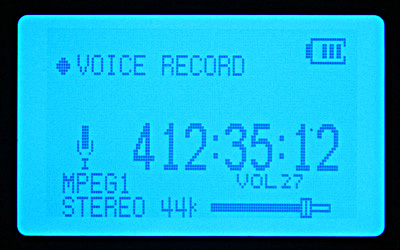
I don’t have a great deal of experience with mp3 players. I have only used my little JetAudio iAudio4 MP3 Player that I reviewed for The Gadgeteer quite some time ago, but the VP3320 strikes me as a pretty simple, yet serviceable player. I don’t think I would buy it for it’s audio capabilities but they are a really nice bonus!
I highly recommend this device. They are kind of hard to find in the US, but worth the effort to track one down.
Product Information
| Price: | 199.0 |
| Manufacturer: | Vosonic |
| Requirements: |
|
| Pros: |
|
| Cons: |
|
Gadgeteer Comment Policy - Please read before commenting
Post your comments on the vosonic_vp3320_xs_drive review.
http://www.the-gadgeteer.com/review/vosonic_vp3320_xs_drive
Just click the POST REPLY button on this page.
I take it this machine can only copy from a card to the hard drive. Can it copy from the hard drive to the card?
thanks for a good review…
Good question. When a USB cable connects the Vosonic VP3320 drive to a computer, the hard drive acts as an external USB drive and the card slots behave just like any USB card reader. You can easily copy data from the hard drive in the unit to a card in one of the card slots or vice versa.
I failed to mention the USB functionality of the card slots in my review. Both card slots (one Compact Flash and the other multi-format) are automatically mapped to separate drive letters.
Little Update.
Fat32 DOES NOT have a 32gig limit. It’s physical limit is much much higher. The 32gb cap is not a limit of the filesystem, but a limit placed on it by Microsoft. Every single Operating system out there ca format and create Fat32 file systems at virtually any size you want. However Microsot wants people to use their proprietary NTFS file system for anything larger then 32gigs. So of course they don’t give you the choice. Granted NTFS is better then FAT32, in many ways, it lacks MAJOR feature. The ability to move it from computer to computer and share it across different operating systems. And since MS won’t share how NTFS works, you have virtually no support on other Platforms, Mac, Linux, etc.
Thankfully Microsoft does not prevent you from ACCESSING fat32 drives formated above 32gigs, they only prevent you from creating them. A Drive formated in any non-Microsoft OS, or with a 3rd party disk management utility will break right past that Microsoft imposed limit.
For those that need to create external USB or flash (WOW) drives larger then 32gigs. Virtually ANY Linux Live CD. (http://www.distrowatch.com), like knoppix, or Suse live, will allow you to boot into Linux (without touching your windows drive at all). Plug in your device, and reformat it as Fat32, 500gb if you so desire, no 32gig cap. Then unplug your drive, take out cd, reboot and your done. There are some 3rd party utils to allow you to do this inside windows, but I think they all cost $$$. Where the Linux Live CD just costs you the time for d/l and the cost of a blank cd.
How can I get a updated driver to operate vp3320 on a win7 64 computer